For successful deep sky viewing, you’ll need to master proper polar alignment, precise focus adjustments using Bahtinov masks, and regular collimation checks. Select appropriate magnifications based on your target, and balance your mount correctly. Use narrowband filters for nebulae and broadband for galaxies. Practice averted vision techniques by looking slightly off-center. Maintain dark adaptation with red lights. Secure your focuser to prevent unwanted movement. These adjustments will transform your celestial exploration experience.
10 Essential Telescope Adjustments for Deep Sky Viewing
When venturing into the domain of deep-sky observation, proper telescope adjustments can make the difference between seeing a faint smudge and discerning breathtaking detail.
Start by fine-tuning your telescope’s focus—even minor adjustments notably enhance clarity of faint deep-sky objects. Consider using a telescope with a long focal length, as these provide superior contrast and detail compared to shorter alternatives.
For ideal viewing, equip yourself with high-quality zoom eyepieces that allow precise magnification adjustments tailored to different celestial targets.
Don’t forget to implement averted vision techniques by looking slightly off-center at your target, leveraging your more sensitive peripheral vision.
Finally, always consult detailed star charts or software before your session—this preparation can improve object visibility by approximately one magnitude.
Precise Polar Alignment Techniques
You’ll find the drift alignment method invaluable for achieving precise polar alignment without specialized equipment, requiring only careful observation of star movement across your eyepiece.
Modern smartphone apps offer convenient alternatives that utilize your device’s sensors to guide you through the alignment process with remarkable accuracy.
For those with polar scopes, mastering refinement techniques will dramatically improve tracking performance by ensuring your mount’s rotation axis perfectly parallels Earth’s.
Drift Alignment Method
Two essential components separate casual stargazing from successful deep-sky astrophotography: patience and precise polar alignment.
The drift alignment method offers superior tracking accuracy when properly executed, allowing your telescope mount to follow celestial objects throughout long exposure sessions.
To implement this technique, select a star near the celestial equator and carefully observe its movement over several minutes. This drift reveals alignment errors that require correction.
Make incremental adjustments to your mount’s altitude and azimuth settings, allowing time between each modification to evaluate the results.
Before beginning, verify your telescope is level and properly set to your location’s latitude.
While time-consuming, mastering drift alignment greatly enhances your ability to photograph deep-sky objects by eliminating the subtle tracking errors that can ruin otherwise promising images.
Smartphone App Solutions
Modern astronomy has been revolutionized by the advent of powerful smartphone applications that simplify precise polar alignment. Apps like SkySafari and Stellarium deliver real-time celestial data directly to your pocket, offering step-by-step guidance through the alignment process.
These tools leverage your phone’s GPS to provide location-specific recommendations, ensuring your telescope accurately tracks the night sky. Many apps feature augmented reality capabilities that overlay star charts onto your camera view, making it easier to identify reference points for alignment.
After achieving proper alignment, you’ll benefit from enhanced object locators that help you find and track faint deep-sky objects.
These digital assistants eliminate much of polar alignment’s traditional guesswork, allowing you to spend less time setting up and more time observing celestial wonders.
Polar Scope Refinement
While smartphone apps offer convenience, achieving the ultimate precision for deep-sky photography requires mastering your telescope’s polar scope. This critical tool helps you align your mount precisely with Earth’s axis of rotation, preventing star trails in your long-exposure astrophotography.
Your alignment procedure should begin by centering Polaris within the polar scope’s reticle. This guarantees your mount’s rotation perfectly parallels Earth’s own movement, enabling accurate tracking of celestial objects throughout your imaging session.
You’ll need to fine-tune both altitude and azimuth settings based on your specific location—calculations that dedicated apps can simplify.
Remember to verify your polar alignment regularly, especially after adjusting or moving your setup. Even minor misalignments can compromise hours of imaging work, so take the time to perfect this fundamental skill.
Optimal Magnification Selection for Nebulae and Galaxies
Contrary to popular belief, selecting the right magnification for deep-sky objects requires careful consideration rather than simply defaulting to low power. Higher magnifications can actually reveal more details in galaxies than conventional wisdom suggests.
Challenging tradition: higher powers often unveil galaxy details that low magnification simply can’t reveal.
You’ll want to experiment with different powers to find what works best for each target.
For nebulae, consider a focal length of 750mm for medium-sized galaxies, while compact refractors with 250-500mm focal lengths excel at capturing large nebulae in wide-field deep-sky astrophotography.
Long focal lengths generally provide better contrast for faint deep sky objects.
Your telescope’s aperture size determines the best magnification range—larger apertures support higher powers without image degradation.
High-quality zoom eyepieces allow you to adjust on the fly, helping you discover the ideal magnification for each celestial wonder.
Fine-Tuning the Focuser for Sharper Star Points
You’ll get dramatically clearer views of deep sky objects by mastering precise focusing techniques that eliminate image blur.
To achieve pinpoint stars, guarantee your focuser is properly aligned and tension-adjusted to prevent unwanted movement or focus shift during observation.
Try using a Bahtinov mask to visualize the exact point of perfect focus, especially when preparing for longer viewing sessions or astrophotography.
Precise Focusing Techniques
Why do some astronomers capture breathtaking details in deep-sky objects while others see only fuzzy patches? The answer often lies in precise focusing techniques. Even minimal adjustments can dramatically enhance the clarity of celestial objects and star points.
| Technique | Application | Benefit |
|---|---|---|
| Fine Focuser | Small, incremental adjustments | Essential for sharp focus on faint objects |
| Multiple Magnifications | Test focus at different powers | Reveals focus discrepancies more easily |
| Bahtinov Mask | Creates diffraction patterns | Identifies exact focus point for crisper images |
You’ll need patience and practice to master these techniques. Start by observing bright stars to establish your baseline focus, then apply the same careful attention to deep-sky targets. With consistent practice, you’ll develop an intuitive feel for that perfect focus point, transforming fuzzy patches into detailed celestial wonders.
Eliminating Focus Shift
Even when you’ve achieved initial focus on a celestial object, subtle mechanical issues can cause that perfect clarity to drift away.
Focus shift can greatly degrade image quality, especially when observing faint deep-sky objects that demand maximum sharpness.
To eliminate focus shift and attain consistently sharp star points:
- Invest in a high-quality focuser with minimal backlash that maintains position during temperature changes.
- Check and adjust your telescope’s collimation regularly—proper alignment is essential for preventing focus issues.
- Use a Bahtinov mask to achieve precise focus, creating distinctive diffraction patterns that indicate ideal sharpness.
- Make sure your focuser is securely mounted with no play or wobble that could compromise stability during observations.
These adjustments will remarkably improve your deep-sky viewing experience, revealing fine details that would otherwise remain hidden.
Dark Adaptation and Red Light Management
Patience becomes the astronomer’s greatest ally when preparing for deep-sky observation. Your eyes require approximately 30 minutes of dark adaptation to reach full night vision sensitivity as chemical changes in your retina enhance detection of faint light.
The universe rewards those who wait, revealing its deepest treasures only to eyes patiently acclimated to darkness.
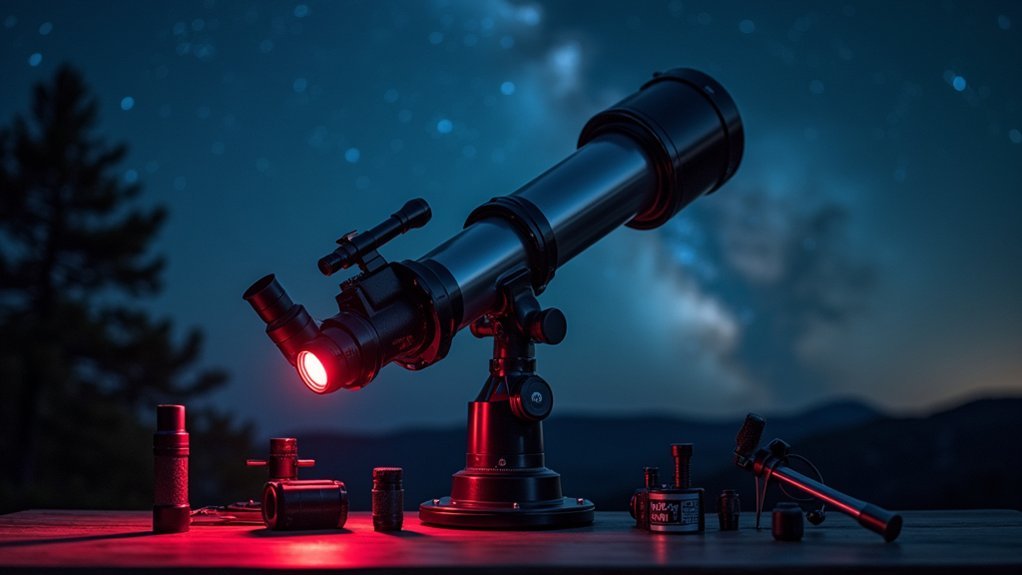
When consulting star charts or adjusting equipment, use red light exclusively. This specific wavelength preserves your hard-earned night vision while white light immediately resets the adaptation process. Keep your pupils maximally dilated by minimizing exposure to any bright sources.
For ideal visibility of dim celestial objects, employ averted vision by looking slightly away from your target. This technique leverages the greater sensitivity of your peripheral vision in low light conditions.
Hold your gaze still for about 6 seconds, allowing your retina to accumulate sufficient photons to reveal previously invisible details.
Balancing Your Telescope Mount for Tracking Stability
While your eyes adjust to the darkness, let’s address the physical foundation of successful deep-sky observations. Proper balancing of your telescope mount is essential for tracking stability and extended observing sessions.
An unbalanced setup creates vibrations and tracking errors that will frustrate your viewing experience. Your mount needs to be balanced in all axes:
- Adjust counterweights to match your telescope’s weight, ensuring even distribution
- Rebalance when changing equipment as different eyepieces shift the center of gravity
- Use your finderscope to center targets before final balance adjustments
- Check balance throughout your session to maintain ideal tracking performance
A well-balanced mount reduces motor strain and eliminates the need for constant manual corrections, letting you focus on the wonders above rather than equipment struggles.
Collimation Methods for Improved Contrast
Achieving maximum clarity for deep-sky objects depends fundamentally on proper collimation of your telescope’s optical system. When your optics are perfectly aligned, you’ll notice noticeably enhanced contrast and detail when observing faint nebulae and distant galaxies.
| Telescope Type | Collimation Method | Tool | Frequency | Impact |
|---|---|---|---|---|
| Reflector | Mirror alignment | Laser collimator | After transport | Critical |
| Refractor | Lens cell adjustment | Sight tube | Less frequent | Moderate |
| Schmidt-Cassegrain | Secondary mirror alignment | Cheshire eyepiece | Monthly | Notable |
| Maksutov | Factory set (rarely needed) | Star test | When blurry | Important |
| Dobsonian | Primary mirror adjustment | Collimation cap | Weekly | Essential |
Perform your collimation in low light conditions to better evaluate adjustments. For reflector telescopes, use a laser collimator to precisely align both mirrors. Refractor telescopes require checking objective lens alignment. Remember that even minor misalignments dramatically affect image quality.
Eyepiece Selection for Different Deep Sky Objects
Your choice of eyepieces directly impacts your view of deep-sky objects, requiring a balance between magnification and field of view for ideal results.
You’ll find that contrast-enhancing filters paired with appropriate eyepieces can dramatically improve visibility of nebulae and galaxies under various light conditions.
Consider your telescope’s focal length when selecting eyepieces, as this combination determines both your final magnification and your ability to resolve fine details in distant celestial targets.
Magnification vs. Field View
How do you choose between seeing more sky or more detail when observing deep space objects? The balance between magnification and field of view is essential for successful deep sky viewing. Your eyepiece selection determines what you’ll see through your telescope.
- Low magnification eyepieces (30-40mm) provide wider fields of view, ideal for large galaxies and nebulae that require seeing more sky at once.
- Higher magnification eyepieces (10-15mm) reveal finer details in smaller objects like planetary nebulae, but require more stable tracking.
- Averted vision techniques work better with lower power eyepieces, allowing your peripheral vision to detect faint objects.
- Telescope focal length affects your choice too—longer focal lengths can improve contrast at high power but demand precise tracking.
Contrast-Enhancing Eyepiece Filters
Once you’ve selected the appropriate magnification, the next tool in your deep sky observation arsenal is the contrast-enhancing filter.
These specialized eyepiece filters dramatically improve visibility of faint deep-sky objects by reducing light pollution and enhancing color contrast.
For emission nebulae, narrowband filters like UHC and OIII isolate specific wavelengths from ionized gases, revealing details that would otherwise remain hidden.
When observing galaxies and star clusters, broadband filters are your best choice as they block artificial light while allowing a wider range of celestial wavelengths through.
The right contrast-enhancing eyepiece filters can improve an object’s perceived magnitude by approximately one full step, making previously invisible targets discernible.
Always match your filter to your target—nebulae respond well to narrowband options, while galaxies and clusters benefit from broadband solutions.
Focal Length Considerations
Selecting the right focal length is perhaps the most essential decision when preparing for deep sky observations. Your telescope’s focal length dramatically affects what celestial objects you’ll see best, while your eyepiece selection determines the final magnification and viewing experience.
For best magnification of different deep-sky objects, consider these guidelines:
- Use telescopes with focal lengths under 400mm for wide-field views of larger nebulae and galaxy clusters.
- Select a medium focal length around 750mm for observing typical galaxies with good detail.
- Reserve high focal lengths (2000mm+) primarily for planetary viewing, not deep-sky objects.
- Pair high-quality zoom eyepieces with your telescope to flexibly adjust magnification without changing equipment.
Remember to calculate the combination of your telescope and eyepiece focal lengths to achieve the ideal view for each target.
Mastering Averted Vision Techniques
Three essential techniques separate casual stargazers from skilled deep-sky observers, with averted vision standing as perhaps the most powerful. When deep-sky observing, don’t look directly at faint objects—instead, shift your gaze 8-16° toward your nose to engage the more sensitive rod cells in your peripheral vision.
Keep your eye stationary for up to 6 seconds to allow your retina to accumulate light, similar to how an amateur astrophotographer extends exposure times. In light-polluted areas, this technique becomes even more critical.
| Technique | Application | Benefit | When to Use | Tips |
|---|---|---|---|---|
| Direct Vision | Bright objects | Detail perception | Planets, bright stars | Minimizes apparent movement |
| Slight Offset | Medium-bright DSOs | Enhanced contrast | Globular clusters | Hold position 3-4 seconds |
| Full Averted | Very faint objects | Maximum sensitivity | Nebulae, galaxies | Aim 8-16° from target |
| Scanning | Large, dim objects | Pattern recognition | Open clusters | Gentle eye movement |
| Aided Vision | Critical details | Combines techniques | All DSOs | Try various magnifications |
Using Filters to Enhance Deep Sky Details
While mastering averted vision techniques forms a critical foundation for deep-sky observation, specialized astronomical filters can dramatically transform your viewing experience by revealing details otherwise invisible to the naked eye.
Filters isolate specific wavelengths of light and combat light pollution, allowing you to see nebulae and other deep-sky objects with enhanced contrast.
- Match filters to your targets – Use H-alpha filters for emission nebulae and OIII filters for planetary nebulae
- Consider your telescope’s aperture – Larger apertures benefit more from specialized filters
- Use broadband filters like UHC and CLS for general light pollution reduction while preserving important wavelengths
- Expect longer exposure times in astrophotography when using narrowband filters, but with the reward of capturing more detail and structure
Frequently Asked Questions
What Focal Length for Deep Sky Objects?
For deep sky objects, you’ll want a focal length of 500-800mm. This range is ideal for capturing galaxies and nebulae, while still maintaining a good field of view for detailed astrophotography.
What Eyepiece Is Best for Deep Sky Objects?
For deep sky objects, you’ll want eyepieces with longer focal lengths (10-30mm) that provide wider field of view. Look for high-quality zoom eyepieces with large apparent fields (60-80°) for immersive viewing experiences.
What Is the Setup for Deep Sky Photography?
For deep sky photography, you’ll need a 500-800mm telescope with low focal ratio, computerized equatorial mount, guide scope with camera, and accessories like field flatteners and t-adapters to capture distant celestial objects effectively.
What Are the Best Conditions for Telescope Viewing?
You’ll get the best telescope views under dark skies with minimal light pollution, clear stable air, and when the Moon isn’t bright. High-altitude locations and hours after twilight provide ideal deep-sky observation conditions.
In Summary
You’ve now learned the ten adjustments that’ll transform your deep sky observations. By mastering polar alignment, selecting proper magnification, and fine-tuning your focus, you’ll reveal details invisible to casual observers. Remember that collimation, eyepiece selection, and filter use are equally essential. Don’t forget the human element—dark adaptation and averted vision techniques will push your astronomical experience to new depths. The universe awaits your improved skills!

Leave a Reply