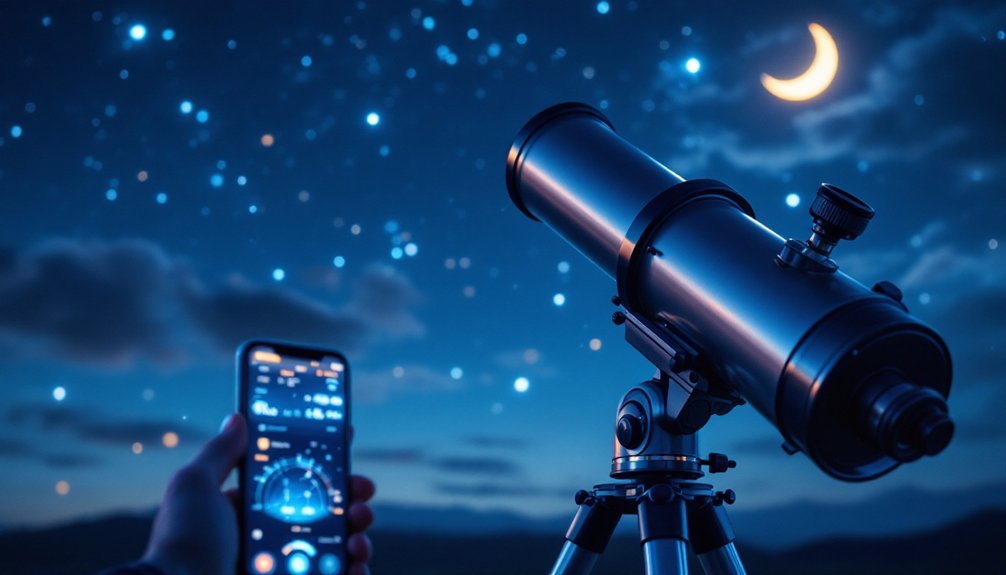
To align your telescope, start by finding a flat, stable area and setting up your tripod with a bubble level. Mount your telescope, ensuring all bolts are tight, and point it northward. Install your finderscope and use a low-power eyepiece to align it with distant objects during daylight. Once darkness falls, use bright stars to fine-tune your polar alignment. Following proper alignment techniques with the right tools will reveal the full potential of your stargazing experience.
Essential Equipment for Telescope Alignment

When you're preparing to align your telescope, having the right equipment is vital for achieving precise observations.
You'll need a laser collimator to project beams through your mirrors, particularly if you're using a Newtonian or Dobsonian telescope. Among the available options, you'll find 11 laser collimator models designed for different telescope types. A Cheshire eyepiece helps create phantom images for accurate mirror alignment, while collimation caps offer a simpler alternative that doesn't require external light.
Your finder scope is essential for locating celestial objects, and you'll need to guarantee it's properly aligned with your main telescope.
If you're using an equatorial mount, you'll also want polar alignment tools to track objects accurately.
Don't forget basic accessories like batteries for powered tools, adjustment knobs, and the necessary thumbscrews to secure your equipment firmly in place.
Setting Up Your Base Location
Your first step in telescope alignment is finding a flat, stable area away from city lights and heat-retaining surfaces like concrete.
You'll need to extend your tripod legs evenly on the chosen ground and use a bubble level to guarantee perfect horizontal alignment.
With your base stable, you can properly position the mount by orienting it toward true north and adjusting it to match your location's latitude. For more advanced setups, consider mounts like the EQ6-R Pro SynScan which offers automated alignment capabilities.
Choose Level Ground Location
Setting up a telescope begins with three critical ground location requirements: stability, accessibility, and clear sightlines.
You'll need to find firm, dry ground that won't cause your telescope to sink or wobble during observations. For best results, face tripod legs northward for optimal alignment. Clear the area of any obstacles like trees or fences that could block your view of the sky.
Position your telescope away from foot traffic and underground features that might cause vibrations. If you're uncertain about the ground's stability, use metal support plates under the tripod feet.
Locate true North using a compass and identify visible landmarks to maintain consistent alignment. Make sure you can easily access your telescope for adjustments, and guarantee the area is safe to navigate at night.
Always check local regulations before setting up your viewing spot.
Set Stable Tripod Base
A properly stabilized tripod base serves as the foundation for successful stargazing. Spread the tripod legs wide apart, ensuring they're extended evenly on level ground.
You'll want to avoid hot surfaces that can cause thermal expansion and opt for soft terrain like grass when possible. Compass alignment with North is essential for initial placement of your mount.
Use your tripod's built-in bubble level or a separate spirit level to check alignment. Make careful adjustments to each leg until the bubble centers perfectly.
Once you've achieved the right height and position, firmly tighten all leg clamps and locks. Don't forget to verify stability by gently testing for any wobble.
If you're dealing with windy conditions or uneven terrain, add extra weights to enhance stability.
Install anti-vibration pads beneath the legs to minimize unwanted movement during your observation session.
Position Mount Properly
With a stable tripod in place, proper mount positioning becomes the next fundamental step in telescope setup.
You'll need to start by attaching your mount securely to the tripod and ensuring all bolts are tight. Use a compass to point the mount northward, but remember to account for the difference between magnetic and true north in your area.
For equatorial mounts, you'll need to set the correct latitude and achieve precise polar alignment using a polarscope. Ensure the counterweight shaft points down when establishing your initial mount position.
If you're using an altazimuth mount, focus on getting accurate horizon tracking. Regardless of mount type, use spirit levels to verify horizontal alignment.
Don't forget to balance your telescope and counterweights properly once mounted. Set up during daylight hours when possible, and make sure you've got a clear view without obstacles blocking your intended observation area.
Leveling and Stabilizing the Mount
Proper leveling and stabilization of your telescope mount form the foundation for successful stargazing.
Find a flat surface and extend your tripod legs, using a compass to orient them northward. While perfect leveling isn't essential for polar alignment, it'll make your adjustments easier later on.
Level ground and northward orientation provide the best foundation, even if absolute precision isn't required for successful polar alignment.
Secure the mount to your tripod using azimuth screws and the central bolt. You'll need to set the altitude adjustment according to your local latitude. Whether you have an alt-azimuth or equatorial mount will determine your specific setup steps.
Don't forget to attach and secure the counterweights to prevent any imbalance. Use the built-in spirit levels or external tools to guarantee all legs are properly adjusted.
Once you've positioned everything, double-check all clamping bolts and connections. A stable mount will greatly improve your viewing experience and make precise alignment much simpler.
Positioning the Finderscope
Successful stargazing begins with setting up your finderscope, an essential tool that helps you locate celestial objects.
Whether you're using an optical crosshair or red-dot finderscope, proper mounting and alignment are vital for accurate observations.
First, mount your finderscope securely following the manufacturer's guidelines. If you have an optical crosshair model, you'll use three thumbscrews for adjustments, while red-dot types feature adjustment knobs.
Point your telescope at a distant target using your lowest power eyepiece, then align your finderscope without moving the main scope. When practicing alignment during daylight hours, use stationary objects like telephone poles or street signs for the best results.
Make fine adjustments using the appropriate screws or knobs, being careful not to overtighten them.
Check your alignment with multiple targets and verify it periodically throughout your observation session to maintain accuracy.
Daytime Alignment Techniques
When aligning your telescope during daylight hours, you'll want to select safe targets like distant buildings or mountains rather than attempting to view the Sun without proper solar filters.
You can make precise adjustments using your mount's alignment screws while keeping your chosen target centered in both the finderscope and main telescope. Following step-by-step instructions from Track The Stars' video guide will ensure proper alignment technique.
If you're using a computerized mount, lock the alignment once you've achieved proper positioning to maintain accuracy throughout your observation session.
Safe Target Selection
Safe target selection during daytime alignment requires careful consideration to protect both your eyes and equipment. You'll need to choose targets that won't risk damaging your vision or telescope components. Understanding your specific audience needs and preferences will help determine the most suitable alignment targets for your experience level.
For solar observation, you must use a certified solar filter that covers the entire front of your telescope. Never attempt to view the Sun without proper protection.
Instead, start with terrestrial objects like distant buildings or landscape features for initial alignment practice. If you're planning to observe Venus during daylight, make sure you're pointing well away from the Sun's position.
You can also create a reference point by recording a precise nighttime alignment using a fixed terrestrial object, then use this saved alignment during subsequent daytime sessions.
This approach offers a safer, more efficient way to achieve accurate positioning.
Adjusting Alignment Screws
Proper alignment of your telescope's adjustment screws requires a systematic approach during daylight hours.
Start by using the Right Ascension (RA) and Declination (Dec) controls to make precise adjustments to your mount's position. You'll need to move these controls gradually to avoid overshooting your target.
As you adjust the screws, make sure you're tightening them firmly enough to maintain stability but not so tight that future adjustments become difficult. Using a certified solar filter is essential when performing daytime alignment with the Sun as your reference point.
Once you've achieved the desired alignment, lock down your mount to prevent any unwanted movement.
If you're using computer assistance, take advantage of autoguiding software to help compensate for minor alignment imperfections.
Remember to verify your adjustments by monitoring your target's movement through the telescope's field of view.
Aligning the Red Dot Finder
Three key steps will help you accurately align your telescope's Red Dot Finder.
First, mount the finder securely following manufacturer instructions and select a distant stationary object like a rooftop vent as your target. Use a low-power eyepiece for a wider field of view.
Next, center your chosen object in the main telescope's eyepiece. Keep both eyes open while using the finder's azimuth and altitude adjustment knobs to align the red dot with your target. Make small, precise movements without moving the telescope.
Keep both eyes open and make small, precise adjustments to align the red dot with your target celestial object.
Finally, verify your alignment by selecting a different object and confirming the accuracy. You'll need to realign after any transport, jolts, or removal of the finder.
Don't forget to check the battery connections and adjust the dot's brightness for ideal viewing conditions.
Polar Alignment Fundamentals
To find true celestial north, you'll need to locate Polaris in the night sky and account for its slight offset from the actual celestial pole.
Your mount's axis points must be set to match your location's latitude while maintaining a level tripod position.
Once you've made these initial adjustments, you can fine-tune the alignment using either the drift method or computerized assistance for more precise tracking.
Finding True Celestial North
Accurate polar alignment forms the foundation of successful astronomical observation and astrophotography. To find true celestial north, you'll need to look beyond just pointing at Polaris. Instead, use bright reference stars near the meridian for more precise alignment.
| Alignment Step | Key Action |
|---|---|
| Initial Setup | Point mount's polar axis northward |
| Star Selection | Choose bright stars away from horizon |
| Drift Method | Monitor star movement in eyepiece |
| Fine-Tuning | Adjust altitude and azimuth as needed |
Your mount's polar axis must parallel Earth's rotational axis. While rough alignment works for visual observing, you'll need precise alignment for astrophotography. Use your telescope's high-power eyepiece to check star drift, making careful adjustments to both altitude and azimuth until you've achieved proper alignment. Remember, stars near the celestial equator offer the best reference points for drift alignment.
Adjusting Mount Axis Points
Properly adjusting your mount's axis points serves as the critical foundation for achieving precise polar alignment.
You'll need to start by ensuring your mount is level and securely fastened to the tripod before making any adjustments.
Begin by aligning the right ascension (RA) axis with the celestial pole, using your mount's latitude scale to set the correct altitude.
Use the altitude adjustment bolts to make precise changes, moving them slowly for better control. If you're using a polar scope, you can achieve more accurate alignment by centering Polaris in the reticle.
Once you've set the RA axis, verify your adjustments by checking star positions or using alignment software.
Star Alignment Methods
Successful stargazing begins with choosing the right alignment method for your telescope. You'll find several options, from basic to advanced techniques, that'll help you achieve accurate tracking and positioning.
| Method | Difficulty | Best For |
|---|---|---|
| 1-Star | Easy | Limited visibility areas |
| 2-Star | Moderate | General viewing |
| 3-Star | Advanced | Precise tracking |
| Auto-Align | Easy | Computerized mounts |
For beginners, start with the Brightest Star method or 1-Star alignment. If you're using an equatorial mount, you'll need polar alignment first. The 2-Star method offers better accuracy, while 3-Star alignment provides the most precise tracking by using two western stars and one eastern star. Advanced systems like Celestron's Sky Align let you point at any three bright objects without knowing their names.
Fine-Tuning Your Alignment
Once you've selected your alignment method, fine-tuning your telescope's position requires careful attention to several critical factors. Your success depends on making precise adjustments while monitoring star movement through your eyepiece or polar scope.
- Make tiny incremental changes to your mount's azimuth and altitude settings – rushing big adjustments will only lead to frustration.
- Watch how stars drift in your field of view – movement to the east or west indicates needed azimuth corrections.
- Pay attention to north-south star movement – this signals required altitude adjustments.
- Verify your alignment using multiple reference stars for the best accuracy.
Remember to maintain a stable mount throughout the process and don't hesitate to repeat adjustments until you achieve ideal alignment.
Software tools and smartphone apps can provide valuable assistance during fine-tuning.
Checking Alignment Accuracy
To guarantee your telescope delivers peak performance, you'll need to verify its alignment accuracy through several proven methods.
Modern technology-assisted tools and software can help you analyze star positions with an accuracy of 0.1 arc minutes through astrometric techniques and plate solving.
You can also use the traditional star drift method by tracking celestial objects and adjusting until you observe no drift. For visual verification, use a high-magnification eyepiece to check if stars remain centered.
If you prefer mathematical precision, calculate alignment errors using right ascension and declination measurements from two reference stars.
Many computerized mounts now offer built-in alignment checks with real-time feedback, making the process more accessible while maintaining high accuracy.
These tools will help you achieve the precise alignment needed for ideal viewing.
Common Alignment Problems
Even well-maintained telescopes can encounter several common alignment issues that impact viewing quality.
Regular maintenance alone won't prevent telescope alignment problems – they're a common challenge that can diminish your stargazing experience.
You'll face challenges ranging from misaligned mirrors causing blurred images to tracking errors from poor mount balance. Environmental factors and equipment limitations can also interfere with proper alignment.
- Incorrect collimation and misaligned mirrors distort your view and reduce optical performance.
- Poor polar alignment leads to tracking issues and failed GOTO operations.
- Improper finderscope alignment makes it difficult to locate and center celestial objects.
- Mount imbalance and incorrect counterweight placement stress your equipment.
When troubleshooting alignment problems, consider both equipment and environmental factors.
Check your mount's time and location settings, ascertain proper eyepiece selection, and maintain accurate polar alignment.
Understanding your telescope's control system and basic astronomy principles will help you overcome most alignment challenges.
Maintaining Proper Alignment
Maintaining proper telescope alignment requires consistent attention to both mechanical and optical components. You'll need to regularly inspect your mount and finderscope, ensuring all components remain precisely positioned for ideal viewing.
Check your telescope's alignment using bright stars or landmarks as reference points, always following your manufacturer's specific guidelines. Keep all moving parts properly lubricated and tighten any loose screws on the mount and finderscope.
Using tools like split-bubble levels helps maintain precise positioning, while rotating your telescope verifies alignment across multiple positions.
Remember to document your settings and conditions during each alignment session. After transportation or extended storage, you'll need to realign your telescope.
Regular maintenance checks help identify potential issues before they affect your viewing experience, ensuring consistent performance over time.
Frequently Asked Questions
How Often Should I Realign My Telescope in a Single Viewing Session?
You'll need to check your telescope's alignment at the start of your session and whenever you notice changes. Temperature shifts, movement, or extended viewing periods may require 1-2 additional realignments during use.
Can Extreme Weather Conditions Permanently Affect My Telescope's Alignment Mechanism?
Yes, extreme weather can permanently damage your telescope's alignment mechanism. High winds, moisture, and temperature fluctuations can warp components or cause rust. You'll need proper protection and maintenance to prevent lasting damage.
Does Telescope Alignment Accuracy Differ Between Urban and Rural Viewing Locations?
You'll achieve similar alignment accuracy in both urban and rural locations using modern methods. However, it's easier to perform initial alignment in rural areas where you can see more reference stars clearly.
What Backup Alignment Methods Work When Electronic Alignment Systems Fail?
You can rely on manual star alignment using bright stars or planets, a polar scope for equatorial mounts, star charts, or mobile apps. The brightest star method works well for quick backup alignment.
How Does Telescope Size Affect the Time Needed for Proper Alignment?
You'll spend more time aligning larger telescopes, especially those with equatorial mounts. Smaller scopes are quicker to set up, while bigger ones need extra care for proper balance and precise adjustments.
In Summary
Remember, you'll need to check your telescope's alignment regularly during your observing sessions, as subtle movements and temperature changes can affect accuracy. If you've followed these steps carefully, you're ready for a night of successful stargazing. Don't forget to document your alignment process and settings – it'll make future sessions much easier and more efficient.


Leave a Reply