To measure stellar parallax accurately, you’ll need a 3-inch+ telescope with quality CCD imaging. Schedule observations six months apart to maximize apparent shift. Choose distant, stable background stars as reference points. Convert pixel measurements to arcseconds using proper calibration factors. Observe in dark locations with minimal atmospheric turbulence. Process your data using the distance formula d=1/p (parsecs). Account for environmental variables during your observations. These foundational techniques will transform your astronomical distance measurements.
7 Quick Tips for Measuring Stellar Parallax

When attempting to measure stellar parallax, you’ll need to plan observations six months apart as Earth orbits to opposite sides of the Sun. This maximizes the apparent shift of a nearby star against distant background stars, creating a measurable parallax angle.
Equip your telescope with a high-quality CCD imager that can track the sky during long exposures. Calibrate your telescope‘s angle scales carefully to convert pixel movements into arcseconds—essential for accurate distance calculations.
Aim for precision around 0.25 arcseconds, though amateur setups typically achieve about 1 arcsecond due to atmospheric limitations. Record your observations systematically and choose nights with ideal seeing conditions to minimize atmospheric turbulence.
With patience and proper technique, you’ll be able to measure distances to stars using this fundamental astronomical method.
Choose the Right Equipment for Parallax Observations
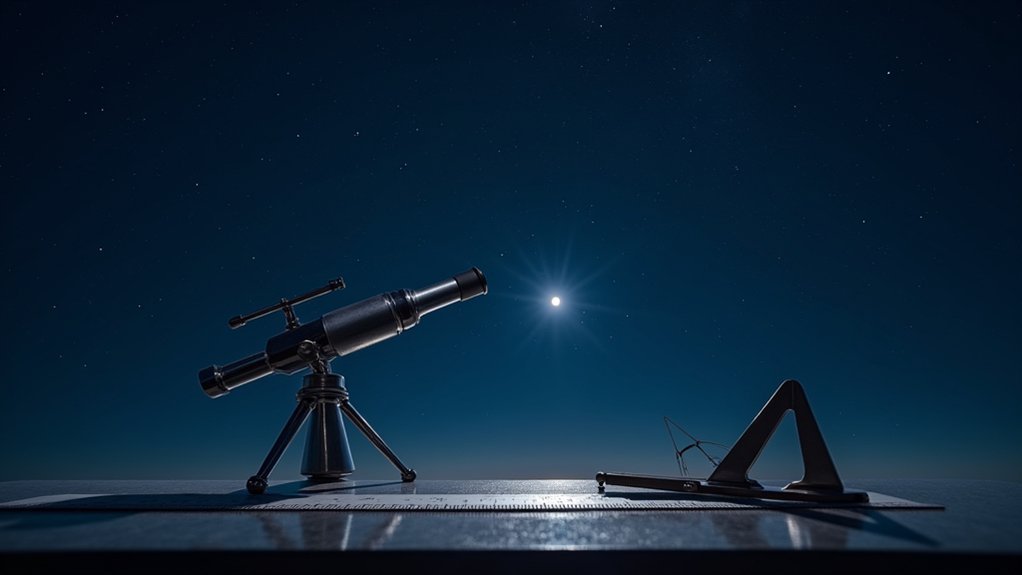
For accurate stellar parallax measurements, you’ll need a telescope with precise tracking capabilities and at least a 3-inch aperture, though larger is preferable for detecting minute angular shifts.
Your imaging setup should include a CCD camera with a large f-ratio to capture the detailed star positions necessary for parallax calculations.
Don’t overlook the importance of properly calibrated angle scales on your equipment, as this guarantees your pixel measurements can be correctly converted to the arcsecond measurements used in parallax determination.
Essential Telescope Characteristics
The right equipment makes all the difference in successful parallax measurements. Your telescope should have at least a 3-inch aperture, though larger diameters will greatly enhance your light-gathering abilities and measurement precision.
For accurate astrometric readings, a CCD imager is non-negotiable—it’s the heart of your imaging system.
Ensure your telescope offers reliable tracking capabilities for long exposures; even minor drift can invalidate your parallax measurements. Select a model with a high f-ratio to achieve the necessary precision for measuring angles as small as 0.25 arcseconds.
Don’t overlook seeing conditions when planning your observations. Schedule your measurement sessions during nights with minimal atmospheric turbulence to maximize image clarity and data reliability. Clear skies mean clearer parallax values.
Imaging Technology Selection
Selecting appropriate imaging technology stands at the core of successful parallax measurements. You’ll need a high-quality CCD imager with a large f-ratio to maximize sensitivity during observations. Choose a telescope with at least a 3-inch aperture—larger ones deliver better resolution for precise star position recording.
| Equipment | Minimum Requirement | Ideal Choice |
|---|---|---|
| Telescope | 3-inch aperture | 8-inch or larger |
| Camera | CCD imager | High-resolution with micro-arcsecond precision |
| Tracking | Basic motor drive | Computerized mount with autoguiding |
| Software | Basic calibration | Advanced data processing suite |
Ensure your setup includes robust tracking capabilities to maintain focus during long exposures. Your high-resolution camera should handle micro-arcsecond precision for accurate parallax measurements, especially with nearby stars. Finally, invest in software that efficiently processes imaging data, converting pixel measurements to arcseconds for reliable parallax calculations.
Master the Six-Month Measurement Cycle

When measuring stellar parallax accurately, you’ll need to position your observations exactly six months apart to capture the maximum apparent shift of your target star. This timing creates the widest possible baseline for detecting the star’s angular displacement against distant background stars.
For precise stellar parallax measurements, observations at six-month intervals provide the optimal baseline for detecting a star’s true angular displacement.
Always plan your observations during ideal seeing conditions to minimize atmospheric interference. Carefully calibrate your astrometric measurements at each point in the cycle, meticulously recording the apparent position of your target star relative to more distant reference stars.
For maximum precision, don’t rely on just one measurement cycle. Repeat your parallax observations across multiple years to refine your data and identify potential measurement errors.
This methodical approach will greatly improve the accuracy of your stellar distance calculations.
Calibrate Your Telescope’s Angle Scales
Proper calibration of your telescope’s angle scales stands as a critical foundation for accurate parallax measurements.
You’ll need to systematically compare your instrument’s readings against established star catalogs and convert pixel movements in your digital images to precise arcsecond measurements.
Document all calibration adjustments to build a reliable measurement history that improves your parallax data quality over time.
Calibration Methods Matter
Transform your parallax measurements from approximate guesswork to precise calculations by properly calibrating your telescope’s angle scales. Your calibration approach directly impacts measurement accuracy, so choose methods that guarantee reliable conversions from pixels to arcseconds.
- Select multiple reference stars with well-documented positions across your field of view to establish a thorough calibration baseline.
- Perform calibration checks before each parallax measurement session to identify any drift in your telescope’s positioning system.
- Document your calibration process methodically, noting atmospheric conditions and mount stability that might affect results.
- Compare calibration results across different nights to identify patterns and improve consistency in your measurements.
Remember that stellar parallax requires extreme precision—even small calibration errors can greatly impact your results when measuring such minute angular shifts.
Pixel-to-Arcsecond Conversion Essentials
The cornerstone of accurate stellar parallax measurement lies in mastering the pixel-to-arcsecond conversion process. Start by calibrating your telescope’s angle scales using stars with known positions, comparing them to their pixel coordinates on your imaging sensor.
Select a test star with established parallax as your baseline to guarantee your pixel-to-arcsecond ratio reflects your specific setup.
Employ specialized software to analyze captured images, precisely measuring pixel movement when comparing foreground stars against fixed background references.
Don’t forget to recalibrate regularly, as temperature fluctuations and mechanical wear can diminish measurement precision over time.
Maintain systematic records of your calibration process—this documentation validates your conversion accuracy and guarantees reliable parallax measurements.
With proper calibration, you’ll transform simple pixel shifts into meaningful astronomical measurements.
Select Appropriate Background Stars as References

When measuring stellar parallax accurately, selecting the right background stars as reference points is essential to your success. These distant celestial objects serve as your fixed backdrop against which you’ll observe the tiny angular shifts of your foreground star.
To optimize your parallax measurements:
- Choose background stars at least several hundred light-years away to guarantee they appear stationary relative to your target.
- Verify your reference stars are documented in reliable star catalogs with known positions and characteristics.
- Select stars positioned away from your foreground star’s line of sight to minimize confusion from proper motion effects.
- Aim for reference points similar in brightness to your target to reduce observational bias.
A field with multiple well-distributed reference points will greatly improve your measurement precision.
Account for Environmental Factors Affecting Precision
Despite your best equipment and techniques, environmental factors can dramatically impact the precision of stellar parallax measurements.
You’ll get the most accurate results by observing on nights with minimal atmospheric turbulence, which reduces variations in apparent star positions.
Seek dark-sky locations away from urban centers to avoid light pollution that obscures faint reference stars.
Make certain your telescope’s tracking accuracy is calibrated to prevent drift errors during long exposures.
Remember that the size of the seeing disc directly affects your angular measurement precision—smaller discs yield better results.
Time your observations carefully, as even subtle changes in atmospheric conditions can shift star positions.
Process Your Data With Trigonometric Calculations
After collecting your stellar observations, you’ll need to transform those raw measurements into meaningful distances using fundamental trigonometric principles. The parallax angle in arcseconds directly determines a star’s distance through the simple formula: distance to a star (in parsecs) = 1/p.
- Convert pixel measurements to arcseconds using your telescope’s calibration factors.
- Calculate the angular shift in both right ascension and declination between observations taken six months apart.
- Determine the parallax angle (p) by measuring the star’s maximum angular displacement against background stars.
- Apply the distance formula d = 1/p to find the star’s distance in parsecs (multiply by 3.26 to convert to light-years).
Remember that smaller parallax angles indicate greater distances, making precise trigonometric calculations essential for distant stars.
Frequently Asked Questions
What Is a Parallax for Dummies?
Parallax is what you’re experiencing when you hold a finger up and close one eye, then the other. Your finger seems to “jump” because you’re viewing it from different positions.
How Do You Measure Solar Parallax?
You measure solar parallax by observing the Sun’s position from two locations on Earth six months apart. You’ll calculate the angle of apparent shift, which helps determine Earth’s distance from the Sun.
What Is the Parallax Method in Simple Words?
The parallax method is how you measure star distances by observing a star’s apparent shift against background stars as Earth orbits the Sun. It’s like seeing objects appear to move when you change viewpoints.
What Are Two Ways That You Could More Accurately Measure the Distance to an Object Using Parallax?
You can improve parallax distance measurements by using longer observation baselines (like Earth’s full orbit) and employing higher-resolution imaging technology with adaptive optics to minimize atmospheric distortion and capture more precise stellar shifts.
In Summary
Measuring stellar parallax doesn’t need to be intimidating. By following these seven tips, you’ll improve your measurements and gain valuable insights into stellar distances. Remember that patience is key—you’re capturing tiny angular shifts that reveal vast cosmic distances. As you practice these techniques, you’ll develop skills that connect you directly to the fundamental methods astronomers use to map our universe. Keep observing!


Leave a Reply