Capturing stunning nebulae from your backyard requires proper equipment, technique, and patience. You’ll need at least a 4-inch telescope, sturdy equatorial mount, and a dedicated astronomy camera. Combat light pollution with specialized filters and by timing sessions during new moons. Master polar alignment for sharp 2-5 minute exposures, and use image stacking to enhance details. Post-processing transforms raw data into breathtaking images. The difference between good and extraordinary nebula photos lies in the details that follow.
Numeric List of Second-Level Headings
Five essential components form the backbone of successful nebula photography.
The foundation of breathtaking nebula imagery rests on mastering five critical technical elements.
When planning your deep sky astrophotography journey, you’ll want to focus on these key areas:
- Selecting the Right Equipment: Choose a telescope with a wide field of view to combat light pollution and capture expansive nebulae.
- Camera Selection: A dedicated astronomy camera like the ZWO ASI294MC Pro will dramatically improve your results compared to standard DSLRs.
- Planning Your Imaging Sessions: Use tools like AsiAir to maximize efficiency for each image taken.
- Data Collection and Stacking: Combine multiple exposures in DeepSkyStacker to enhance detail.
- Post-Processing Techniques: Transform raw data into stunning visuals using PixInsight or Lightroom to reveal intricate nebula structures.
Understanding Light Pollution Challenges in Urban Settings
Light pollution maps help you identify local skyglow intensity and find darker observing locations within driving distance of your urban home.
The Bortle Scale‘s nine-level classification system gives you a standardized way to assess your night sky conditions, with most city centers falling between Class 6-8 where nebulae visibility is severely limited.
You’ll need to implement urban glow mitigation strategies like shooting from rooftops, timing your sessions during low-activity hours, or setting up portable light barriers to block direct artificial light from reaching your equipment.
Light Pollution Maps Explained
When venturing into astrophotography, you’ll quickly discover that the urban sky above rarely resembles the spectacular cosmic tapestry visible from remote locations.
Light pollution maps serve as essential navigation tools for astrophotographers seeking darker skies for nebula photography.
These maps utilize satellite data to visualize night sky brightness across geographic areas, highlighting potential viewing locations with minimal light interference.
The Bortle Scale, appearing on many of these maps, provides a nine-level classification system ranging from Class 1 (pristine dark skies) to Class 9 (severely light-polluted inner-city environments).
Bortle Scale Basics
Although amateur astronomers have long discussed sky quality in subjective terms, the Bortle Scale provides a standardized nine-point system to quantify what you’re actually seeing overhead.
When you’re attempting astrophotography of nebulae from your backyard, understanding your local Bortle rating is essential for setting realistic expectations.
Most urban locations fall between Class 5 and 7, where light pollution greatly limits your ability to capture deep sky objects. In these conditions, you’ll struggle to see many nebulae visually, and your camera will require longer exposures or specialized filters.
Knowing your Bortle class helps you plan effectively—while Class 1-3 skies allow straightforward imaging of faint details, Class 6+ environments demand more technical solutions.
Check your area’s rating before setting up your equipment to avoid frustration.
Urban Glow Mitigation
Despite your best equipment and techniques, the orange-yellow glow that blankets urban skies presents a formidable challenge for nebula photography. In highly light-polluted areas (Bortle Class 8), you’ll struggle to see anything beyond the brightest celestial objects.
| Mitigation Strategy | Effect | Best For |
|---|---|---|
| Narrowband filters | Isolates specific wavelengths | Emission nebulae |
| Stacking exposures | Averages out noise | All deep sky objects |
| Timing with new moons | Reduces ambient light | Maximum contrast |
You don’t need to escape the city completely to capture stunning nebulae. By employing light pollution filters designed specifically for astrophotography, planning sessions when the moon is below the horizon, and patiently stacking multiple exposures, you’ll extract remarkable detail from even the most challenging urban skies.
Essential Equipment for Backyard Nebula Photography
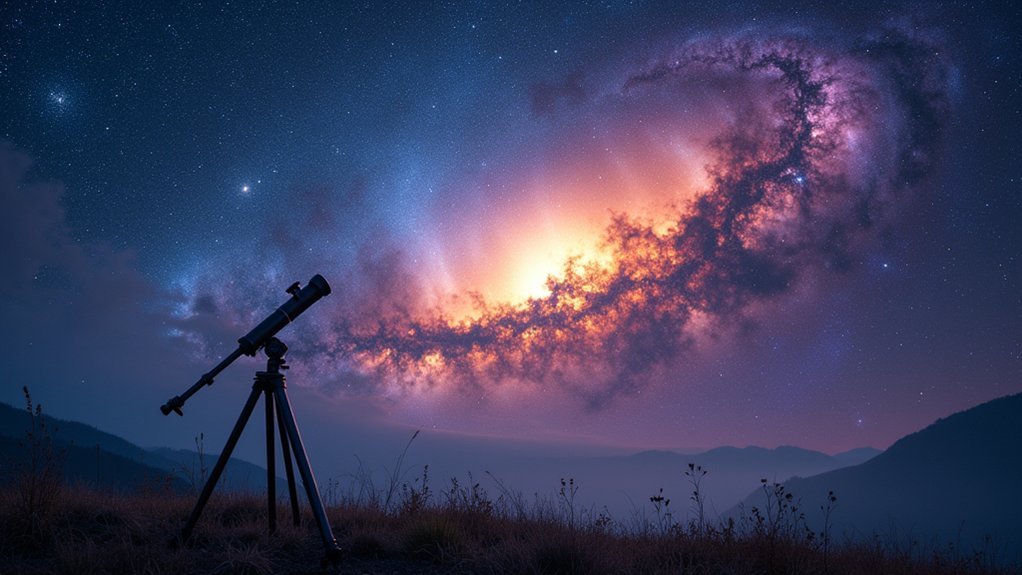
Your journey to backyard nebula photography starts with selecting a telescope of at least 4 inches in aperture, with wide-field refractors offering excellent views of these cosmic wonders.
You’ll need a sturdy equatorial mount to track the stars accurately during long exposures, preventing the star trails that can ruin nebula images.
When paired with a dedicated astronomy camera like the ZWO ASI294MC Pro, this equipment foundation will dramatically improve your ability to capture the delicate details and vibrant colors of distant nebulae.
Choosing Your Telescope
When capturing the ethereal beauty of nebulae, selecting the right telescope becomes your first critical decision. A wide-field refractor telescope offers significant advantages for beginners with its lighter weight and broader field of view, making nebulae easier to locate and frame in your images.
For successful nebula photography, you’ll need:
- A quality equatorial mount to compensate for Earth’s rotation, preventing star trails during long exposures.
- Dedicated astronomy imaging equipment like the ZWO ASI294MC Pro, which provides superior sensitivity to capture faint nebular details.
- An electronic filter wheel that allows automated switching between different wavelength filters, revealing intricate nebula structures.
Don’t overlook the importance of an autoguider to enhance tracking accuracy—it’s essential for maintaining pinpoint stars during the extended exposures needed to capture nebulae’s delicate wisps and colors.
Mount Stability Matters
Stability serves as the cornerstone of successful nebula photography. When imaging these distant cosmic clouds, your mount’s ability to counter Earth’s rotation makes all the difference between stunning detail and disappointing star trails.
An equatorial mount like the iOptron CEM70 provides the precise tracking needed for extended exposures. Its substantial payload capacity supports your telescope and camera setup while minimizing vibrations.
You’ll need to properly balance your equipment on the mount—uneven weight distribution leads to tracking inaccuracies and diminished image quality.
Don’t underestimate the importance of your mount’s foundation. A robust tripod or pier greatly reduces ground vibrations that can ruin long exposures.
Investing in a high-quality mount with autoguiding capabilities allows for longer exposure times, capturing the faint details that make nebula images truly breathtaking.
Choosing the Right Nebulae for Beginners
Starting with the right celestial targets can make or break your early astrophotography experience.
Choosing the right celestial subjects is the critical first step between frustration and stunning deep-sky images.
As a beginner astrophotographer, you’ll want to focus on nebulae that are bright and relatively easy to locate. The Orion nebula (M42) is perfect for newcomers due to its impressive bright magnitude, making it visible even with minimal equipment during winter months.
Three excellent nebulae targets for beginners:
- The Lagoon Nebula (M8) – A vibrant summer target in Sagittarius with stunning colors
- The Dumbbell Nebula (M27) – Distinctive shape with a magnitude of 7.5, found in Vulpecula
- The Ring Nebula (M57) – A bright planetary nebula in Lyra, accessible even from light-polluted areas
Use star charts or mobile apps to locate these objects during their ideal viewing seasons.
Mastering Polar Alignment for Sharp Images
The foundation of capturing breathtaking nebula images lies in proper polar alignment of your telescope mount. Without it, your deep space astrophotography will suffer from star trails and blurred details, regardless of your equipment quality.
| Alignment Quality | Effect on Images | Recommended Tools |
|---|---|---|
| Poor | Visible star trails after 30s | Visual estimation |
| Good | Clean 2-3 minute exposures | Polar scope |
| Excellent | Sharp 5+ minute exposures | NINA software + autoguider |
Begin your alignment process before sunset for convenience. Use a polar scope or software like NINA to position your mount according to Polaris’s location. Remember, even slight misalignments compound over time, so prioritize accuracy. For maximum tracking accuracy, complement your polar alignment with an autoguider system—this combination will dramatically improve your nebula photography results.
Camera Settings and Exposure Techniques
While polar alignment establishes your foundation, properly configuring your camera and exposure settings determines how effectively you’ll capture nebulae’s delicate details.
Specialized astronomy cameras like the ZWO ASI294MC Pro offer superior camera sensor performance compared to DSLRs, revealing more nebula structure.
Your exposure times should balance detail capture and tracking limitations:
- Set exposures between 30 seconds and several minutes based on your mount’s tracking accuracy and local light pollution.
- Implement narrowband filters (Ha, OIII, SII) with an electronic filter wheel to isolate specific wavelengths and enhance contrast.
- Acquire multiple frames across several nights to build substantial total exposure time for stacking.
Use software like DeepSkyStacker to combine your subexposures, averaging out noise while preserving detail—essential preparation for effective post-processing.
Image Stacking: Collecting More Photons for Better Results
Image stacking forms the backbone of successful nebula photography by combining multiple exposures to dramatically increase your signal-to-noise ratio.
You’ll collect more photons with each additional frame, allowing faint nebula details to emerge while random noise gets averaged out of your final image.
Software like DeepSkyStacker can align and merge dozens or even hundreds of exposures, transforming what would be grainy single shots into smooth, detailed portraits of these cosmic clouds.
Stacking Fundamentals Explained
When capturing breathtaking nebulae, collecting sufficient light becomes your greatest challenge.
Image stacking solves this problem by combining multiple subexposures of the same celestial object, dramatically improving your signal-to-noise ratio. This technique reveals delicate structures that remain invisible in single frames.
To master stacking for your nebula photography:
- Capture hundreds of short exposures rather than a few long ones – this minimizes star trailing and atmospheric interference.
- Use calibration frames (darks, flats, bias) to eliminate camera artifacts and dust spots.
- Process with software like DeepSkyStacker that uses sophisticated stacking algorithms to align and combine frames.
The final image will showcase remarkably more detail and color than any single exposure could achieve, transforming faint gray smudges into vibrant cosmic wonders.
Noise Reduction Techniques
To truly elevate your nebula photography, mastering advanced noise reduction through strategic image stacking becomes essential. By combining multiple exposures of the same target, you’ll greatly increase your signal-to-noise ratio, revealing delicate nebula details otherwise hidden in random noise.
Consider employing “Lucky Imaging” techniques, capturing thousands of frames rapidly to select only those with minimal atmospheric distortion. Software like DeepSkyStacker can effortlessly align and merge hundreds of these frames, effectively cleaning up your final image.
For maximum impact, don’t hesitate to photograph your target across multiple nights. This accumulated exposure time collects considerably more photons, producing richer, more detailed results.
Once stacked, use post-processing tools like Pixinsight or Lightroom to further refine your image, bringing out the faintest nebula structures with precision.
Filters That Enhance Nebula Details
The right filters can transform your nebula photography from ordinary to extraordinary by revealing details invisible to the naked eye. Narrowband filters like Hα, OIII, and SII isolate specific wavelengths emitted by elements within nebulae, creating vivid, detailed images.
Pair these with a broadband light pollution filter to cut through urban sky glow and dramatically increase contrast.
For maximum efficiency, consider investing in:
- An electronic filter wheel to switch between filters without refocusing
- A dedicated astronomy camera compatible with your filter system
- Software that allows automated filter changes during imaging sessions
When processing your images, combine data from multiple filters to create composite images that showcase the nebula’s full complexity, highlighting different elements and structures that single-filter photography simply can’t capture.
Post-Processing Workflows for Nebula Photography
Capturing nebulae with the right equipment and filters is only half the journey—your raw images contain hidden cosmic beauty that requires careful processing to reveal.
Begin your post-processing workflow by stacking multiple exposures in DeepSkyStacker, which dramatically reduces noise while enhancing subtle details.
Next, import your stacked image into Pixinsight to stretch the histogram, separating the nebula’s delicate structures from the background.
Create masks to target specific areas without affecting the entire image. You’ll find this precision particularly valuable when enhancing faint nebula filaments.
For final touches, consider using Lightroom’s Highlights slider to tame any overly bright regions.
Don’t hesitate to experiment with combining images at different exposure times—this creates a more dynamic final image that showcases both bright and dim regions of your cosmic target.
Weather Conditions and Seasonal Considerations
While advanced equipment can compensate for various imaging challenges, successful nebula photography ultimately depends on selecting the right atmospheric conditions and seasons for your target.
The night sky reveals different celestial treasures throughout the year, requiring careful planning and seasonal adjustments to your imaging schedule.
For ideal conditions when capturing nebulae, focus on:
- Clear, dark skies with minimal light pollution and low humidity, which provide the best contrast for faint nebulae details.
- Moon phases – schedule your imaging sessions during new moons or when the moon is below the horizon to prevent its brightness from washing out delicate structures.
- Seasonal visibility – spring and summer months offer excellent views of popular nebulae like the Lagoon and Trifid, while other targets may require different seasons.
Patience and Persistence: Building Your Imaging Skills
Because nebula photography stands as one of the most rewarding yet challenging forms of astrophotography, you’ll need to develop significant patience alongside your technical skills.
Capturing detailed nebulae often requires multiple imaging sessions to accumulate sufficient exposure data for impressive results.
Persistence in refining techniques like polar alignment and using an autoguider will dramatically improve your tracking accuracy over time.
Don’t hesitate to experiment with different imaging settings and filters as you learn what works best with your equipment.
Connect with fellow astrophotographers through online forums for valuable feedback and support.
Maintain a consistent imaging schedule and document your progress—this practice will help you stay motivated as you gradually improve.
The astrophotography community offers a wealth of knowledge to help you overcome common challenges on your journey.
Frequently Asked Questions
How Do You Capture a Nebula?
You’ll need a telescope with equatorial mount, an astronomy camera, and image-processing software. Polar align your setup, plan exposures using astronomy apps, then capture and stack multiple images to reveal the nebula’s details.
What Magnification Do You Need to See a Nebula?
You’ll need lower magnification (20x-60x) to see nebulae, as this provides a wider field of view. Focus on aperture (4-6 inches minimum) rather than magnification for better light gathering capacity.
Can You See Nebula Without a Telescope?
Yes, you can see some bright nebulae like the Orion Nebula without a telescope if you’re under dark skies. You’ll have better results using binoculars and finding locations away from city lights.
What Is the Best Focal Length for a Nebula?
For nebula photography, you’ll find 400-800mm is your ideal focal length. It strikes a perfect balance between detail and field of view. For wider shots, use 200-300mm, while detailed imaging requires 800mm+.
In Summary
You’ve now got the knowledge to photograph nebulae from your backyard, regardless of light pollution challenges. With the right equipment, proper alignment, suitable filters, and post-processing skills, you’ll capture stunning cosmic clouds. Remember that weather conditions and seasons affect visibility, so plan accordingly. Don’t get discouraged by initial results—astrophotography is a journey. Keep practicing, learning, and you’ll soon have breathtaking nebulae images to treasure.


Leave a Reply