
To measure sky angles, you can use your hand at arm’s length: outstretched hand (25°), fist (10°), three fingers (5°), pinky width (1°). Navigate with altitude (height from horizon) and azimuth (compass direction). Find your latitude by measuring the North Star’s angle. Use the sexagesimal system (degrees, arcminutes, arcseconds) for precision. Calculate angular sizes of planets with simple formulas. Track constellations with angular distance. These natural tools will transform your stargazing experience.
Using Your Hand as a Natural Angular Ruler

When observing celestial objects, you don’t always need fancy equipment to measure angular distances in the sky. Your hand is a natural tool that’s readily available and surprisingly accurate.
Hold your hand at arm’s length toward the sky to create a reliable measuring system. Your clenched fist spans approximately 10 degrees, while your outstretched hand from thumb to pinky covers about 25 degrees.
Need to measure angles with more precision? The width of your little finger represents roughly 1 degree—perfect for gauging the separation between close stars.
The three middle fingers held together provide a handy way to measure about 5 degrees, and the span between your index and little finger gives you about 15 degrees.
These natural gauges make astronomical observations more accessible and intuitive.
Navigating the Sky With Altitude and Azimuth
While your hand provides quick estimates of celestial distances, understanding the altitude-azimuth coordinate system gives you precise sky navigation capabilities. This two-dimensional approach uses altitude—measured in degrees from the horizon (0°) to the zenith (90°)—to determine how high a celestial object appears in your sky.
Azimuth completes the coordinate pair by measuring the horizontal angle clockwise from true north: north (0°), east (90°), south (180°), and west (270°). Together, these coordinates pinpoint exact object locations.
Azimuth readings around the compass rose provide the essential horizontal component for precisely locating objects in the celestial sphere.
You can measure these angles using simple tools like a magnetic compass and ruler. The local meridian, which connects your zenith to the North and South points, serves as an important reference line.
With practice, you’ll confidently track the positions of stars, planets, and other celestial bodies.
Finding Latitude With Celestial Objects

You can find your latitude in the Northern Hemisphere by measuring the angle between the horizon and the North Star, with each degree of elevation matching your latitude in degrees north of the equator.
In the Southern Hemisphere, where Polaris isn’t visible, you’ll need to rely on the Southern Cross constellation and its pointer stars to establish your position.
These celestial navigation techniques have guided sailors and explorers for centuries before the advent of modern GPS technology.
North Star Method
For thousands of years, sailors and explorers have relied on a remarkably simple yet powerful navigational technique: the North Star method. This approach works because the angle between Polaris and the visible horizon directly corresponds to your latitude in degrees.
As you travel northward in the Northern Hemisphere, you’ll notice Polaris climbing higher in the sky. Conversely, it descends toward the horizon as you move south. To determine your latitude, simply use a protractor to measure the angle of elevation to the North Star.
What makes this method so reliable is Polaris’s position almost directly above the North Pole at +90° declination.
It’s worth noting this technique is unique to the Northern Hemisphere, as the Southern Hemisphere lacks a similarly positioned bright star for reference.
Southern Cross Techniques
Just as Northern Hemisphere navigators rely on Polaris, sailors and travelers in the Southern Hemisphere depend on the distinctive Southern Cross constellation for celestial navigation.
To identify the Southern Cross, look for its four bright stars forming a cross shape spanning about 6 degrees in the sky. Locate it using the Pointers—Alpha and Beta Centauri—which are roughly 4 degrees apart. You can measure this distance using your fingers at arm’s length.
Unlike the Northern Hemisphere where Polaris indicates north, the Southern Cross helps determine your latitude directly. Simply measure the angle between the Southern Cross and the horizon—this angle corresponds to your latitude in degrees.
This technique provides a reliable method to fix your position when traditional navigation tools aren’t available, making it invaluable for southern explorers and astronomers alike.
Measuring Angular Size of Planets and Moons
When gazing at planets and moons through a telescope or with the naked eye, understanding their angular size helps put cosmic dimensions into perspective.
Angular diameter describes how large objects in the sky appear from Earth, regardless of their actual size. You can measure the angle of celestial bodies using simple hand techniques.
Jupiter, at approximately 0.7 degrees, appears slightly larger than a clenched fist at arm’s length, while Saturn‘s body measures about 0.4 degrees—roughly a little finger’s width. However, Saturn’s rings extend its apparent distance to 0.8 degrees.
The Sun and Moon dominate our sky with angular sizes of about 30-32 degrees, making them easily visible.
For precise calculations, use the formula l = d × tan(theta), where theta represents the angular size in radians.
Calculating Arc Minutes and Arc Seconds
You’ll need to master the basic conversion formulas to effectively work with sky angles: multiply degrees by 60 for arc minutes and by 3600 for arc seconds, or divide in the reverse direction.
Modern astronomy relies on these measurements when you’re tracking celestial objects that appear incredibly small from Earth.
Digital calipers, micrometers, and specialized astronomical software now offer unprecedented precision for these critical angular calculations.
Conversion Formulas Explained
Astronomers rely on a specific angular measurement system that’s essential for precisely locating celestial objects.
When you’re working with these angular measurements, you’ll need to convert between degrees, arc minutes, and arc seconds regularly.
To convert degrees to arc minutes, simply multiply by 60. For example, 2° equals 120 arc minutes.
Similarly, convert arc minutes to arc seconds by multiplying by 60 again—so 3′ equals 180″.
For direct conversion from degrees to arc seconds, multiply by 3600. This calculation works because 1° contains 3600″ (60′ × 60″).
These conversions help you accurately describe the distances between stars and other celestial bodies in the night sky, allowing for precise observations and measurements in your astronomical work.
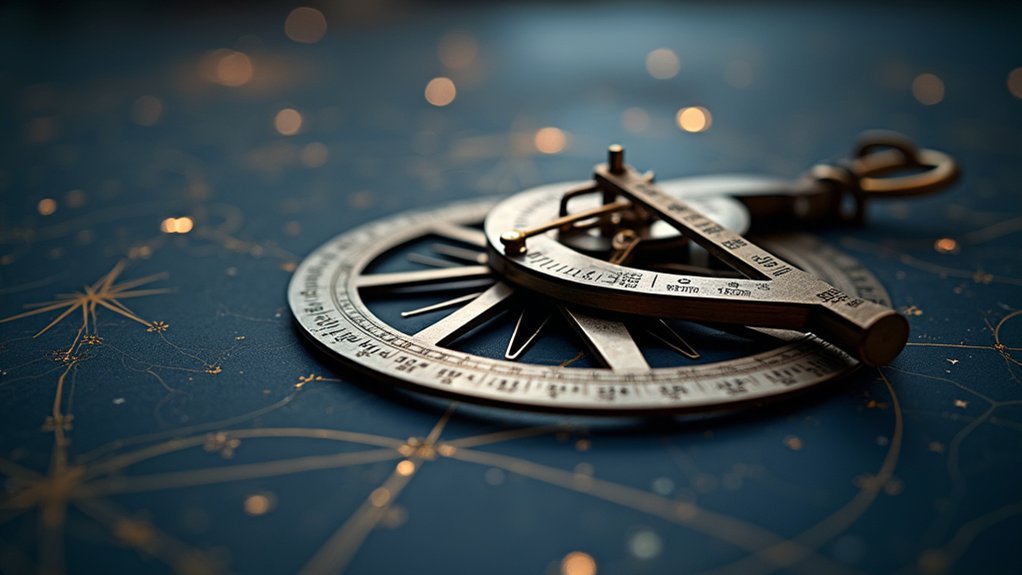
Precision Measurement Tools
To achieve high-precision celestial measurements, you’ll need specialized tools designed specifically for calculating arc minutes and arc seconds. Modern astronomical protractors and digital angle finders allow you to measure the angular distance between celestial objects with remarkable accuracy.
When measuring the angle between stars, remember that even tiny differences matter—just 1 arc second represents 1/3600th of a degree. For context, the Moon’s 30 arc minute diameter provides a useful reference point in the night sky.
Digital astronomy apps now offer built-in angle calculators that instantly convert between degrees, arc minutes, and arc seconds. These tools are invaluable when you’re trying to determine exact positions of objects in the sky, especially when tracking motion over time or calculating relative distances between celestial bodies.
Employing Digital Apps for Angular Measurement
Everyone can now transform their smartphone into a precision celestial measurement tool with today’s digital astronomy apps.
These applications leverage your device’s compass and gyroscope to measure angular distances in the sky with remarkable accuracy, providing instant altitude and azimuth readings.
Many apps overlay celestial objects on your camera feed, allowing you to identify constellations and measure angles between stars intuitively.
You’ll enhance your observational skills as you explore features that let you input specific coordinates to calculate angular separation between heavenly bodies.
The augmented reality capabilities in these apps visually guide you to the correct positions in the night sky, making spatial relationships easier to comprehend.
With built-in tutorials, you’ll quickly learn to navigate the cosmos using angular measurements, turning your evening stargazing into a more educational experience.
Understanding the Sexagesimal System in Astronomy
You’ll find astronomy’s ancient sexagesimal system divides a full circle into 360 degrees, with each degree containing 60 arc minutes and each arc minute comprising 60 arc seconds.
This precise system helps you pinpoint celestial objects in the night sky, making it essential for stargazing and astronomical calculations.
When you’re measuring the angular separation between stars or the size of a lunar crater, these degrees, minutes, and seconds provide the mathematical foundation for your observations.
Ancient Degree Divisions
When you look up at the night sky, you’re viewing it through an angular measurement system that dates back thousands of years. This ingenious approach, borrowed from the Babylonians, divides the circle into 360 degrees—a number likely chosen for its proximity to the days in a year.
You’ll find astronomers breaking these measurements down further for precise celestial object positioning. Each degree splits into 60 arc minutes (marked with ‘), and each arc minute divides into 60 arc seconds (“). This sexagesimal (base-60) system provides the detailed language needed to express even tiny angles in the vast cosmos.
The system isn’t arbitrary—it’s a practical framework that’s survived millennia because it works. When you navigate the night sky, you’re participating in an ancient tradition that continues to serve modern astronomical needs.
Minutes and Seconds
The sexagesimal system breaks down astronomical measurements into increasingly fine divisions, offering remarkable precision for celestial observations. When you’re tracking objects across the celestial sphere, you’ll need this level of detail to pinpoint exact positions.
A degree isn’t precise enough for many astronomical measurements, which is why it’s divided into 60 arc minutes, with each minute further split into 60 arc seconds.
| Unit | Symbol | Fraction of Circle |
|---|---|---|
| Degree | ° | 1/360 |
| Arc Minute | ‘ | 1/21,600 |
| Arc Second | “ | 1/1,296,000 |
You’ll often see coordinates written as 42° 13′ 8″, indicating degrees, minutes, and seconds. When higher precision is needed, you can convert these sexagesimal measurements to radians for advanced calculations.
Comparing Jupiter and Saturn’s Angular Diameters
Two gas giants dominate our night sky with distinctly different angular measurements that reveal their celestial personalities.
Jupiter displays an impressive angular diameter of about 0.7 degrees, appearing slightly wider than your little finger held at arm’s length.
Saturn, while smaller at 0.4 degrees, offers a unique visual challenge to measure. Its stunning ring system extends this apparent size to 0.8 degrees, sometimes making it seem larger than Jupiter despite its smaller planetary disk.
You can use these comparative sizes as practical celestial yardsticks during your stargazing sessions.
Next time you’re observing, try measuring these planets against your finger to appreciate their relative scale.
These angular differences not only enhance your viewing experience but also provide insights into their distances within our solar system.
Locating Constellations With Angular Distance
Traversing the celestial sphere becomes remarkably intuitive once you’ve mastered measuring angular distances with your own hands. Your body provides perfect tools for constellation hunting—simply extend your arm and use your fist to measure approximately 10 degrees across the night sky.
When searching for the Southern Cross, remember it spans about 6 degrees. You’ll find its two Pointers, Alpha and Beta Centauri, roughly 4 degrees apart. Three fingers held together at arm’s length represent about 5 degrees, making them ideal for verifying these stellar relationships.
Don’t confuse the Moon’s position when mapping constellations—its angular diameter is around 30 degrees, serving as another useful reference point.
With these measurement techniques, you’ll quickly learn to navigate between stars and identify patterns that have guided observers for centuries.
Practical Applications of Position Angle Measurement
Moving beyond simple constellation finding, position angle measurement offers astronomers a precise framework for mapping celestial relationships. When you measure the distance and orientation between celestial objects, you’re utilizing a system that defines angles counterclockwise from the north celestial pole.
Position angle measurement elevates astronomy from stargazing to precision science, mapping the heavens through northward-referenced angular relationships.
The angle between these two objects provides essential data for studying binary star systems, where position angles reveal orbital characteristics and mass distributions.
You’ll find this technique particularly valuable when tracking celestial motion over time, as changes in position angle indicate real dynamic relationships in space.
For galaxy studies, position angles help determine alignment and orientation, offering insights into formation histories.
When objects are positioned close together, alternative calculation methods using sine and cosine identities guarantee your measurements maintain numerical stability and precision despite challenging observational conditions.
Frequently Asked Questions
How Do You Measure the Angle of the Sky?
You’ll measure sky angles using a combination of degrees, arc minutes, and arc seconds. You can estimate with your fist (10°) at arm’s length, or measure altitude (above horizon) and azimuth (compass direction).
What Is a Handy Way to Measure the Sky?
You can measure the sky with your hand: your fist equals 10 degrees, outstretched hand spans 25 degrees, index to pinky measures 15 degrees, and three middle fingers together cover about 5 degrees.
How to Measure Degrees in Sky With Hand?
You can measure sky degrees using your hand at arm’s length: your fist spans 10°, three fingers together cover 5°, index to pinky measures 15°, and stretched thumb to pinky covers about 25°.
What Is the Best Device to Measure Angles?
For measuring angles precisely, you’ll find theodolites offer the highest accuracy. Digital protractors and inclinometers are excellent alternatives. If you’re on a budget, smartphone apps with angular measurement capabilities work well too.
In Summary
You’ve now gained practical tools to measure the sky’s vast dimensions with only your hands and simple instruments. When you’re exploring the night sky, these angular measurement techniques will help you locate objects, understand celestial mechanics, and deepen your astronomical observations. Whether you’re a beginning stargazer or experienced amateur astronomer, these methods transform abstract celestial coordinates into tangible, navigable space above you.


Leave a Reply