To get the most from your constellation wheel, print it on cardstock and customize it with glow-in-the-dark paint. Set the correct date, time, and latitude for accuracy. Find true north using Polaris or a compass. Align the wheel with the zenith overhead. Start with bright anchor constellations like the Big Dipper. Shield yourself from light pollution. Hold the wheel at eye level. Add personal markings for favorite celestial events. Pair with binoculars for enhanced viewing. These techniques will transform your stargazing experience.
10 Best Tips For Using Your Constellation Wheel

Stargazers and astronomy enthusiasts find constellation wheels invaluable for traversing the night sky. To maximize your experience, print your star wheel on cardstock and protect it with clear contact paper for durability against nighttime moisture.
When using your wheel, align the current date with the correct time—white for standard time, orange for daylight-saving time. Hold it at eye level, matching the cardinal directions with your actual orientation. The oval’s center represents the zenith directly above you, while its edge shows the horizon. Remember that while the wheel doesn’t display planets, you can locate them by following the ecliptic path across the sky.
Use a dim red light to preserve your night vision while referencing your wheel. For ideal planning, rotate the wheel to preview how constellations will shift throughout your stargazing session, allowing you to anticipate celestial events before they occur.
Aligning Your Wheel to Match Your Location’s Latitude
While many astronomy enthusiasts don’t realize it, one of the most essential factors in getting accurate readings from your constellation wheel is matching it to your specific latitude. A wheel designed for Dallas won’t serve you well in New York due to significant differences in visible constellations.
When selecting a constellation wheel, check if it’s calibrated for your latitude or offers customization options. If you’re crafting your own wheel, download templates specific to your region from resources like Lawrence Hall of Science.
To properly align your wheel, orient it so the horizon closest to your target constellation is at the bottom. Then rotate it to match the current date and time. Star wheels designed for 40°N latitude work perfectly for locations like Iowa City.
Regular comparisons between your wheel and the actual night sky will help you refine your observation skills.
Setting the Date and Time for Accurate Star Positions

Because the night sky constantly shifts throughout the year, properly setting the date and time on your constellation wheel is essential for accurate star positions.
To get started, align the current date on the wheel’s rim with the time on the outer sleeve. Remember to adjust for daylight saving time when applicable. The Star Wheel times are based on standard time, so you must add one hour during daylight savings period. Rotate the wheel until your desired constellation aligns with the present time and date.
The oval shape on your wheel represents the entire visible sky, with yellow directional labels to help you orient yourself. As Earth orbits the Sun, different stars become visible each month, making your wheel valuable for planning year-round observations.
You can also use your constellation wheel to determine when specific stars rise, cross the meridian, and set, helping you maximize your viewing experience.
Finding North and Orienting Your Wheel Properly
To orient your constellation wheel accurately, you’ll need to find true north through magnetic compass alignment or by locating Polaris in the night sky.
When using a compass, remember to account for magnetic declination in your area, or better yet, spot Polaris directly by following the pointer stars in the Big Dipper.
Once you’ve established north, align your wheel’s celestial axis with it, ensuring the wheel’s orientation matches the actual dome of the sky above you. Remember that at 40° North Latitude, the Star Wheel is precisely calibrated for cities like Denver and San Francisco.
Magnetic Compass Alignment
A properly aligned magnetic compass forms the foundation of successful constellation wheel navigation.
When using your compass alongside your star wheel, remember to account for magnetic variation—the difference between magnetic and true north. This adjustment is essential when transferring compass readings to your constellation wheel.
Before stargazing, perform a compass swing to determine deviation caused by nearby electronic equipment or metal objects. Keep your compass level and turn on all electrical devices you’ll use during observation to get accurate readings.
For precise navigation, cross-verify your compass orientation with celestial landmarks. If you’re in the northern hemisphere, locate Polaris (the North Star) to confirm your compass reading. Understanding the distinction between true north and magnetic north will significantly improve your celestial navigation accuracy.
This complementary approach guarantees you’ll correctly orient your star wheel even when magnetic interference is present.
Polaris Spotting Tips
Finding Polaris stands as the cornerstone of properly orienting your constellation wheel.
Locate it by using the “pointer stars” Merak and Dubhe in the Big Dipper (Ursa Major) – follow them outward about five times their own distance. Alternatively, use Cassiopeia’s Gamma star which also points toward Polaris.
Once you’ve spotted Polaris at the end of the Little Dipper’s handle, align your wheel‘s North marking with it. This critical step guarantees your constellation wheel accurately represents what’s visible in your sky.
Remember that Polaris appears off-center unless you’re at the North Pole, as its position relates to your latitude. Despite common misconceptions, Polaris is not actually the brightest star in the sky but ranks around 50th in brightness.
For enhanced stargazing, practice this alignment in darker locations where stars are more visible, and you’ll soon navigate the night sky effortlessly.
Celestial Axis Orientation
Properly orienting your constellation wheel begins with understanding the celestial axis, which serves as the invisible line around which the entire night sky appears to rotate. This axis runs through both celestial poles, with Polaris marking its northern end.
To align your wheel correctly, first identify north in the night sky. In the Northern Hemisphere, locate Polaris using Ursa Major or Cassiopeia as guides. Southern Hemisphere observers should use the Southern Cross to find the South Celestial Pole.
Once you’ve established your primary direction, adjust your wheel to match your local latitude. Set the time dial to current local time, ensuring constellations align with what’s visible overhead. When facing Polaris, you’ll notice stars move in a counterclockwise direction around the celestial North Pole.
Remember that celestial coordinates (right ascension and declination) dictate star positions, not terrestrial coordinates.
Watch star movements to fine-tune your orientation—they’ll appear to rotate around the celestial pole.
Identifying Major Constellations in Each Season
Your constellation wheel’s true value emerges when you can recognize the distinctive patterns in each season’s sky.
You’ll notice Orion’s three-star belt dominating winter evenings, while summer brings Cygnus’s prominent cross-shape overhead.
Spring showcases Leo’s sickle formation and autumn reveals Cassiopeia’s W-pattern, making your stargazing more rewarding as you connect these celestial signposts to their respective seasons. Earth’s continuous orbit around the Sun creates this changing celestial panorama, ensuring you’ll discover new constellations throughout the year.
Seasonal Constellation Highlights
The ever-changing night sky offers a rotating gallery of stellar patterns throughout the year. As Earth orbits the Sun, different constellations take center stage each season.
In the Northern Hemisphere, spring brings Lyra, Cygnus, and Bootes into view. Summer showcases dramatic Scorpius, Sagittarius, and Hercules. By autumn, you’ll spot Andromeda, Pegasus, and Cassiopeia dominating the evening sky. Winter highlights include magnificent Orion, Taurus, and Gemini.
Southern Hemisphere stargazers enjoy a different perspective: Pavo, Grus, and Tucana in spring; the stunning Southern Cross and Centaurus in summer; Vela and Pyxis in autumn; and Triangulum Australe in winter. This hemisphere variation occurs because the Earth’s round shape affects which constellations are visible from different locations.
Your constellation wheel makes tracking these seasonal shifts simple—just align it to your current date, time, and latitude for an accurate snapshot of tonight’s celestial display.
Star Pattern Recognition
Now that you’re familiar with how constellations shift across the seasons, let’s focus on identifying these celestial patterns more effectively. Your constellation wheel becomes more powerful when you can recognize key asterisms—distinctive star patterns that help you locate larger constellations.
- Start with anchor patterns like the Big Dipper or Orion’s Belt, which serve as reliable signposts in the night sky. Ursa Major’s Big Dipper is particularly useful as it remains visible year-round in the UK.
- Adjust for your latitude since visibility changes based on your geographical location.
- Use seasonal reference points such as the Summer Triangle (Vega, Deneb, Altair) in warmer months or Gemini’s Twins during winter.
- Leverage technology with star wheel apps and planetarium software that can enhance your ability to identify patterns through GPS integration.
Remember that different cultures recognize unique patterns, enriching your stargazing experience.
Using Bright Stars as Navigation Points

Since ancient times, bright stars have served as reliable beacons for travelers across land and sea.
When using your constellation wheel, you’ll want to focus on the brightest stars first as anchor points for orientation.
Polaris (the North Star) should be your primary reference in the Northern Hemisphere, as it remains virtually fixed while other stars appear to rotate around it.
Locate Sirius, the brightest star in both hemispheres, to help determine southerly directions.
The distinctive “W” shape of Cassiopeia can guide you toward true north when Polaris is obscured.
For effective navigation, use your wheel to identify these key stars first, then “star-hop” to find less prominent constellations.
Remember that stars rise in the east and set in west, providing directional cues throughout the night.
Familiarizing yourself with approximately 38 constellations will significantly enhance your ability to navigate using your wheel effectively.
Overcoming Light Pollution Challenges
Light pollution shields can greatly improve your constellation wheel experience by blocking artificial light from entering your viewing area.
When stargazing in urban environments, position yourself in the shadows of buildings to create a makeshift dark zone and allow your eyes at least 20 minutes to fully adapt to darkness.
You’ll find that starting with the brightest constellations and gradually moving to fainter ones helps you navigate the night sky despite the urban glow that obscures dimmer stars. With the 9.6% annual increase in sky brightness worldwide, finding truly dark locations for optimal constellation viewing is becoming increasingly challenging.
Light Pollution Shields
Three critical barriers stand between amateur astronomers and truly dark skies: artificial lighting, atmospheric conditions, and improper equipment setup.
When using your constellation wheel, light pollution shields can be essential for creating a makeshift dark zone.
To effectively implement shielding for better stargazing:
- Position your telescope with nearby structures blocking major light sources while maintaining view of your target area.
- Create a personal viewing shield using cardboard panels covered with black fabric to block peripheral glare. Use a dark cloth over your head while viewing to further eliminate stray light and improve your dark adaptation.
- Install proper shielded fixtures on your property that direct light downward, reducing both immediate glare and contributing to less sky glow.
- Use natural barriers like trees and hedges as permanent shields against neighborhood lighting when selecting your regular observation spot.
Urban Stargazing Techniques
Urban stargazing presents unique challenges that extend beyond simple shielding techniques.
To maximize your constellation wheel experience in light-polluted areas, target brighter celestial objects like planets, the Moon, and prominent star clusters that remain visible despite skyglow.
Time your observations around the new moon when natural light interference is minimal.
Position your telescope at higher elevations away from direct light sources and urban obstructions.
Allow your eyes at least 30 minutes to adapt to darkness before serious observation.
Consider investing in light pollution filters, particularly narrowband options that excel at capturing nebulae.
Adjust your camera settings with appropriate ISO and white balance when photographing.
Remember that post-processing software can help remove light pollution effects from your images afterward.
Consulting the Bortle Scale can help you understand the severity of light pollution in your area and set realistic expectations for what celestial objects will be visible.
Mastering the Overhead Viewing Technique
Mastering the overhead viewing technique transforms your star wheel from a mere reference guide into a powerful navigational tool for the night sky. This method helps you precisely identify what’s directly above you, making constellation identification considerably easier.
To perfect your overhead viewing technique:
- Choose a dark location away from light pollution for ideal visibility of stars and constellations.
- Hold your star wheel vertically at eye level, aligning the zenith point with stars directly overhead.
- Allow your eyes at least 20 minutes to fully adapt to darkness before attempting to match patterns.
- Recognize that stars in the center of your star wheel’s oval window represent those directly above you.
Remember that stars move across the sky as Earth rotates, so regular adjustments to your wheel’s settings are necessary. Your star wheel is designed specifically for your geographical region, as constellations appear differently when viewed from different latitude positions.
Enhancing Your Wheel With Personalized Markings
Why settle for a standard constellation wheel when you can transform it into a unique astronomical tool that reflects your interests and observing habits? With high-quality markers, paints, or metallic ink, you’ll create a more engaging stargazing companion.
Consider adding personally significant dates, your favorite constellation patterns, or initials to make the wheel truly yours. For durability, print on cardstock and apply clear contact paper to protect your customizations from wear.
Enhance functionality by including coordinates of notable celestial events, seasonal constellation highlights, or planetary identification guides. Using a drawing compass for precise circular elements will ensure professional-looking results.
For visual appeal, try glow-in-the-dark paint that illuminates your constellations in low light—perfect for nighttime observations. Experiment with watercolors or textured backgrounds to create a tool that’s both practical and beautiful.
Combining Your Wheel With Binoculars for Deeper Observation
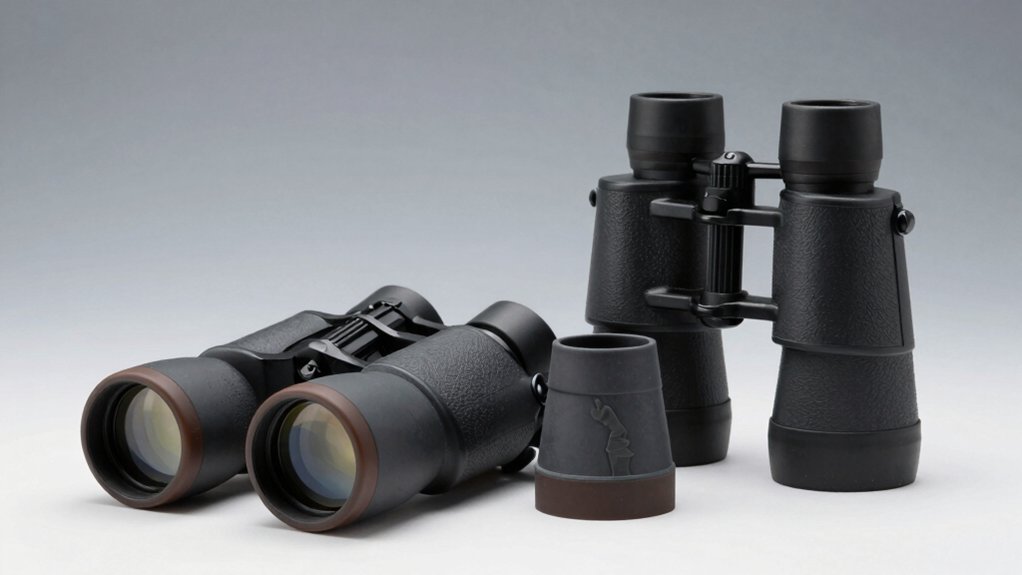
While your constellation wheel serves as an excellent starting point for exploring the night sky, pairing it with a good set of binoculars will dramatically transform your stargazing experience.
Once you’ve oriented your wheel to match the current date and time, use it to identify your target constellation before enhancing your view with binoculars.
- First locate a constellation on your wheel, ensuring proper alignment with your viewing horizon.
- Direct your binoculars to this area, using bright stars as navigational markers.
- Look for details invisible to the naked eye, such as the structure in the Pleiades or features in the Andromeda Galaxy.
- Practice this combination regularly, documenting your observations to improve your stargazing skills over time.
Beginner observers might particularly enjoy seeking out the Messier 42 nebula in Orion, as it’s visible to naked eye but reveals stunning colors and gaseous structures through binoculars.
Frequently Asked Questions
Can Constellation Wheels Be Used in the Southern Hemisphere?
Yes, you can definitely use constellation wheels in the Southern Hemisphere. You’ll need to get Southern Hemisphere-specific wheels designed for your latitude, especially those featuring the Southern Cross and other regional constellations.
How Do I Account for Twilight Periods When Using My Wheel?
To account for twilight periods, you’ll need to wait until true darkness falls. Start your observations 30-60 minutes after sunset when fainter stars become visible and your constellation wheel will work effectively.
Why Do Stars Appear in Different Colors?
Stars appear in different colors because of their surface temperatures. You’ll see that hotter stars look blue, while cooler stars appear red. This temperature difference is what creates the colorful celestial display you observe.
Can Children Effectively Use Constellation Wheels for Learning Astronomy?
Yes, children can effectively use constellation wheels. You’ll find they’re perfect learning tools that simplify star identification, promote hands-on exploration, and develop spatial reasoning while making astronomy accessible and engaging for young learners.
How Accurate Are Constellation Wheels Compared to Digital Planetariums?
While you’ll find digital planetariums offer superior accuracy in star positions, brightness, and real-time simulations, constellation wheels provide adequate basic representations for beginners despite their mechanical limitations and simplified planar view of the sky.
In Summary
Your constellation wheel isn’t just a paper gadget—it’s your gateway to the cosmos. With these tips, you’ll transform from casual stargazer to confident navigator of the night sky. Remember, practice makes perfect. The more you use your wheel, the more familiar the heavens become. Don’t let clouds or city lights discourage you—your next stellar discovery is just a spin away. Happy stargazing!


Leave a Reply