To capture stunning lunar eclipse photos, use a sturdy tripod and telephoto lens (150-600mm). Start with ISO 200 and aperture f/2.8-f/5.6, then adjust as the eclipse progresses. During totality, switch to longer exposures (1-2 seconds) to capture the “blood moon” effect. Practice with your gear beforehand, and bring extra batteries and memory cards. Scout locations with interesting foreground elements for context. The perfect eclipse shot combines technical precision with creative composition—let’s explore how to achieve both.
How to Capture Stunning Lunar Eclipse Photos
When the moon passes through Earth’s shadow, you’ll want to be ready with the right equipment and techniques to document this celestial spectacle.
Capture Earth’s dramatic shadow play across lunar terrain with proper preparation and precise timing.
Photographing lunar eclipses requires preparation—practice with your gear before the event since full eclipses can last over five hours with dramatic lighting changes.
Mount your camera on a sturdy tripod to eliminate camera shake. A telephoto lens (150-600mm) captures detailed moon shots, while wide-angle lenses (35mm or 50mm) include landscape elements for context.
Start with ISO 200 and aperture between f/2.8-f/5.6, adjusting your exposure to capture different eclipse phases.
As totality approaches, lengthen your shutter speed to compensate for diminishing light. Use Auto Exposure Bracketing to guarantee you’ll have usable images despite challenging lighting conditions.
Understanding Lunar Eclipse Types and Their Visual Characteristics
Recognizing the difference between a subtle penumbral eclipse and the dramatic red glow of a total “blood moon” will help you plan your photography approach.
During a total lunar eclipse, you’ll witness the moon transform through distinct phases—penumbral, partial, total, and maximum—each offering unique photographic opportunities.
Understanding this timeline allows you to prepare your equipment for the most visually striking moments, especially during totality when Rayleigh scattering creates that characteristic reddish hue.
Penumbral Versus Total Eclipses
Lunar eclipses come in distinct varieties that present unique visual signatures and photographic challenges.
When shooting a penumbral lunar eclipse, you’ll notice only subtle shading as the moon passes through Earth’s outer shadow, making it difficult to photograph the moon effectively. The brightness decreases slightly, but lacks dramatic visual changes.
In contrast, total lunar eclipses offer spectacular photographic opportunities. As the entire moon enters Earth’s umbra, it transforms into a “blood moon” with striking reddish hues caused by Rayleigh scattering. These can last several hours, with totality typically spanning 30-60 minutes.
Partial eclipses fall between these extremes, showing clear contrast between illuminated and shadowed regions.
Your camera settings must adapt to these varied light conditions, requiring different techniques for each eclipse type.
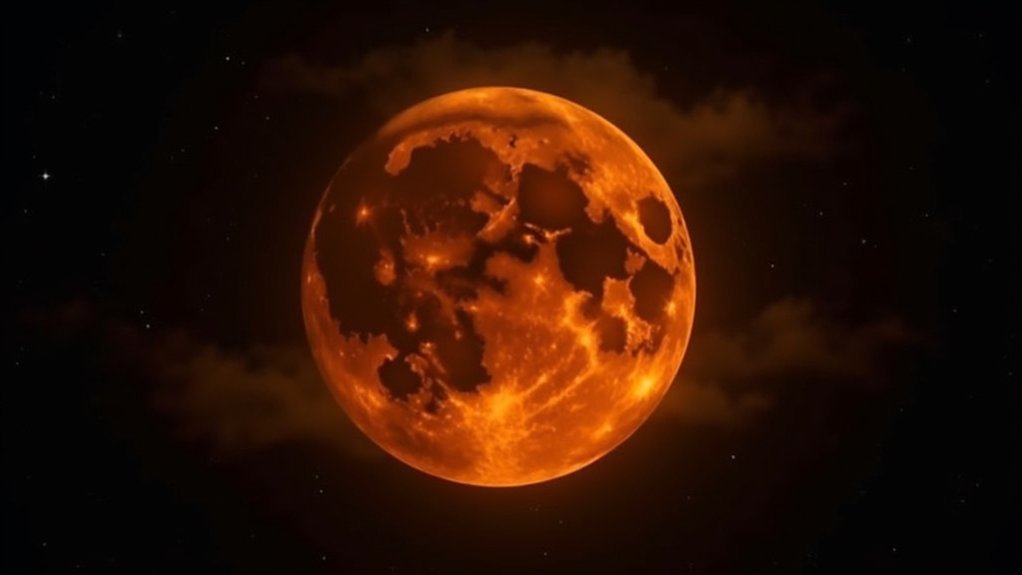
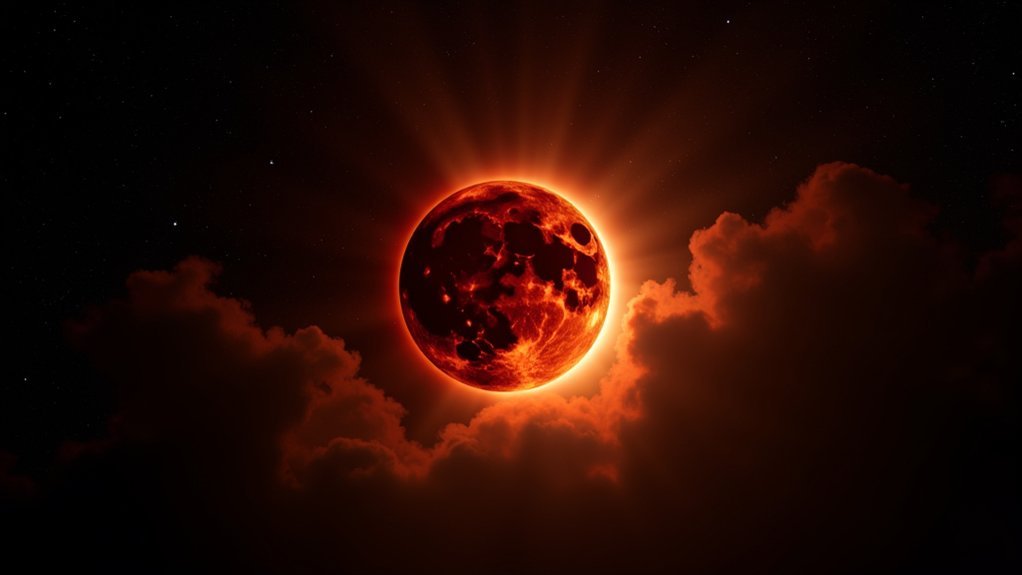
Blood Moon Phenomenon
The “blood moon” represents the most spectacular phase of a lunar eclipse, enchanting photographers and skywatchers alike. This striking phenomenon occurs during a total lunar eclipse when the moon passes entirely into Earth’s umbral shadow.
Unlike partial eclipses, which show only a section of the moon darkened, the blood moon displays a dramatic reddish-copper hue across its entire surface.
This distinctive coloration happens through Rayleigh scattering—the same process that creates our colorful sunrises and sunsets. When you photograph the moon during totality, you’re capturing sunlight that has filtered through Earth’s atmosphere and bent around our planet.
The totality phase can last up to 100 minutes, giving you ample time to experiment with different camera settings. Mark your calendar for the upcoming total lunar eclipses in March and September 2025 for your next blood moon photography opportunity.
Eclipse Phases Timeline
Every lunar eclipse unfolds through a predictable sequence of phases, each offering unique photographic opportunities. When planning your shoot, understanding these eclipse phases will help you capture the entire celestial drama.
| Phase | Duration | Visual Characteristics |
|---|---|---|
| Penumbral | 30-60 min | Subtle darkening; difficult to photograph |
| Partial | 1-2 hours | Moon gradually enters Earth’s umbral shadow; sharp contrast |
| Totality | 30-60 min | Complete “blood moon” effect; deep red coloration |
During a partial lunar eclipse, you’ll see a distinct boundary between light and shadow as the moon slides into Earth’s umbral shadow. For total lunar eclipses, prepare to capture the change from bright white to coppery red as totality approaches. The blood moon phase provides limited time to capture the most dramatic shots, so scout locations and test your settings beforehand.
Essential Camera Equipment for Eclipse Photography
Capturing the perfect lunar eclipse requires three critical pieces of equipment: a high-quality camera, a sturdy tripod, and appropriate lenses.
DSLRs or mirrorless cameras offer superior resolution for lunar photography, with both crop and full-frame sensors having distinct advantages.
A solid tripod is non-negotiable when using a telephoto lens (ideally 150-600mm) for close-up moon shots. Prevent camera shake by adding weight to your tripod with sandbags or camera bags, especially in windy conditions.
Consider a star tracker like the iOptron SkyGuider Pro to compensate for the moon’s movement during longer exposures.
Don’t forget practical essentials: extra batteries (cold temperatures drain them quickly) and additional memory cards to capture the entire eclipse sequence without interruption.
For context shots, keep a wide-angle lens handy.
Planning Your Eclipse Photography Session

Successfully photographing a lunar eclipse begins long before you press the shutter button. Thorough preparation guarantees you’ll be in the right place at the right time with properly functioning equipment.
- Research timing and visibility using NASA resources or astronomy apps, then scout photography locations with interesting foreground elements and clear sightlines to the moon.
- Monitor weather forecasts religiously in the days leading up to the event, having backup locations ready if clouds threaten your primary spot.
- Utilize planning tools like PhotoPills or The Photographers Ephemeris to track the moon’s position and visualize potential compositions ahead of time.
- Prepare your camera gear at least a day before, charging batteries, cleaning lenses, and testing all equipment to prevent last-minute surprises when the celestial show begins.
Finding the Perfect Location and Composition
Where you choose to shoot a lunar eclipse can make the difference between a forgettable snapshot and a breathtaking image. Scout potential locations in advance, ensuring an unobstructed view free from mountains and buildings that might block visibility.
| Location Type | Composition Tips | Apps to Use | Arrival Time |
|---|---|---|---|
| Open field | Rule of thirds | PhotoPills | 1 hour early |
| Hilltop | Foreground trees | Ephemeris | 2 hours early |
| Lakeside | Reflection shots | Both apps | 90 min early |
| Urban rooftop | Cityscape silhouette | PhotoPills | 1 hour early |
For ideal composition, position the moon at an intersection point using the rule of thirds. Including a foreground subject like trees or landmarks creates depth and scale. Use apps like PhotoPills to pinpoint the moon’s exact position during the eclipse, allowing you to plan your shot with precision.
Camera Settings for Different Eclipse Phases

Your camera settings will need to shift dramatically as you track the moon from its bright full phase through the darkening partial eclipse and into totality.
During the partial phase, start with 1/125-1/250 seconds at f/8 and ISO 100, then gradually increase to 1 second exposures at ISO 200 as the eclipse progresses.
When you reach totality, you’ll want to bracket your exposures and shoot at f/5.6 for 1-2 seconds to capture the moon’s ethereal reddish glow while properly metering the penumbral light.
Totality Exposure Tricks
Three distinct exposure strategies are needed to photograph a lunar eclipse as it shifts from full brightness through partial eclipse to the dramatic red glow of totality.
When the moon reaches total eclipse, you’ll need to adjust your settings dramatically—up to 8 stops darker than your initial settings.
- Lengthen your shutter speed to 1-2 seconds during totality to capture the moon’s reddish glow, while maintaining an aperture of f/5.6 to f/8.
- Raise your ISO to 200 when the moon darkens, balancing noise with necessary light sensitivity.
- Use Auto Exposure Bracketing (AEB) to capture multiple exposures of the same scene, ensuring you don’t miss the perfect shot.
- Combine images in post-processing to create a composite showing the eclipse’s progression with properly exposed phases.
Partial Phase Settings
As the moon begins its dramatic journey into Earth’s shadow, capturing the partial phase requires a specific combination of camera settings to document the gradually diminishing lunar brightness.
Start with ISO 200 and an aperture of f/5.6—this balance allows sufficient light while preserving detail. Begin with a shutter speed of 1/125 to 1/250 seconds, slowing it progressively as darkness envelops more of the lunar surface.
Switch to manual focus for ideal sharpness, as autofocus typically struggles with the changing light conditions. Activate AEB (Auto Exposure Bracketing) to capture multiple exposures automatically—this proves invaluable as light levels shift dramatically throughout the partial phase.
Remember to frequently recompose your frame as the moon moves across the sky, ensuring it remains perfectly centered as Earth’s shadow creates this celestial spectacle.
Penumbral Light Metering
The penumbral phase presents unique metering challenges that require specific adjustments to capture the subtle dimming of the lunar surface. During this phase, the moon appears only slightly darker than normal, requiring careful exposure settings to reveal the delicate shadowing.
- Meter for the highlights of the lunar surface using ISO 200, aperture f/5.6, and shutter speeds between 1/125 to 1/250 seconds for ideal exposure.
- Implement exposure bracketing in 1-2 stop increments to guarantee you capture the best possible image as lighting conditions change.
- Monitor your histogram closely, making sure you’re not clipping highlights while still capturing the penumbral eclipse’s subtle shadow details.
- Be prepared to adjust your settings frequently as the eclipse progresses, as the penumbral shadow deepens gradually before entering partial phase.
Focusing Techniques for Sharp Lunar Images
Sharp focus makes or breaks your lunar eclipse photography. Switch to manual focus mode instead of relying on autofocus, which often struggles in low light conditions.
To achieve precise focus, zoom in on the Moon using your camera’s LCD screen, and disable exposure simulation to prevent overexposure that can interfere with focusing. Set your focus before the eclipse begins and immediately turn off autofocus to prevent accidental refocusing.
Focus on the Moon before darkness falls, then lock your settings to maintain sharpness throughout the eclipse.
Mount your camera securely on a tripod and use a remote shutter release or Mirror Up mode to eliminate camera shake. As the Moon moves quickly across the sky, regularly re-center it in your frame.
For consistent focus throughout the lunar eclipse, consider using a motorized tracker that follows the Moon’s movement automatically.
Exposure Challenges During Totality
Photographing the Moon during totality presents unique exposure challenges as its brightness drops dramatically, requiring you to adjust your settings by up to 8 stops compared to the full Moon.
You’ll need to carefully meter the darkened lunar surface, starting with shutter speeds between 1-2 seconds at ISO 200 while maintaining an aperture of f/5.6 to f/8 for ideal depth of field.
Using Automatic Exposure Bracketing (AEB) will help you capture multiple exposures quickly, ensuring you don’t miss vital details during the rapidly changing light conditions of this spectacular phase.
Metering the Dark Moon
When totality begins to envelop the moon, your camera’s exposure settings must dramatically shift to capture the stunning coppery glow that emerges.
As the moon appears darker during the total solar eclipse, your metering strategy needs adjustment to compensate for diminished light.
- Extend shutter speeds from 1/250 second to potentially several seconds, adjusting as the eclipse progresses.
- Switch to manual focusing since autofocus systems struggle with the darkened lunar surface.
- Maintain a low ISO initially (100-200) to preserve detail, only increasing when absolutely necessary.
- Use bracketing techniques to capture multiple exposures, ensuring at least one perfect shot.
Remember that a full stop difference typically exists between the bright and dark phases, requiring frequent adjustments as totality deepens.
Balancing ISO and Noise
As the moon slips into the Earth’s shadow during totality, you’ll face the photographer’s classic dilemma of balancing exposure with noise control.
Start with a low ISO around 200 during the initial phases of the lunar eclipse to maintain image clarity when the moon is still relatively bright.
As totality approaches, you’ll need to increase your ISO settings to 800 or higher to properly expose the darkening moon.
This is where your camera’s capabilities become essential—models that handle high ISO well will produce cleaner images during these challenging conditions.
Always shoot in RAW format to preserve maximum detail and provide greater flexibility when managing noise in post-processing.
Apply targeted noise reduction techniques later to enhance your eclipse photos while maintaining the delicate features and color variations of the eclipsed moon.
Bracketing Saves Images
Three critical exposure challenges await photographers during lunar eclipse totality. The moon’s brightness changes dramatically, details can be lost in shadows, and that elusive red glow demands perfect exposure. Bracketing is your secret weapon against these challenges.
- Set up automatic exposure bracketing (AEB) to capture multiple shots with different settings, ensuring at least one perfect exposure as light conditions change.
- Start with your base exposure then bracket in 1-2 stop increments as the eclipse progresses.
- Adjust shutter speeds considerably during totality – you may need up to 1 second to photograph the blood moon’s reddish hue.
- Bracket quickly between phases to document the entire lunar eclipse journey without missing critical moments.
Don’t let rapidly changing light conditions ruin your once-in-a-lifetime eclipse shots!
Wide-Angle vs. Telephoto Approaches
Your choice between wide-angle and telephoto lenses dramatically influences the lunar eclipse story you’ll tell through your photographs.
With wide-angle photography, you’ll capture the eclipse within its natural context, using 35mm or 50mm lenses to incorporate compelling foreground elements like trees or buildings that create depth and scale in your composition.
Embrace wide-angle lenses to tell your eclipse story through context, framing the moon amid earthly elements that ground the celestial wonder.
Telephoto approaches, using 150-600mm lenses, bring you closer to the celestial action, highlighting the moon’s surface features and the subtle color changes during different eclipse phases. You’ll need to adjust your framing frequently as the moon moves across the sky. This method excels at revealing intricate details that wide-angle shots can’t capture.
Each approach offers distinct advantages—contextual storytelling with wide-angle or intimate detail with telephoto—so consider which aspect of the lunar eclipse you most want to showcase.
Creating Lunar Eclipse Composite Images
Capturing the entire lunar eclipse journey in a single frame creates a stunning visual record that’s impossible to achieve with one exposure alone.
By photographing multiple phases of the eclipse and blending them together, you’ll create a powerful visual narrative showing the moon’s transformation.
- Shoot consistently – Maintain uniform exposure settings across all shots to guarantee seamless integration when combining images.
- Select carefully – Use tools like Photoshop’s Quick Selection to isolate each moon phase, feathering edges for smooth shifts.
- Enhance details – Apply post-processing techniques such as noise reduction and selective sharpening before combining your images.
- Add context – Consider incorporating foreground elements to create depth and scale in your composite, positioning phases according to the rule of thirds.
Weather Considerations and Backup Plans
While the celestial mechanics of a lunar eclipse are perfectly predictable, the weather on Earth remains stubbornly unpredictable and can quickly transform your carefully planned photo session into a disappointing non-event.
Monitor weather forecasts several days before the eclipse, paying attention to cloud cover predictions. Having multiple backup locations ready can save your shoot when conditions deteriorate at your primary site.
| Preparation Strategy | Weather Scenario |
|---|---|
| Check forecasts 72+ hours ahead | Clear skies predicted |
| Scout elevated locations | Partial cloud cover expected |
| Research light pollution maps | Hazy conditions likely |
| Pack weather protection gear | Unexpected weather changes |
Don’t forget that higher elevations often provide clearer viewing conditions, but they’re also prone to sudden weather shifts. Always protect your equipment from moisture, and remain flexible—sometimes driving just 20 miles can make the difference between seeing nothing and capturing a spectacular eclipse.
Post-Processing Your Eclipse Images
Once you’ve successfully photographed the lunar eclipse, your work has only reached its halfway point.
Post-processing transforms your raw captures into stunning final images that showcase the eclipse’s beauty.
- Apply noise reduction techniques first to minimize graininess, particularly in high ISO shots where digital noise is most apparent.
- Create composite images by using selection tools to isolate the Moon, feathering edges for seamless blending.
- Fine-tune exposure levels to preserve details in both the Moon and night sky, avoiding washed-out highlights or blocked shadows.
- Implement sharpening methods carefully to enhance lunar details without creating unwanted artifacts.
For professional results, consider blending multiple exposures from different phases of the eclipse.
This approach creates a balanced final image that maintains realism while showcasing the eclipse’s dramatic transformation.
Common Mistakes to Avoid When Shooting Lunar Eclipses
Even experienced photographers can fall victim to preventable errors that compromise their lunar eclipse images. Failing to familiarize yourself with camera settings before the event often leads to frantic adjustments and missed shots during vital eclipse phases.
Don’t rely on autofocus during totality—it will hunt unsuccessfully in low light. Instead, switch to manual focus for sharp detail.
Another common mistake is neglecting exposure bracketing, which helps capture details in the varying brightness levels throughout the eclipse.
Weather oversight can ruin your plans, so always check forecasts days in advance.
Finally, underestimating the importance of stability can introduce motion blur into your images. Invest in a solid tripod and secure your equipment properly to eliminate vibrations when the shutter releases.
These simple precautions will dramatically improve your results.
Frequently Asked Questions
How Do You Take Good Pictures of a Lunar Eclipse?
You’ll need a tripod, manual settings (low ISO, f/4, varying shutter speed), and remote release. Focus manually before totality begins. Take photos every 15 minutes to capture all phases with interesting compositions.
What Are the Best Settings to Photograph the Eclipse?
Use ISO 200-800, aperture f/2.8-f/5.6, and shutter speeds from 1/250s to 1s as the eclipse progresses. You’ll want to shoot in RAW with auto exposure bracketing to capture all light variations effectively.
Can You Take a Picture of the Lunar Eclipse With Your Phone?
Yes, you can take pictures of a lunar eclipse with your phone. Use a tripod, avoid digital zoom, activate night mode, and try a magnifier lens for better results. Self-timers help reduce camera shake.
How Do I Take a Good Picture of the Eclipse on My Iphone?
You’ll need to stabilize your iPhone on a tripod, use night mode, avoid digital zoom, and try a magnifier lens attachment. Set a self-timer and take multiple shots at different exposures for best results.
In Summary
Capturing lunar eclipses isn’t just about technical perfection—it’s about telling a celestial story. You’ve now got the tools to plan, shoot, and process these rare events. Remember, each eclipse offers unique opportunities, so don’t get discouraged by mistakes. They’re learning experiences. Whether you’re a beginner or seasoned photographer, the moon’s dramatic journey through Earth’s shadow awaits your creative vision.


Leave a Reply