Start with a thorough evaluation of your telescope's cable layout, then gather essential management tools like cable ties, sleeves, and clips. You'll want to group wires by function, keeping power and data cables separated to prevent interference. Create organized bundles with proper slack for mount movement, and secure them at strategic anchor points using Velcro straps or rubber O-rings. Regular maintenance checks will keep your setup professional, and there's a whole world of advanced techniques waiting to elevate your astrophotography game.
Understanding Your Telescope's Cable Layout
Anyone who's used a telescope knows that managing cables can quickly become a complex challenge.
You'll need to handle connections for your mount, camera, guide scope, filter wheel, and various accessories while ensuring everything works smoothly during operation.
Start by identifying all your components and their required connections. You'll want to focus on both power distribution and data cables, making sure they're properly secured to prevent disconnections. Using a solution like the Celestron CGX cabling helps keep your cables organized and positioned close to the mount for optimal performance.
Begin with a complete inventory of your setup's connections – proper cable management starts with understanding your equipment's needs.
Consider how each cable affects your telescope's movement – any drag or snagging can impact your imaging session. Using a USB hub can simplify your setup by consolidating multiple connections into one organized point.
Remember that keeping weight off connectors and managing cable tension are essential for maintaining signal integrity and preventing wear on your equipment.
Essential Tools for Cable Management
You'll need a basic toolkit that includes cable ties, sleeves, and clips to effectively sort and bundle your telescope's wires.
To protect your cables from wear and environmental damage, get cable wraps, weatherproof sleeves, and strain relief components. Consider using microfiber cable ties for safer handling and easier adjustments while organizing your telescope equipment.
A multimeter and continuity tester will help you check for cable faults and guarantee proper connections throughout your setup.
Basic Cable Sorting Tools
While organizing telescope mount wiring can seem challenging, having the right cable management tools makes the task considerably easier. You'll want to start with cable combs, which can handle multiple wires simultaneously, and pair them with reusable straps for flexible management. Velcro straps offer quick adjustments without damaging your expensive equipment. Modern cable combs like the CCB-25 are made from durable nylon and Zytel materials, ensuring long-lasting performance.
| Tool Type | Best Use | Key Benefit |
|---|---|---|
| Cable Combs | Bundle Management | Handles 24+ cables |
| Velcro Straps | Quick Changes | No wire damage |
| Cable Ties | Permanent Setup | Strong hold |
For more precise organization, you'll find cable clips with magnetic or adhesive backing particularly useful for securing wires along your mount's frame. Don't forget to incorporate cable trays to create structured pathways, keeping your setup clean and professional while protecting your valuable astronomy equipment from wear and tear.
Wire Protection Equipment
Beyond basic sorting tools, proper wire protection equipment serves as your main defense against cable wear and damage.
You'll want to invest in quality protective gear that shields your telescope's wiring from environmental factors while keeping everything organized and secure.
Essential protection equipment for your telescope setup includes:
- Cable conduits to encase and protect wires from abrasion while routing them neatly along your mount
- Wiring ducts that offer versatile organization options and shield cables from external damage
- Adhesive mounts for quick, drill-free cable attachment to your telescope's surfaces
- Cable cleats to prevent wire tangling and guarantee secure placement
Remember to choose equipment that offers both flexibility and durability.
You'll need to adjust your cable layout occasionally, so opt for protection tools that allow easy access while maintaining solid security.
The self-closing design of twist-in protective braided sleeving makes it particularly convenient for ongoing telescope maintenance and cable adjustments.
Cable Testing Devices
Three essential cable testing devices stand at the forefront of proper telescope mount maintenance. You'll want a handheld tester for quick field checks, a network cable tester for your control system connections, and a basic benchtop unit for detailed diagnostics at home. These tools help you identify shorts, breaks, and connectivity issues before they cause problems during significant observation sessions. Regular testing using high potential tests helps ensure proper isolation between circuits.
| Tester Type | Best Use | Key Feature |
|---|---|---|
| Handheld | Field Testing | Portability |
| Network | LAN Verification | Protocol Testing |
| Benchtop | Detailed Analysis | Multiple Test Points |
| Basic Voltage | Safety Checks | Current Detection |
| Continuity | Quick Diagnosis | Simple Operation |
For your telescope setup, consider the CCT-01 or WireBasics CT-16 models. They're portable, USB-powered, and offer enough test points for most amateur astronomy applications. Don't forget to export and save your test results for future reference.
Planning Your Cable Organization Strategy
Successful cable organization for your telescope mount begins with a thorough assessment of your current setup and future needs. You'll want to identify every cable running to your equipment and determine how they affect your telescope's range of motion.
Before purchasing any cable management tools, create a detailed plan that includes:
- Your budget for cable management supplies like sleeves, ties, and straps
- Specific anchor points where you'll secure cables to your mount
- Required cable lengths accounting for full telescope movement
- Locations of power distribution hubs and USB connections
Consider how you'll integrate your automation software and maintain easy access for future upgrades. Using cable harness assemblies helps ensure reliable performance during automated Meridian flips and prevents equipment damage.
Don't forget to plan for additional cables you might need later, and establish a labeling system that'll help you quickly identify connections during nighttime viewing sessions.
Step-by-Step Cable Routing Guide
Before running any cables, you'll want to map out the most efficient paths from your equipment to your mount's power source and control hub.
Next, gather wires with similar functions, such as power or data cables, and bundle them together using flexible cable wraps or zip ties.
Finally, attach your bundled cables to strategic points along your mount using Velcro straps or mounting clips, ensuring enough slack for smooth telescope movement. A powered USB3 hub mounted on the telescope with Velcro provides centralized connectivity while minimizing cable clutter.
Plan Cable Paths First
Planning your telescope mount's cable paths requires careful consideration of several key factors. You'll need to analyze your setup's full range of motion and identify critical attachment points before running any cables. Experienced astrophotographers often use flexible wraps or ties to keep cables organized while maintaining movement flexibility.
For ideal cable routing, focus on these essential elements:
- Evaluate each component's power and data requirements, keeping these cables separated to prevent interference.
- Map out secure anchor points on your declination plates, scope rings, and tripod legs.
- Create a cable loop with enough slack to accommodate your mount's movement without excess length.
- Consider accessibility for quick setup and teardown during field sessions.
Before installing cables, test your planned paths by simulating mount movement through its complete range. This helps identify potential snag points and guarantees smooth operation during actual imaging sessions.
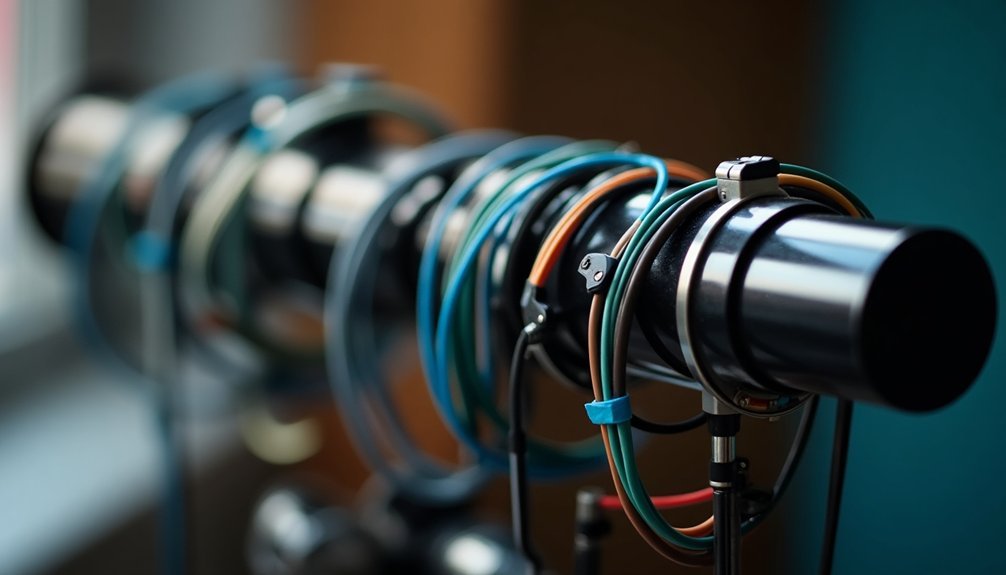
Bundle Similar Wires Together
Proper wire bundling begins with grouping cables by their function and routing requirements. Use flexible cable wraps or zip ties to secure power cables separately from data cables, reducing interference and making troubleshooting easier.
Create a cable loop with enough slack to allow full telescope movement while avoiding sagging. Anchor your bundles at two key points – typically the declination plate and tripod leg. You'll want to use protective sheathing to prevent cable damage and enhance durability.
Mount powered USB hubs and controllers centrally to minimize cable lengths. Test your bundled setup by moving the telescope through its full range of motion. Check for any snag points or tension issues, and adjust the cable loops as needed. Thorough planning upfront will save considerable time during the actual cable routing process.
Regular maintenance of these bundles will guarantee consistent performance and prevent future complications.
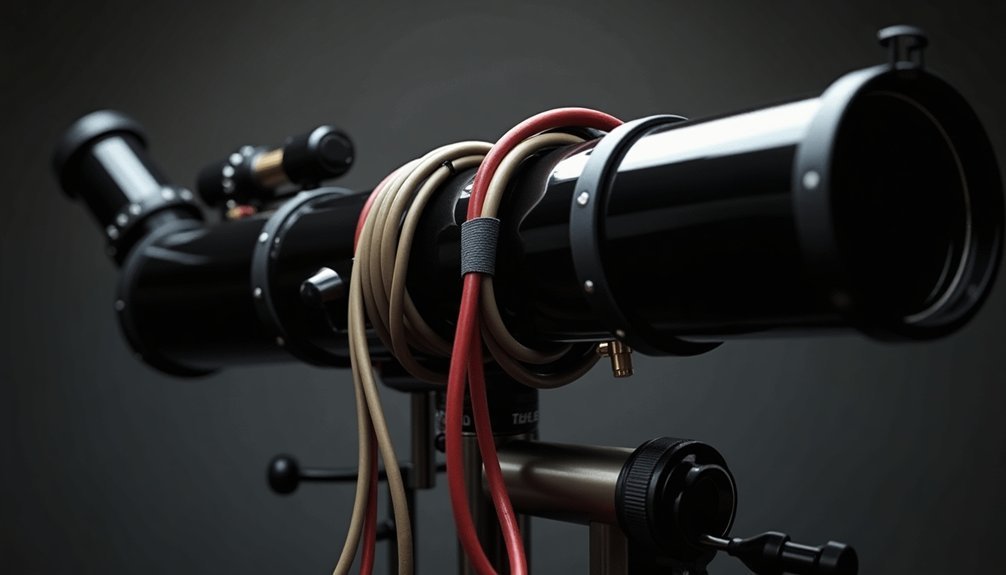
Secure With Mount Points
Securing telescope mount cables starts with identifying strategic anchor points that won't compromise your equipment's movement or stability.
You'll want to use proper fasteners like Velcro straps or rubber O-rings to prevent any unwanted cable movement during operation.
Here's how to secure your cables effectively:
- Choose mount points that can handle cable weight without affecting balance
- Route cables along natural channels or grooves in your mount, using built-in clips when available
- Leave enough slack for full motion range, but avoid excess that could cause sagging
- Secure cables at multiple points using appropriate fasteners that won't damage the wiring
Remember to test your mount's full range of motion after securing cables to ascertain nothing snags or binds.
Check that all fasteners are snug but not overtightened to prevent cable damage.
Incorporating a 30amp power supply ensures reliable operation across multiple telescope components while maintaining clean cable management.
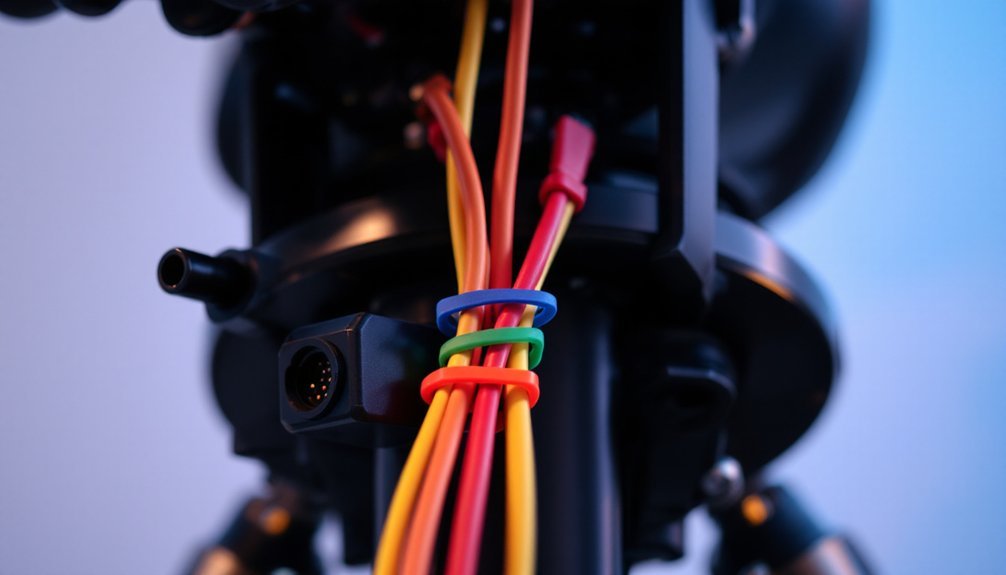
Best Practices for Securing Cables
A few key practices can transform messy telescope wiring into a clean, functional setup. Start by using cable routing techniques that minimize slack while guaranteeing enough length for full telescope movement. You'll want to group related cables together and secure them using appropriate tools like velcro ties or cable sleeves.
| Practice | Tool | Benefit |
|---|---|---|
| Color coding | Colored velcro/labels | Quick identification |
| Bundling | Zip ties/sleeves | Reduced clutter |
| Strategic routing | Cable clips | Prevents snags |
| Regular testing | Movement checks | Assures reliability |
| Standardized lengths | Custom cables | Ideal organization |
Don't forget to test your cable setup through the full range of telescope motion. You'll avoid frustrating snags and potential damage by establishing a consistent method for securing cables each time you set up your equipment.
Protecting Cables From Environmental Damage
Because telescope cables face constant exposure to harsh outdoor conditions, you'll need to implement reliable protection strategies to extend their lifespan.
Focus on shielding your cables from temperature extremes, moisture, and UV radiation that can quickly degrade materials and cause premature failure.
- Use UV-resistant cable sheathing or conduit to prevent sun damage
- Apply water-resistant coatings or weatherproof enclosures to protect against moisture
- Install strain relief at connection points to absorb vibrations and minor impacts
- Secure cables with proper anchoring to prevent wind damage and tangling
Don't forget to leave enough slack in your cable routing to allow for natural movement while maintaining protection.
Regular inspections will help you catch early signs of environmental wear before they lead to serious damage.
Cable Management Solutions for Different Mount Types
Different telescope mount types present unique cable management challenges that require specific solutions.
For altazimuth mounts, you'll want to integrate power and data cables into a single harness and use braided sleeves to prevent snagging.
When working with equatorial mounts, consider using the EAGLE system to reduce cable count and implement twist ties for better organization.
For German Equatorial Mounts, use thicker power cables and Y-splitters to handle high current loads while planning routes carefully around the mount's shafts.
Fork mounts benefit from strain relief mechanisms and cable guides along the arms.
If you're operating a robotic telescope, invest in automated cable protection systems and centralized hubs.
Across all mount types, you'll find velcro ties, cable sleeves, and proper routing essential for maintaining smooth operation.
Tips for Cable Length Optimization
While optimizing cable lengths might seem straightforward, proper planning can dramatically improve your telescope's performance and reliability.
Taking time to optimize cable management isn't just about neatness – it's a crucial step toward achieving peak telescope performance.
You'll want to keep cables just long enough to accommodate your mount's full range of motion without excess length that could snag or tangle.
Here's what you need to take into account for ideal cable lengths:
- Keep USB 2.0 cables under 5 meters and USB 3.0 under 3 meters for best signal integrity
- Add a small amount of slack to prevent strain during telescope movement
- Measure cables while the mount is at its maximum extension points
- Reflect on environmental factors, as cold or humid conditions can affect cable performance
Custom cable harnesses are an excellent solution when you're dealing with multiple connections, allowing you to standardize lengths and maintain clean routing throughout your setup.
Color Coding and Labeling Systems
Implementing an effective color coding and labeling system can transform your telescope mount's wiring from a confusing mess into an organized, maintainable setup. You'll reduce errors and make future maintenance much easier by adopting standardized colors and clear labels.
| Component | Color | Label Info |
|---|---|---|
| Power Lines | Black/Red | Voltage/Amperage |
| Motor Controls | Blue/Yellow | Axis/Direction |
| Sensor Cables | Green | Type/Location |
| Data Lines | Orange | Device/Protocol |
| Ground Wires | Green/Yellow | Ground Point |
Attach durable labels that clearly show each cable's purpose and destination. Use color-coded cable ties to group related wires together, and maintain consistent colors across your entire setup. Remember to document your color scheme for future reference, and verify it complies with standard electrical practices when applicable.
Maintenance Schedule for Cable Organization
You'll need to check your mount's cables monthly for signs of wear, ensuring all ties and fasteners remain secure and cables maintain their proper routing positions.
During these checks, verify that cable arcs still allow full motion and adjust any bundles that have shifted or loosened over time.
Every three months, perform a thorough assessment where you'll clean cable channels, replace damaged zip ties, and reorganize any problematic cable runs that could affect your mount's performance.
Monthly Cable Check Protocol
To maintain your telescope mount's reliability and prevent equipment damage, establishing a consistent monthly cable check protocol is essential.
During your monthly inspection, you'll want to methodically examine all cables and connections while documenting any issues you find.
Follow these key checkpoints each month:
- Inspect all cables for signs of wear, fraying, or moisture damage while verifying proper routing and strain relief.
- Test connection points for security and tightness, paying special attention to USB hubs and power cables.
- Check that cable management tools like wraps, sleeves, and velcro ties are functioning properly and haven't degraded.
- Verify dew protection measures are intact and all cables remain properly labeled and color-coded.
Remember to update your documentation after each inspection, noting any repairs or adjustments made to your setup.
Quarterly Deep-Clean Assessment
While monthly cable checks help maintain basic functionality, a thorough quarterly deep-clean assessment guarantees your telescope mount's long-term reliability and performance.
Start by documenting your current setup with photos, then carefully inspect each cable for wear, damage, or loose connections. Don't forget to check power supplies and confirm they're properly matched to prevent electrical issues.
Use this opportunity to refresh your cable organization – replace worn cable ties, update labels, and reseal any moisture entry points.
Pay special attention to encoder cables and verify they're correctly routed. You'll also want to check that your mount's gears are well-greased and all components are secure.
Remember to update your maintenance documentation after completing the assessment, noting any repairs or replacements you've made.
Common Cable Management Mistakes to Avoid
When setting up your telescope mount's wiring system, several common mistakes can lead to frustrating problems and potential equipment damage. To protect your valuable equipment and guarantee smooth operation, you'll want to avoid these critical errors.
- Don't skip securing your cables properly – loose wires can snag on moving parts and compromise both safety and performance.
- Never cinch cable ties too tightly, as this can damage the internal wiring and cause signal loss.
- Avoid using generic, one-size-fits-all cables when custom solutions would work better for your specific setup.
- Don't forget to account for environmental factors like moisture, temperature changes, and dust exposure.
Remember to plan for future expansion needs, as overlooking this aspect often results in complicated rewiring projects later.
Future-proof your telescope's wiring setup now – it's far easier than untangling a maze of cables during a hasty upgrade later.
A thoughtful approach to cable management today will save you significant hassle tomorrow.
Advanced Cable Management Techniques
Setting up advanced cable management for your telescope mount requires mastery of several sophisticated techniques.
Start by designing custom harnesses that perfectly match your telescope's configuration while ensuring proper slack for full motion range. You'll want to incorporate cable sleeves and trays to protect and organize your wires, making them more durable and easier to maintain.
Secure your cables using specialized clips and clamps to prevent snags and tangles during operation.
Don't forget to label each cable clearly for quick identification during maintenance. Create a detailed documentation system of your cable layout, which will prove invaluable for future upgrades or troubleshooting.
Choose weather-resistant materials for your management system, and implement regular inspections to catch potential issues before they affect your viewing sessions.
Upgrading Your Cable Management Setup
To upgrade your cable management setup effectively, you'll need to focus on streamlining your existing configuration while incorporating modern solutions.
Start by evaluating your current setup and identifying areas where you can reduce cable clutter through integrated accessories and wireless options.
- Install powered USB hubs directly on your telescope to consolidate multiple connections into a single cable.
- Replace individual power supplies with a centralized power block to minimize redundant cables.
- Add cable retractor reels and spring-loaded solutions to maintain proper tension during movement.
- Implement protective sheathing and strain relief devices to extend the life of your cables.
Consider implementing a modular design that'll make future upgrades easier.
You can also add automated flip support and flexible connections to guarantee smooth operation during meridian flips and other automated functions.
Frequently Asked Questions
Can I Use Wireless Solutions to Eliminate Some Cables on My Telescope Mount?
Yes, you can use wireless solutions to eliminate some cables on your mount. They'll reduce clutter and increase mobility, but keep critical connections wired for reliability and maintain backup systems for essential functions.
How Do Temperature Changes Affect the Flexibility of Telescope Mount Cables?
Your mount cables will become stiffer in cold temperatures and more flexible in warm conditions. This happens because the cable materials expand and contract, affecting their physical properties and overall flexibility.
Will Magnetic Cable Holders Interfere With My Telescope's Tracking Accuracy?
You should avoid magnetic cable holders near your telescope's encoders and tracking components. While small magnets aren't likely to affect tracking, it's safer to use non-magnetic alternatives like Velcro or zip ties instead.
How Often Should I Completely Redo My Telescope's Cable Management Setup?
You'll need to redo your telescope's cable management every 3-6 months with heavy use, or whenever you add equipment. Don't wait for problems—check cables monthly and adjust if you notice any wear.
Can Cable Management Solutions Impact the Balance of My Telescope Mount?
Yes, your cable management definitely impacts mount balance. Poorly arranged cables can create uneven weight distribution, affecting tracking accuracy. You'll get better performance when you keep cables centralized and properly secured around balance points.
In Summary
Clean cable management isn't just about aesthetics – it'll boost your telescope's performance and longevity. By following these guidelines, you've learned how to route, secure, and maintain your mount's wiring system like a professional. Remember to review your setup periodically and make adjustments as needed. With your newly organized cables, you're ready for smoother, tangle-free observing sessions and better astrophotography results.


Leave a Reply