Solar projection offers a safe way to view eclipses without looking directly at the sun. Create a simple pinhole projector using cardboard, or use a colander for multiple images. Keep your back to the sun and hold the projector 1-2 feet from a light-colored surface. For clearer images, try binocular projection with proper filters, ensuring 1-2 feet between the eyepiece and projection surface. Proper setup and distance adjustments dramatically improve your viewing experience. The techniques below will elevate your eclipse observations even further.
Numeric List of Second-Level Headings
When preparing to safely view a solar eclipse, you’ll need to understand several key methods.
Here’s what we’ll cover in this article:
- Pinhole Projection Techniques
- Mastering Binocular Projection
- Eclipse Glasses: Confirming ISO 12312-2 Compliance
- Proper Use of Solar Filters with Optical Devices
- Welders Glass: Requirements for Safe Viewing
Each section will provide expert advice on implementing these solar viewing methods correctly.
You’ll learn how to create a simple pinhole projector using cardboard, position binoculars for ideal projection, and verify your eclipse glasses meet safety standards.
We’ll also cover how to securely attach solar filters to telescopes and binoculars to prevent eye damage, plus the specific shade requirements for welders glass.
These techniques guarantee you can enjoy the celestial event without risking your vision.
The Science Behind Solar Projection Methods
Understanding how projection methods work can help you appreciate their effectiveness in protecting your vision during solar events.
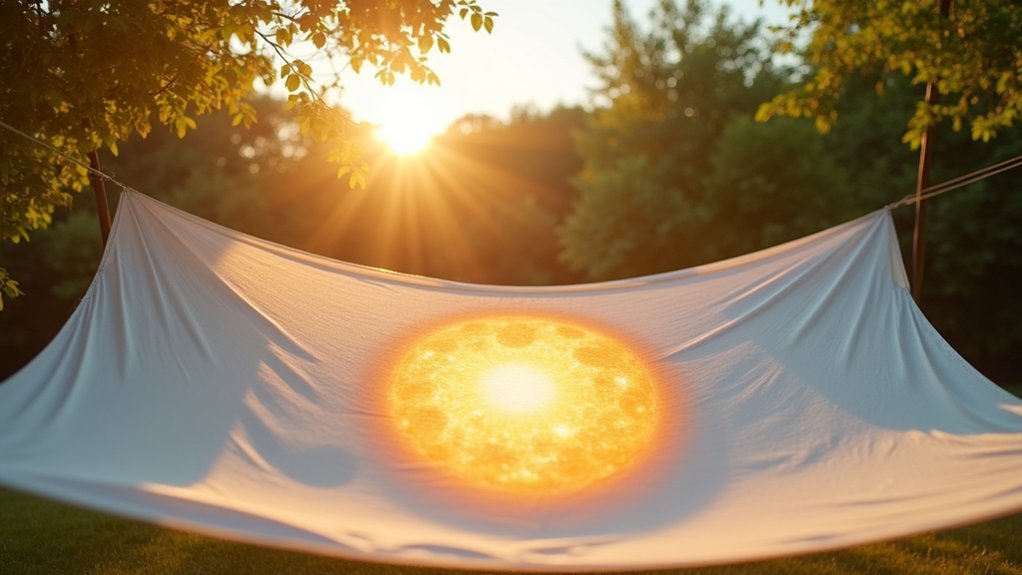
Pinhole projection creates a safe viewing experience by allowing solar rays to pass through a tiny aperture, projecting a miniature image onto a surface several feet away. This principle works with simple materials like cardboard or even kitchen colanders.
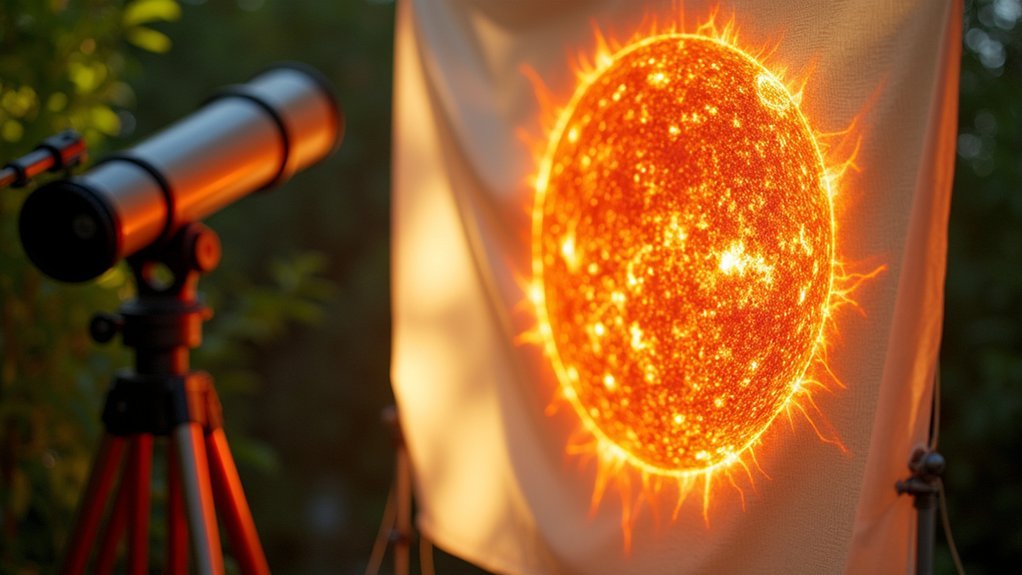
Binocular projection enhances this concept by using optical lenses to create larger, clearer images on white cardboard placed 1-2 feet behind the eyepiece.
For direct viewing, specialized filters are essential – welding glass (shade 14+) blocks harmful radiation while maintaining visibility.
Remember that magnified projection methods require particular caution, as telescopes and unfiltered cameras can concentrate dangerous amounts of light.
Always secure proper filters before viewing, as eclipse glasses alone won’t protect when using magnification devices.
Creating Your First Pinhole Projector
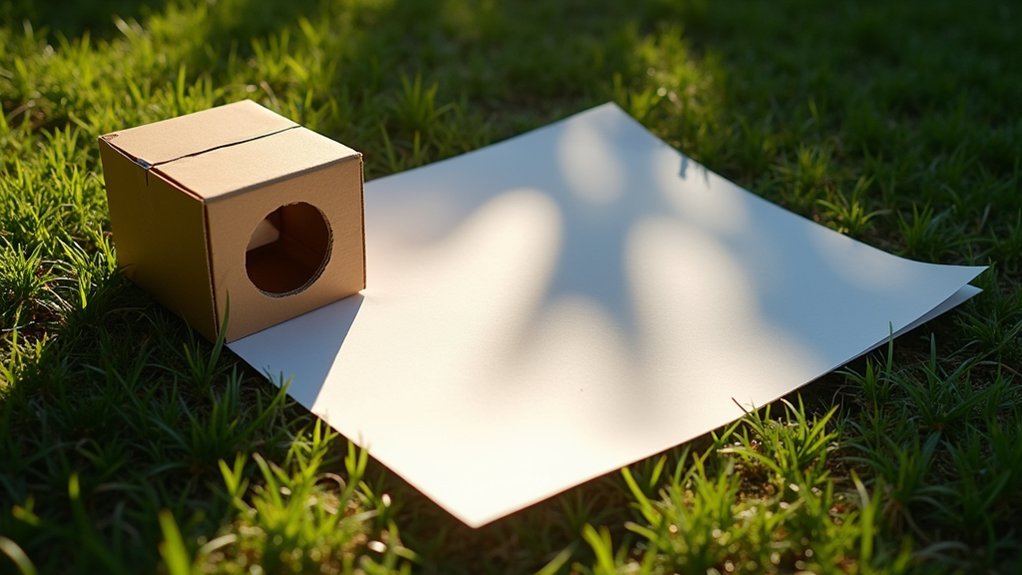
Building your first pinhole projector requires only household materials and a few minutes of preparation time. This simple device allows you to safely observe the solar image without risking eye damage during solar viewing.
- Prepare your materials – Punch a small hole (1-2mm) in a piece of cardboard or paper to create your light source.
- Position correctly – Stand with your back to the sun, holding the pinhole projector about 1-2 feet from a flat surface.
- Observe safely – Never look through the pinhole; instead, observe the projected image on the ground or paper.
- Experiment with variations – Create additional projections using a colander or strainer for multiple solar images simultaneously.
Household Items for Improvised Solar Projection
You’ll find several common household items can safely project fascinating eclipse images without special equipment.
Try holding a colander or cheese grater between the sun and a flat surface to create multiple crescent-shaped projections, or simply cross your fingers in a waffle pattern against a light-colored wall.
Even the natural gaps between tree leaves create thousands of tiny pinhole projectors, transforming ordinary dappled sunlight into a spectacular display of miniature eclipse images.
Colanders And Cheese Graters
A surprising duo of kitchen tools can transform your eclipse viewing experience safely and inexpensively. Colanders and cheese graters create fascinating pinhole projections by allowing sunlight to filter through their numerous holes, casting multiple safe images of the eclipsed Sun onto a flat surface.
- Hold your colander in direct sunlight with a white surface positioned a few feet behind it to observe the projected solar image.
- When using a cheese grater, angle it toward sunlight with a flat surface behind to capture crescent-shaped images during the eclipse.
- Always practice indirect observation—never look through the holes directly at the Sun to avoid serious eye damage.
- Turn this into an educational activity for children and families, demonstrating principles of light and shadow while enjoying the eclipse event together.
Crossed Fingers Technique
Your own hands can serve as a natural solar projection tool without any special equipment. The crossed fingers technique allows you to safely view the Sun during an eclipse through indirect observation.
Simply cross your fingers tightly and hold them up to the sunlight, allowing the rays to pass through the small gaps between your fingers. As light filters through these openings, it’ll project an image onto a flat surface below—creating multiple small images of the Sun.
For best results, use this method on a sunny day and adjust the distance between your hands and the projection surface to sharpen the crescents. This fun DIY project not only prevents eye damage but also offers an engaging way to introduce children to astronomy and safe solar viewing practices.
Tree Leaf Projections
Nature provides its own solar viewing instruments during eclipses. Tree leaf projections create crescent-shaped images of the Sun when light passes through gaps between leaves, functioning as natural pinholes. This safe method requires no equipment, making it perfect for families with children.
To experience this fascinating phenomenon:
- Find a leafy tree during a partial eclipse when the Sun is partially obscured.
- Stand beneath it and look down at the ground or place a white surface underneath.
- Observe the projected images of the Sun – they’ll appear as small crescents on the surface.
- Adjust your distance from the projection surface; closer distances produce brighter, clearer sunlight images.
The best results occur when the Sun is partially eclipsed rather than fully obscured, as this creates more distinct crescent patterns through the natural pinhole effect.
Advanced Techniques for Clearer Projected Images
You’ll achieve sharper solar projections by carefully controlling your aperture size—keeping pinholes between 1-2mm and perfectly round for peak clarity.
To enhance image definition, set up your viewing area in a partially darkened space where ambient light won’t compete with the projected image.
Position your projection surface at the ideal distance from your optical device—closer for brighter but smaller images, farther for larger but dimmer views—while using a stable tripod to eliminate motion blur.
Aperture Control Techniques
Five key factors influence the clarity of projected solar images, with aperture control being among the most critical.
When you’re experimenting with sizes, remember that the aperture opening directly affects both sharpness and brightness of your projected image.
To optimize your solar viewing experience:
- Adjust the aperture size – Try different pinhole diameters to find the perfect balance between image definition and light intensity.
- Control light intensity – Partially cover the aperture with cardboard to manage sunlight entering your device.
- Maintain clean lenses – Verify your optical surfaces remain free of smudges that could distort the image.
- Stabilize optical devices – Use a tripod or stand to prevent movement that would blur the projection surface.
The right aperture control technique will greatly enhance your solar viewing safety and experience.
Ambient Light Management
Beyond perfecting your aperture settings, mastering ambient light conditions will greatly enhance your solar projection clarity.
Choose a viewing spot away from bright ambient light that can wash out your delicate solar image. For ideal balance between image size and brightness, experiment with the distance between your projection device and surface—closer for brightness, farther for size.
Always use a light-colored surface for improved image brightness and contrast during solar viewing.
To further enhance visibility, create a shaded area around your projection methods by using a cardboard enclosure or similar structure to block direct sunlight from hitting your viewing surface.
Finally, adjust your projection angles to minimize glare interference. Small changes in positioning can markedly improve the quality of your projected image, making solar details more visible to everyone.
Distance Optimization Strategies
Finding the perfect viewing distance represents one of the most critical but often overlooked aspects of solar projection quality.
To achieve ideal focus and clarity during your solar event, consider these distance recommendations for different projection methods:
- Pinhole projection: Position your pinhole paper 2-3 feet from the projection surface for the ideal balance between image size and brightness.
- Binoculars/telescope projection: Maintain 1-2 feet between lens and surface to maximize image clarity.
- Magnifying lens method: Begin at 12-18 inches from the surface, then fine-tune until you achieve a clear, round image.
- Distance adjustments: Remember that increasing distance creates larger but dimmer projected images, which you’ll need to adjust based on ambient light conditions.
Using a stable stand or tripod helps maintain consistent distance for sharper viewing throughout the event.
Group Viewing Safety Protocols
Organizing a solar eclipse viewing event requires meticulous planning to protect all participants from potential eye damage. Always verify everyone’s eclipse glasses meet ISO 12312-2 standards before they face the Sun.
Safety first: verify ISO 12312-2 certification on all eclipse glasses before allowing sun viewing.
You’ll need to supervise children vigilantly, as they’re particularly vulnerable to eye injuries during group viewings.
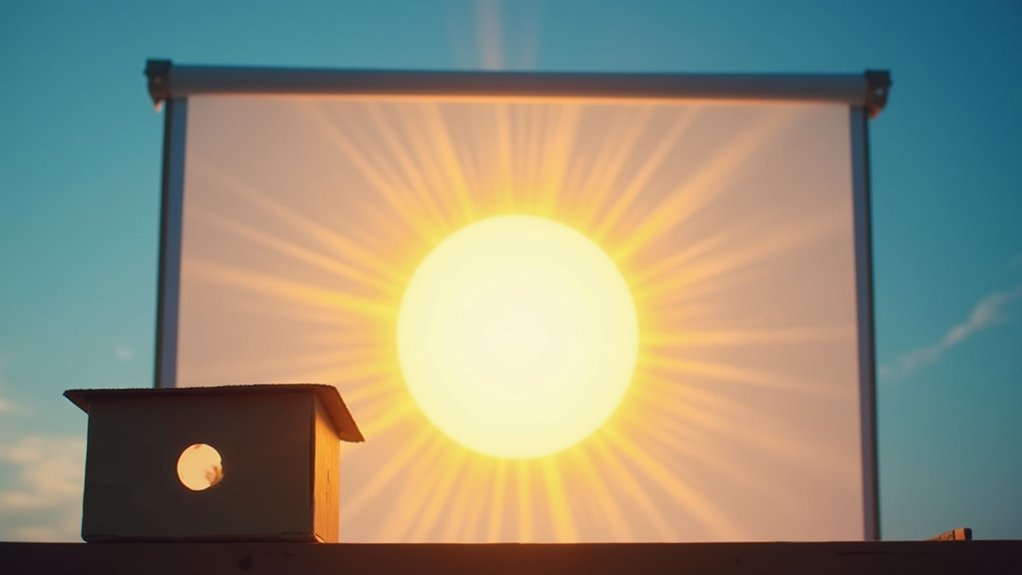
Set up dedicated safe viewing stations where participants can use indirect viewing methods like pinhole projectors or the Sun Funnel. These alternatives allow for collective observation without direct solar exposure.
When establishing safety protocols, clearly communicate proper handling of solar filters, emphasizing the importance of inspecting them for scratches or tears beforehand.
Remember to instruct all attendees to wear their solar viewer when looking sunward and remove it only when facing away—consistent adherence to these guidelines guarantees everyone enjoys the celestial event safely.
Weather Considerations for Projection Methods

While group viewing protocols focus on personal protection, the success of indirect viewing methods depends heavily on environmental factors. Your projected image quality will be markedly affected by weather conditions on eclipse day, so planning ahead is vital.
- Clear skies are essential – even minimal cloud cover can compromise visibility of your projected solar image.
- Timing matters – align your viewing with peak sunlight hours when the Sun’s angle provides ideal projection quality.
- Wind resistance – secure materials properly to prevent movement that could blur your projection during the event.
- Humidity awareness – check the weather forecast before the eclipse, as high humidity levels can create haze that diminishes clarity.
Consider local weather patterns when selecting your viewing location to maximize your chances of success with projection methods.
Photography Tips for Capturing Projected Eclipse Images
Four essential techniques will elevate your projected eclipse photography from basic snapshots to stunning scientific documentation.
First, always stabilize your camera on a tripod to eliminate motion blur when photographing the delicate details of a projected image.
For pinhole projection setups, position your equipment in a bright location while ensuring the projection surface receives ideal light.
Adjust the distance between your pinhole and the screen to enhance image clarity.
Use your camera’s smaller aperture settings to increase depth of field, bringing all aspects of the projection into crisp focus.
A telephoto lens allows you to zoom in safely on details without risking equipment damage.
Finally, experiment with exposure settings—adjusting shutter speed and ISO to capture the subtle brightness variations that make eclipse projections so fascinating.
Common Mistakes to Avoid When Using Projections
Safety errors during solar projection viewing can lead to permanent eye damage or equipment failure.
Safety first: improper solar viewing techniques can cause irreversible eye damage and destroy valuable equipment.
When pursuing safe solar viewing through projection methods, be vigilant about these common mistakes:
- Looking directly at the sun through binoculars or telescopes without proper solar filters attached to the front of your equipment.
- Failing to inspect solar filters before each use, as scratches or damage can compromise protection and potentially damage the filter.
- Positioning your projection surface too close or too far from the pinhole projector, resulting in images that are either too bright or too dim.
- Attempting to project a grid or image by looking through the pinhole rather than allowing the sun’s image to naturally project onto your viewing surface.
Frequently Asked Questions
What Is the Safest Way to View a Solar Eclipse?
You’ll need ISO 12312-2 certified eclipse glasses or solar viewers to safely watch a solar eclipse. They block harmful radiation and protect your eyes. Pinhole projection is another safe indirect viewing method.
How to Do Solar Projection?
You’ll need to project the Sun’s image using a pinhole in cardboard onto a flat surface, or point binoculars at the Sun to create projected images. Never look directly through these devices at the Sun.
How Can You View a Solar Eclipse Without Damaging Your Eyes?
You can safely view a solar eclipse by using ISO-compliant eclipse glasses, creating a pinhole projector, utilizing binocular projection onto cardboard, or using welding glass (shade 14+). Never look directly at the sun unprotected.
How Can You Safely View the Event During a Solar Eclipse?
You can safely view a solar eclipse by using ISO 12312-2 certified eclipse glasses, creating a pinhole projector, or using properly filtered telescopes. Always inspect filters for damage and never look directly at the sun without protection.
In Summary
You’ve now learned how to safely observe the sun without direct viewing. Whether you’re using a simple pinhole projector or more advanced techniques, always prioritize eye safety. Don’t forget to share these methods with friends and family during the next solar event. With these projection methods, you’ll enjoy stunning solar phenomena while completely protecting your vision. Weather permitting, your next eclipse viewing will be both safe and memorable.


Leave a Reply