
A safe DIY solar eclipse viewer must never allow direct sunlight into your eyes. The simplest version uses a shoebox, aluminum foil with a small pinhole (1-2mm), and white paper to catch the projected image. You’ll need to seal all edges to prevent light leaks and test before eclipse day. Never substitute regular sunglasses for proper solar filters. Position your viewer with its shadow aligned toward the sun for the clearest projection. The following instructions guarantee your homemade viewer protects your vision completely.
9 Second-Level Headings for “What Makes A Safe DIY Solar Eclipse Viewer?”
When crafting a DIY solar eclipse viewer, safety must be your top priority. Your viewer needs to effectively block direct sunlight while providing a clear image of the eclipse.
The most reliable method is pinhole projection, where you’ll create a small hole in aluminum foil or cardboard that projects the sun’s image onto a white surface inside your viewer.
To prevent eye damage, make sure your viewer has no gaps where sunlight could directly reach your eyes. Position your viewing surface at an appropriate distance from the pinhole for maximum clarity.
Before the eclipse, test your viewer on a sunny day to confirm it works properly.
Understanding Solar Eclipse Viewing Hazards
Although solar eclipses are enchanting celestial events, they pose serious risks to your eyesight if viewed improperly. When you look directly at the sun during a partial or total solar eclipse, you expose your retinas to intense radiation that can cause permanent damage called solar retinopathy—and you won’t feel pain while it’s happening.
Witnessing an eclipse without proper eye protection can silently cause permanent retinal damage—a steep price for celestial beauty.
Never use regular sunglasses to view an eclipse; they don’t provide adequate protection. Instead, use certified solar eclipse glasses that meet the ISO 12312-2 safety standard.
Alternatively, try indirect viewing methods like pinhole viewers that project the sun’s image onto another surface.
If you’re supervising children during an eclipse, maintain constant vigilance to guarantee they’re using safe viewing techniques and never looking directly at the sun without proper protection.
Essential Materials for Your Pinhole Viewer
Gathering the right supplies for your DIY solar eclipse viewer guarantees a safe and effective viewing experience.
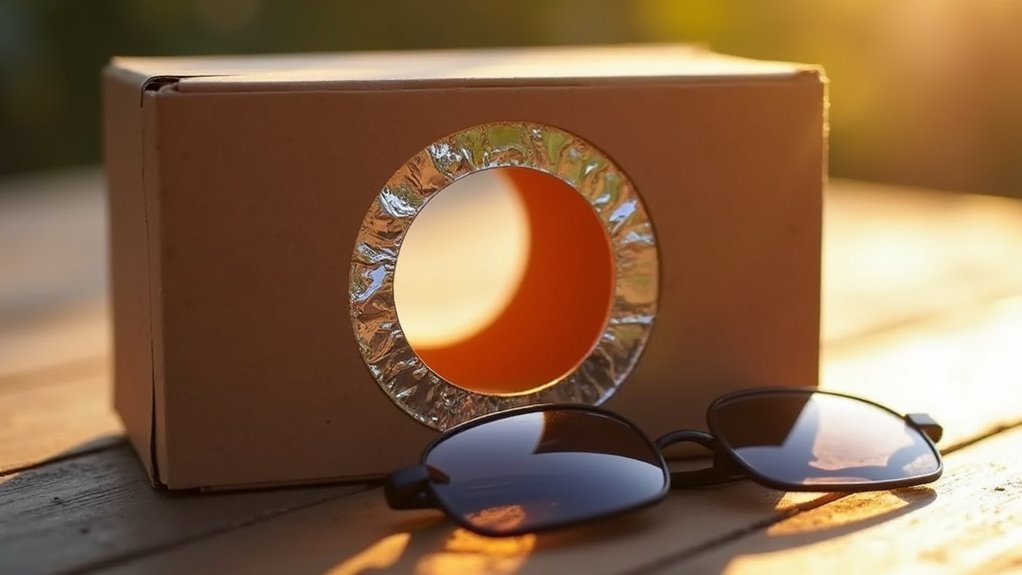
You’ll need a sturdy shoebox or similar container as your viewer base, along with a small piece of aluminum foil to create the projection screen. The foil requires a tiny pinhole that allows sunlight to enter and project onto white paper, which you’ll place inside the box.
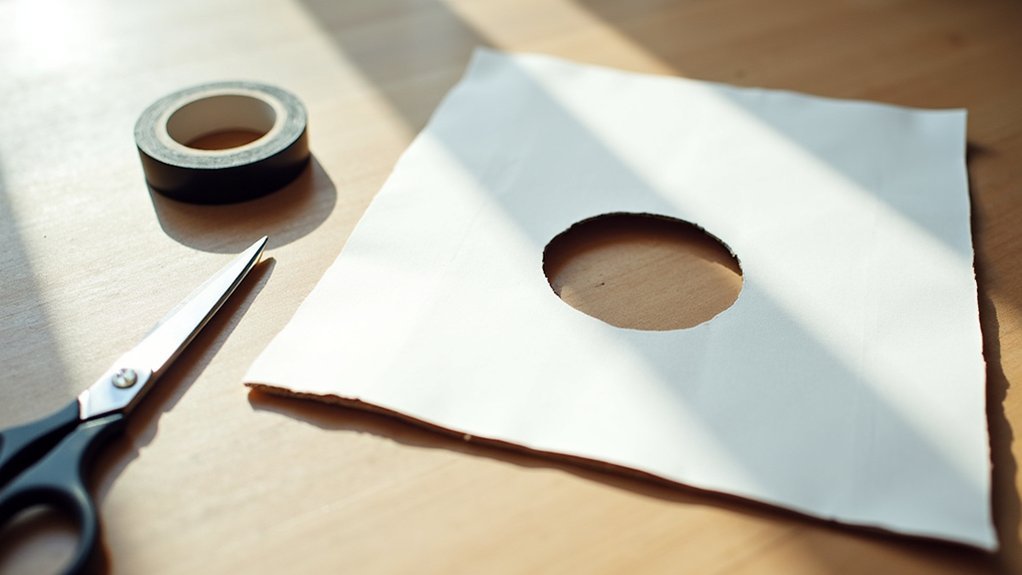
Ensure you have tape to secure all components and a pin or needle for making the precise pinhole. A box cutter helps create clean openings in the shoebox.
Keep the lid firmly attached to prevent light leakage and maintain proper alignment. Before the eclipse, test your viewer on a sunny day to confirm it’s safe to view the projected image, not the sun directly.
Step-by-Step Assembly Instructions
You’ll want to gather all your materials—shoebox, aluminum foil, white paper, and tape—before beginning construction of your eclipse viewer.
Position the pinhole precisely in the center of the foil to guarantee ideal light projection onto the white paper inside.
When using your completed viewer, align the box with its shadow to properly capture the sun’s image on the interior paper screen.
Gathering Materials First
Five simple household items are all you need to create your safe solar eclipse viewer.
Begin by gathering a shoebox, which will serve as the main structure of your viewer. You’ll also need a small piece of tinfoil to cover one end of the box, and a white paper to act as the projection surface inside.
Don’t forget some tape to secure everything in place, and a pin or needle to create the tiny hole in the tinfoil. This pinhole is essential as it allows sunlight to safely project the eclipse image onto the white paper inside.
The viewing hole you’ll cut into the side of the box lets you observe the projection without looking directly at the sun, ensuring your eyes remain protected during this spectacular astronomical event.
Proper Alignment Technique
After collecting your materials, it’s time to assemble your eclipse viewer with precise alignment. Cut a 1-inch hole in one end of the shoebox and cover it completely with aluminum foil, securing it with tape to prevent light leaks.
Using a pin, make a tiny hole in the center of the foil—this serves as your aperture for safely viewing the solar eclipse.
On the opposite end, tape a white sheet of paper to capture the projected image. Cut a 1-inch viewing hole on the adjacent side of the box to observe the projection. This proper alignment technique guarantees you’ll never look directly at the sun, maintaining safety while viewing the dramatic celestial event.
When using your viewer, position it so the box casts minimal shadow, allowing peak sunlight through the pinhole.
Proper Positioning and Alignment Techniques
Once your DIY solar eclipse viewer is constructed, proper alignment becomes essential for a successful viewing experience.
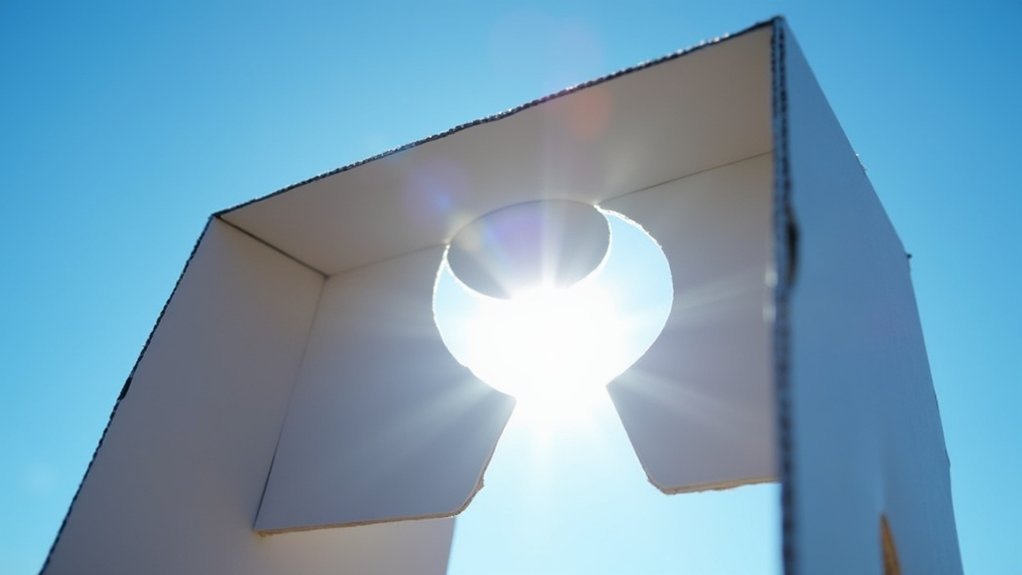
Position the viewer with its hole facing directly toward the sun while your back is turned to the sun’s bright face. The viewer’s hole should allow sunlight to enter and project onto the piece of white paper inside.
For best results, minimize the shadow of your viewer by adjusting its height and angle. You’ll need to tilt it slightly to capture the clearest projection.
Keep your hands steady and avoid excessive movement that might disrupt the image quality.
Remember to check and reposition your viewer regularly throughout the eclipse, as the sun’s position changes. Small adjustments will guarantee you don’t miss the brief but spectacular totality phase.
Testing Your Viewer Before Eclipse Day
You’ll need to test your solar eclipse viewer before the big day by taking it outside on a clear, sunny day and confirming it creates a distinct sun projection.
Position your viewer to catch sunlight, adjusting until you see a bright, circular image on the white paper inside your device.
If you’re having trouble getting a clear image, check that your pinhole isn’t too large and that your viewer is completely sealed against unwanted light leaks.
Testing Your Viewer Before Eclipse Day
To guarantee your solar eclipse viewer works properly on the big day, it’s vital to test it beforehand in regular sunlight.
Take your DIY solar eclipse viewer outside and check if it produces a clear sun image. Align the box with its shadow to capture sunlight, adjusting until you see a bright circle of light on the white paper inside.
Test the pinhole size by experimenting with different diameters—smaller holes often create sharper images.
Ascertain your viewer has secure assembly with no light leaks, which could risk eye damage during the eclipse.
Practice using your viewer multiple times to become familiar with holding and positioning it for ideal viewing conditions.
These trial runs will build confidence so you’re ready when the eclipse arrives.
Clear Day Trial Run
Three key steps guarantee a successful clear day trial run with your DIY eclipse viewer.
First, take your viewer outside when the sun is visible and position it so its shadow falls directly beneath it. This alignment enables sunlight to properly enter through the pinhole.
Second, adjust your viewer’s angle and distance until you see a distinct projection of the sun on the white paper inside. A clear, focused image confirms your device works correctly.
Finally, check that your viewer remains completely sealed, preventing any direct sunlight from entering except through the pinhole. This makes certain safe viewing during the actual eclipse.
Practice multiple times with your viewer before eclipse day.
Becoming familiar with its operation builds confidence in using it safely when the big moment arrives.
Alignment Troubleshooting Tips
Even when carefully constructed, DIY eclipse viewers sometimes need adjustment to work properly.
When testing your viewer on a sunny day, position it to minimize its shadow, allowing sunlight to enter directly through the pinhole. This creates ideal conditions for a clear projected image inside your box.
If you don’t see a bright circular projection, try slightly adjusting your viewer’s angle relative to the sun. Sometimes a minor tilt is all that’s needed to capture the sunlight perfectly.
Make sure your viewer remains stable during testing—any movement can blur the projection.
For sharper images, check that your pinhole isn’t too large or irregular. A clean, precise opening produces the clearest projection.
Alternative DIY Viewer Designs
Beyond the standard pinhole projector, several innovative DIY viewer designs offer safe ways to experience a solar eclipse.
The Simple Viewer uses cardboard with a small hole that projects the sun’s image onto white paper placed on the ground, ensuring safe observation without direct eye exposure.
Experience the eclipse safely with a Simple Viewer—just cardboard, a small hole, and white paper on the ground. No direct eye exposure needed.
For more stability, try the Box Viewer, which uses a cardboard box with aluminum foil and a pinhole to project the sun’s image onto paper inside the enclosed space.
The Tube Viewer, made from a cardboard tube with foil and a pinhole at one end, offers greater maneuverability for tracking the eclipse’s progression.
Don’t worry if you lack typical materials—cereal boxes, bristol board, or index cards work well as alternatives.
Whatever design you choose, proper alignment with the sun remains essential for clear viewing.
Common Mistakes to Avoid When Building Viewers

While building your own eclipse viewer is exciting, certain common errors can compromise safety and viewing quality. Never look directly at the sun through your viewer unless during totality. Verify your pinhole is 1-2mm—larger holes produce blurry projections.
| Mistake | Consequence | Prevention |
|---|---|---|
| Using sunglasses as a solar filter | Severe eye damage | Use only certified solar filters |
| Making the pinhole too large | Blurry, unsafe image | Keep pinhole 1-2mm in diameter |
| Light leaks in viewer | Compromised projection | Seal all edges completely |
| Untested viewer | Potential safety issues | Test before eclipse day |
Always protect your eyes by using proper materials and thoroughly testing your viewer before the eclipse. Remember that DIY viewers project the sun’s image—they aren’t meant for direct viewing.
Enhancing Your Viewing Experience Safely
Once you’ve built your basic DIY solar eclipse viewer, you can implement several enhancements to improve your observation quality without compromising safety.
Make sure your box is properly aligned with the sun by adjusting its position until you see a clear projection on the piece of paper inside. Test your viewer before the eclipse day to confirm it works effectively.
Align your box precisely with the sun for a clear image—always test before eclipse day.
For better visibility, use a darker room or create shade around your viewing area to increase contrast.
Never look at the sun directly through the pinhole or add unauthorized filters to view the eclipse—these won’t protect your eyes.
Instead, focus on optimizing the projection method by enlarging the viewing space inside your box or using whiter paper for a clearer image.
You’ll safely watch a solar eclipse while protecting your vision.
Frequently Asked Questions
How Do I Make My Solar Eclipse Viewer Safe?
You’ll need a shoebox, aluminum foil, and white paper. Cover one end with foil, make a small pinhole, and line the inside with white paper. Never look directly through the pinhole at the sun.
What Makes Eclipse Glasses Safe?
Eclipse glasses are safe because they’re certified to ISO 12312-2 standards, blocking 99.999% of sunlight. You’ll need these special filters that reduce solar radiation to safe levels, unlike regular sunglasses which don’t protect your eyes.
Which Device Is Safe to Use for Viewing a Solar Eclipse?
You can safely view a solar eclipse using ISO 12312-2 certified eclipse glasses, pinhole projectors, or box viewers. Never use regular sunglasses or improvised filters, as they won’t protect your eyes from dangerous solar radiation.
What Is the Safest Way to View a Solar Eclipse?
You’ll stay safest by using ISO 12312-2 certified eclipse glasses. Don’t forget you can remove them only during totality. Alternatively, you can create a pinhole projector that lets you watch indirectly.
In Summary
By following the proper steps and safety guidelines, you’ve now created a safe way to experience the celestial wonder of a solar eclipse. Remember, never look directly at the sun, even during partial phases. Your DIY viewer isn’t just a fun project—it’s essential protection for your eyes. With proper testing and careful use, you’ll enjoy this rare astronomical event without compromising your vision.


Leave a Reply