
Night sky photo editing begins with importing RAW files into Lightroom and applying lens corrections to eliminate distortion and chromatic aberration. Adjust exposure to around -0.90, create an S-curve for contrast, and set temperature to 4200K for natural sky colors. Apply noise reduction (Luminance 15, Detail 45) and careful sharpening (Amount 50, Radius 1.2) to enhance stars without amplifying noise. Proper white balance and selective adjustments transform good captures into breathtaking cosmic displays.
Night Sky Photo Editing: The Fundamental Steps
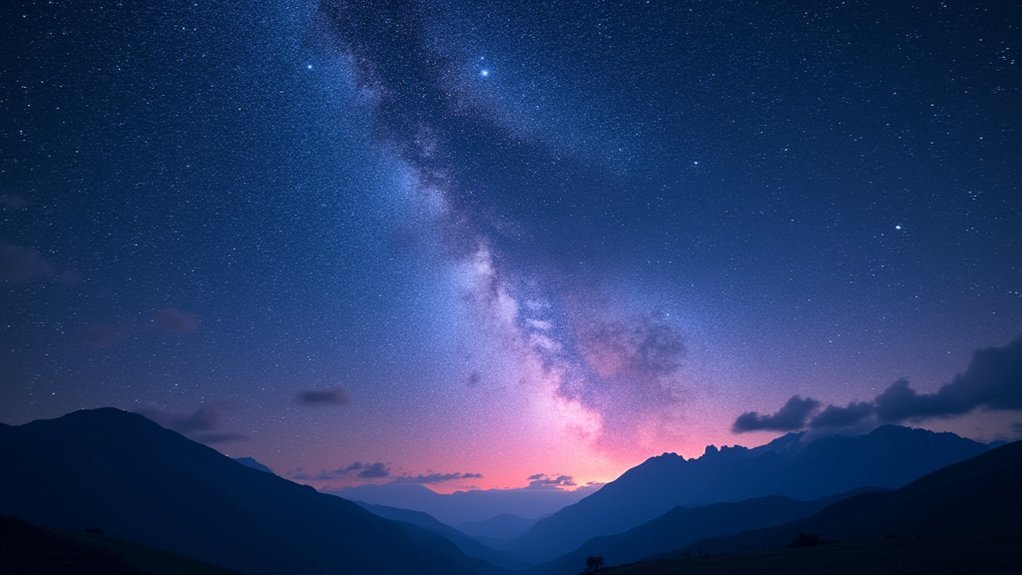
Once you’ve captured the night sky with your camera, proper editing becomes the essential bridge between a good image and a spectacular one.
Start by importing your raw files into Adobe Lightroom, where you’ll make critical exposure adjustments to reveal stars without creating an artificially bright image.
The key to compelling astrophotography lies in subtle exposure adjustments that reveal celestial details while maintaining the natural darkness of night.
Apply lens corrections to eliminate chromatic aberration and distortion that can diminish stellar clarity.
Next, adjust white balance carefully to achieve authentic sky colors rather than unnatural hues.
Create an S-curve to enhance contrast between the dark sky and bright stars.
Don’t forget to apply targeted noise reduction to clean up darker areas without softening star points.
Use graduated filters to subtly balance brightness between foreground and sky elements.
Each adjustment should serve to reveal what your camera captured, not fabricate an unrealistic night sky.
Setting Up Your Workspace for Astrophotography
Because astrophotography editing demands precision and attention to detail, your workspace setup plays an essential role in achieving stellar results. Equip your area with a reliable computer running Lightroom and Photoshop to effectively handle exposure and contrast adjustments and reduce noise through advanced techniques.
Organize your files in a structured folder system by date or location to streamline your workflow. If possible, use dual monitors—one for viewing raw images and another for making precise edits. This arrangement greatly enhances your efficiency.
Create a comfortable environment with dim, warm lighting to minimize eye strain during long editing sessions.
Finally, implement a robust backup system using external drives or cloud storage to protect your valuable night sky captures from potential loss.
Raw File Development and Initial Adjustments
When you first open your night sky images, the raw files may appear underwhelming compared to what you witnessed in person.
The gap between what your camera captures and what your eyes beheld can feel like two different nights entirely.
Start by adjusting exposure to around -0.90 to reveal more stars while setting contrast to -12 for balance. Create an S-shaped tone curve to distinguish stars from the sky background.
Lower the temperature from 5050 to 4195 to achieve that cool, space-blue sky look, then fine-tune saturation and vibrance as needed.
Don’t skip lens corrections—they’ll eliminate distortion and chromatic aberration for a cleaner result.
For final touches, apply sharpening with an amount of 50 and radius of 1.2 to make stars pop, while implementing strategic noise reduction to handle high ISO artifacts without sacrificing important details.
Lens Corrections and White Balance Calibration
Properly applying lens corrections and calibrating white balance transforms mediocre night sky photographs into stunning celestial masterpieces. When editing, make sure to use Lightroom’s lens profile correction to eliminate chromatic aberration and distortion. Take care with vignetting adjustments, as overcorrection in panoramas might require manual tweaking.
For white balance, avoid Tungsten settings which make dark areas look unnatural. Instead, adjust temperature and tint to achieve natural green-yellow hues in the sky, typically around 4200K.
| Adjustment | Purpose | Ideal Setting |
|---|---|---|
| Lens Corrections | Remove distortion | Enable profile |
| Chromatic Aberration | Eliminate color fringing | Check “Remove” |
| Vignetting | Even exposure | Moderate correction |
| Temperature | Natural sky color | ~4200K |
| White Balance | Match conditions | Varies by ambient light |
Enhancing Details With Basic Exposure Controls
Mastering basic exposure controls transforms ordinary night sky photographs into spectacular cosmic displays. When you take astrophotography with your Canon EOS, proper post-processing becomes essential to combat light pollution.
As a first step, adjust your exposure to around -0.90, which enhances star visibility without washing out the sky.
Reduce highlights to -50 to recover star details, while increasing whites to +46 makes stars pop against the background. Be careful—these adjustments are easy to overdo. Setting contrast to -12 helps differentiate between stars and sky, creating depth in your image.
For advanced enhancement, implement tone curves to create an S-shape that increases distinction between celestial objects and the background. This technique dramatically improves the dynamic range of your night sky composition while maintaining natural-looking results.
Targeted Adjustments Using Masks and Gradients
Precision masks and gradients serve as powerful tools for transforming ordinary night sky images into extraordinary celestial showcases.
When editing night photography, you’ll want to treat the sky and foreground separately to maximize impact. Use the quick select tool to create masks for uniform areas like the sky, then refine them through addition and subtraction techniques.
Luminosity masks categorize your image into Brights and Darks, allowing you to add contrast and enhance details with surgical precision.
Apply lighter noise reduction to the sky to preserve faint stars, while using heavier settings for the foreground.
Strategic gradients help balance your composition by brightening the foreground while simultaneously darkening the sky. These targeted adjustments create depth and visual interest that wouldn’t be possible with global edits alone.
Noise Reduction and Sharpening Techniques
When shooting the night sky at high ISO settings, noise becomes an inevitable challenge that can diminish the beauty of your celestial captures.
For ideal noise reduction in Lightroom, set Luminance to 15, Detail to 45, and Contrast to 15—this maintains stellar details while reducing graininess.
Apply targeted noise reduction differently across your star photos; use lighter settings for the sky to preserve faint stars, while applying stronger reduction to the ground.
For sharpening, aim for Amount 50, Radius 1.2, and Masking 10 to enhance stars without creating artifacts.
The Dehaze slider can reveal hidden Milky Way detail, but use it sparingly (between +10 and +24) to avoid an unnatural look.
Remember to apply noise reduction and sharpening after your primary adjustments to preserve image integrity.
Frequently Asked Questions
What Is the 500 Rule in Night Sky Photography?
The 500 rule helps you determine the longest shutter speed before stars blur. Divide 500 by your lens focal length—for example, with a 24mm lens, you’d use about 20 seconds maximum exposure time.
What Are the Basic Night Sky Photography Settings?
For night sky photography, you’ll need a shutter speed of 25 seconds, aperture of f/2.8, and ISO of 1600. Don’t forget your tripod and remote shutter release to prevent camera shake.
What Is the Best ISO for Night Sky Photography?
You’ll typically want to use ISO 1600-3200 on full-frame cameras or 800-1600 on APS-C sensors. Test your specific gear, as wider apertures let you use lower ISO with less noise.
How Long to Leave the Shutter Open for Stars?
You’ll want to keep your shutter open for about 25 seconds when shooting stars. Use the 500 Rule (500÷focal length) to determine maximum exposure time before star trails appear in your image.
In Summary
Remember, you don’t need to master every technique at once. Start with these fundamental steps and develop your own workflow as you gain confidence. With practice, you’ll transform ordinary night shots into spectacular cosmic scenes that capture the viewer’s imagination. The universe is waiting for your unique perspective—so keep shooting, keep editing, and keep looking up!


Leave a Reply