For successful star trails photography, you’ll need a sturdy tripod, full-frame camera, wide-angle lens (14-20mm), and multiple batteries. Set your camera to manual mode with aperture f/2.8-5.6, ISO 800-1600, and shutter speeds of 30+ seconds. Choose locations away from light pollution during new moon phases. Pre-focus on distant objects or bright stars, then switch to manual focus. Capture 100-500 images for stacking in post-processing. The techniques that follow will transform your night sky images into masterpieces.
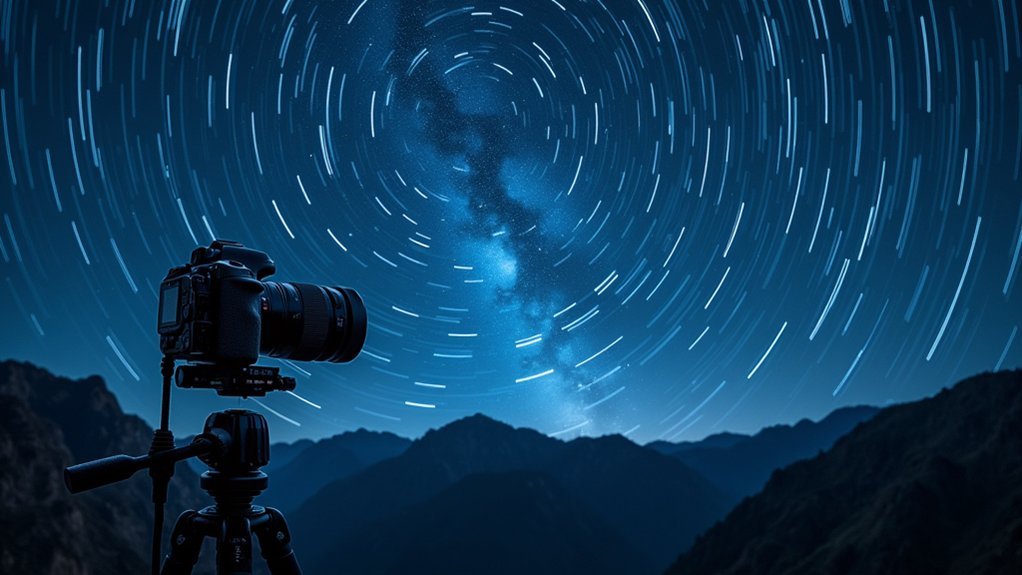
Essential Camera Gear for Star Trails Photography
When venturing into star trails photography, you’ll need specific equipment to capture those mesmerizing celestial streaks across the night sky. A sturdy tripod provides essential stabilization during long exposures, preventing camera shake that ruins your shots.
Full-frame cameras like the Nikon Z7 excel at light collection, delivering clearer, more detailed star trails. Pair your camera with wide-angle lenses—14-20mm focal lengths for full-frames or 10-18mm for crop sensors—to encompass more of the night sky in your composition.
Don’t underestimate power requirements; pack at least 5-6 fully charged batteries for extended shooting sessions.
An external intervalometer automates the process, precisely timing consecutive exposures without requiring your constant attention, which is especially valuable during frigid night shoots or complex sequences.
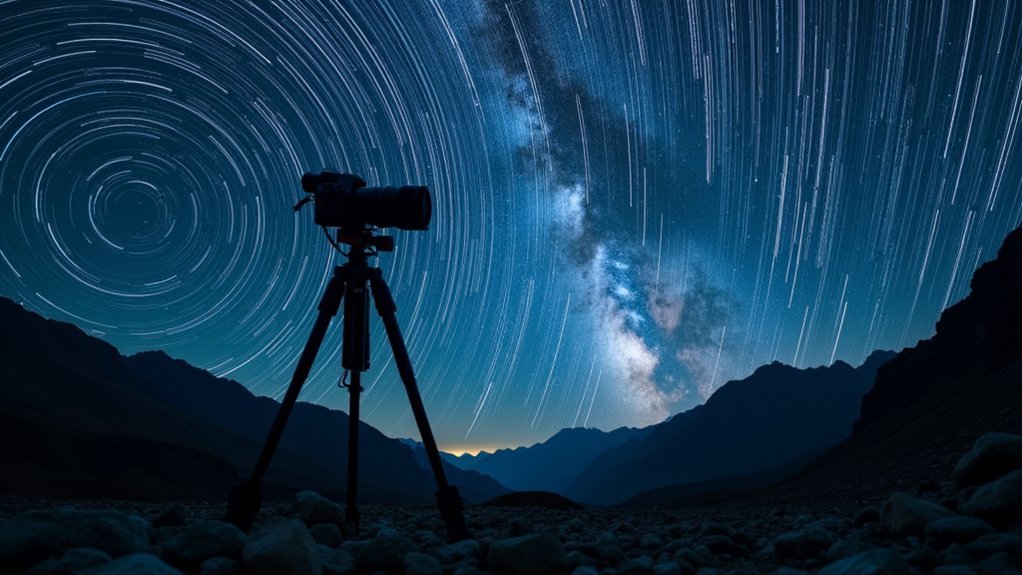
Planning Your Star Trails Shoot Location and Timing
Finding a pristine location away from city lights is essential for your star trails photography, and tools like the Blue Marble Light Pollution Map can help you discover these dark-sky treasures.
You’ll want to time your shoot around the new moon phase when the night sky is at its darkest, allowing the stars to shine more brilliantly in your images.
Early planning using weather forecasts and satellite imagery guarantees you won’t waste a trip to your carefully selected location only to find cloudy skies obscuring your cosmic canvas.
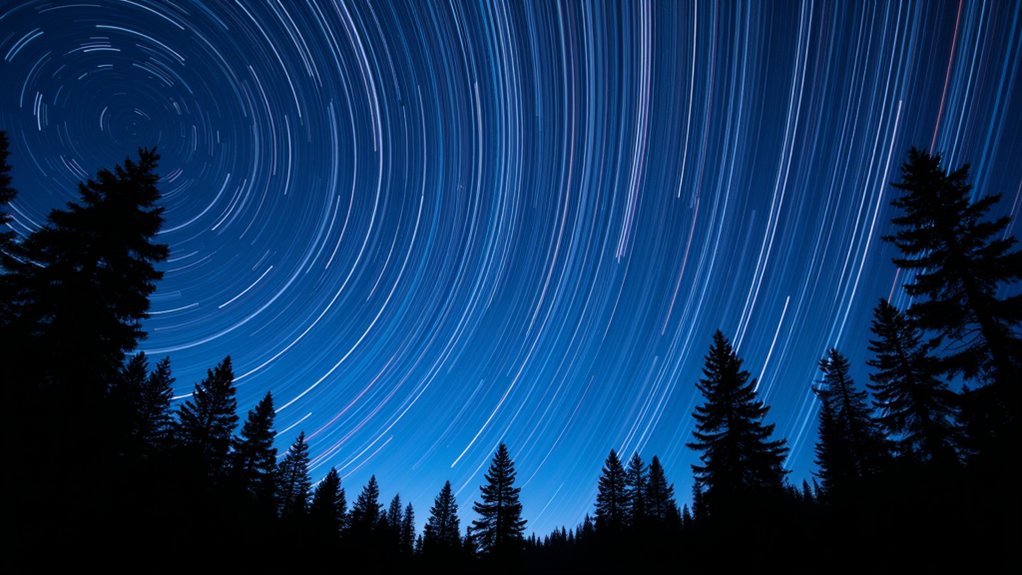
Finding Dark Skies
Where you choose to photograph star trails can make or break your final images. The darker your location, the more stars you’ll capture in your shots. Use the Blue Marble Light Pollution Map to find areas with minimal light pollution for ideal star visibility.
Timing matters just as much as location. Plan your shoot during a new moon phase or when the moon is below the horizon to prevent moonlight from washing out the stars.
Check weather conditions beforehand—aim for nights with less than 20% cloud cover for clear skies.
Arrive early to set up your camera gear while it’s still light. This gives you time to compose your shot and incorporate interesting landscape features that will complement your star trails.
These natural elements add depth and context to your night sky photography.
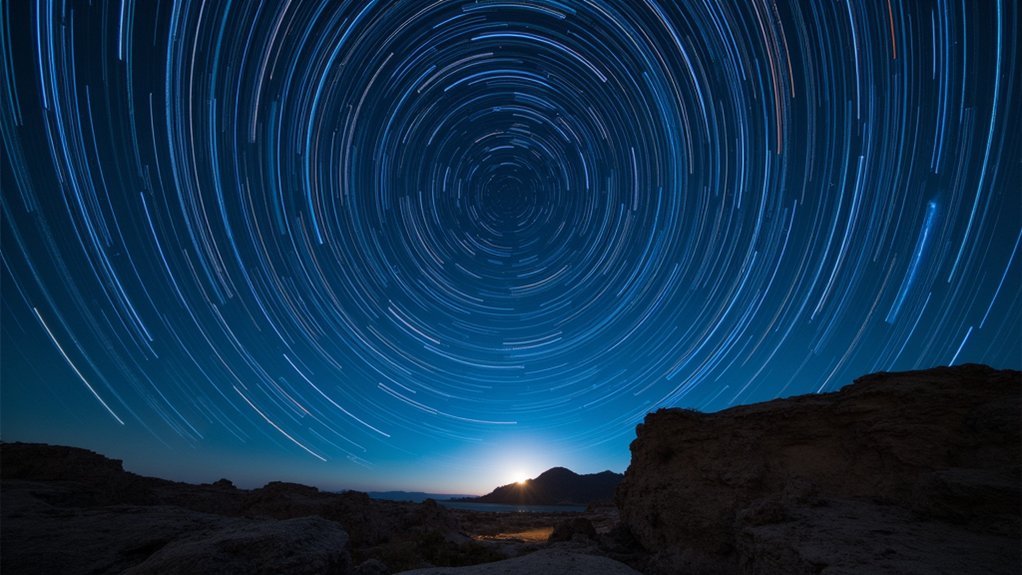
Moon Phase Matters
The moon’s phase dramatically affects your star trails photography success, serving as either your greatest ally or worst enemy. For ideal visibility, plan your shoot during a new moon when stars shine brightest against the dark canvas.
A full moon washes out the night sky, diminishing your star trails, while a half moon offers natural landscape lighting without overwhelming the scene.
- New moon or moon below horizon = maximum star visibility
- Use moon phase calendars online to plan your shooting dates
- Combine dark skies with ideal moon conditions for stunning results
- Position landscape elements strategically relative to moonlight direction
- Consider how moon phase affects your camera settings (exposure time and ISO)
Camera Settings to Capture Perfect Star Trails
Mastering your camera’s manual settings is essential for capturing stunning star trails, with the sweet spot typically found at f/2.8-5.6 aperture, ISO 800-1600, and shutter speeds between 20-90 seconds per frame.
You’ll need to program your intervalometer to take hundreds of consecutive shots with minimal delay between exposures, usually 1-3 seconds to allow your sensor to cool while maintaining continuous capture.
Remember to lock your focus at infinity before beginning your sequence and secure your camera settings with tape to prevent accidental changes during the hours-long shooting session.
Ideal Exposure Settings
Capturing perfect star trails requires four essential exposure settings that work in harmony to reveal celestial movement. Switch your camera to Manual mode to take full control of these variables.
Select an aperture between f/2.8 and f/5.6 to gather maximum light while maintaining sharp image quality. Set your ISO between 800 and 1600—this preserves star colors without introducing excessive noise in your long exposure shots.
For shutter speed, use 30-second to 1-minute exposures, or Bulb mode when you need more flexibility with exposure time. Plan to capture 100-500 individual images for stacking later.
- Use wider apertures (f/2.8-f/4) in darker locations
- Higher ISO works better in colder temperatures
- Block nearby light sources with natural terrain when possible
- Consider intervalometer timing based on star brightness
- Adjust settings seasonally as night sky conditions change
Intervalometer Best Practices
While your camera settings establish the foundation for star trails photography, an intervalometer transforms the tedious manual process into a smooth, automated workflow. Set it to capture images at 1-second intervals for ideal star trails without gaps in your final composition.
Before beginning your session, verify your intervalometer is compatible with your camera model and supports both exposure time and shot quantity settings. For long exposure work, configure it to use Bulb mode, which gives you precise control over each exposure’s duration.
Always shoot in manual mode when using an intervalometer, adjusting your ISO and aperture settings beforehand to maintain consistent exposure throughout the shooting process.
Take a few test shots to confirm your intervalometer is functioning correctly with your chosen exposure settings before committing to hours of star trails photography.
Focusing Techniques for Night Sky Photography
How can you achieve pin-sharp focus when darkness engulfs your surroundings? Proper focusing techniques are essential for capturing crisp star trails.
Begin by pre-focusing your lens during daylight on a distant object, marking the focus point with white tape for quick adjustments later. When darkness falls, try using Auto Focus on a bright star, then switch to Manual Focus to lock your settings. If your camera struggles to find focus, adjust to the infinity mark while ensuring lens stabilization is turned off to preserve battery life.
Focus during daylight, mark your lens, then lock settings at night. Turn off stabilization to maximize battery life.
- Always use the center AF point for most accurate night sky focusing
- Pre-focus during daylight and mark your lens with tape
- Switch to Manual Focus after achieving focus to prevent drift
- Turn off lens stabilization during long exposures
- Verify sharpness with a test shot before committing to a full sequence
Image Stacking vs. Single Exposure Methods
Star trail photographers face a fundamental choice between two distinct capture methods, each with its own unique advantages and challenges.
With image stacking, you’ll capture multiple shorter exposures (20-90 seconds) and blend them together, resulting in smoother trails with minimal noise and reduced camera overheating. This method offers greater flexibility for creating varied trail patterns while eliminating unwanted elements like airplane lights.
The single exposure approach simplifies your workflow by capturing one continuous shot lasting anywhere from a few minutes to several hours. However, you’ll need careful management of exposure settings, ISO values, and aperture to prevent overexposure.
Take test shots to determine ideal camera equipment settings before committing to the long exposure. While single exposures create more continuous trails, they’re prone to increased noise and hot pixels, requiring thoughtful noise reduction techniques.
Post-Processing Your Star Trails Images
Once you’ve captured your stunning star trails, the real magic happens during post-processing. Import your RAW format images into stacking software like StarStaX or use Photoshop to combine multiple exposures. Change the blend mode to Lighten to make stars pop while reducing noise that would appear in a single long exposure.
- Adjust the histogram carefully to enhance star brightness while preserving natural colors
- Work with RAW files for maximum flexibility when tweaking exposure and color balance
- Use stacking software to combine dozens or hundreds of shorter exposures seamlessly
- Enhance foreground elements that you illuminated during shooting for added depth
- Apply selective adjustments to maintain detail in both bright stars and darker landscape areas
Fine-tuning these elements transforms good star trail images into spectacular night sky masterpieces.
Frequently Asked Questions
What Settings Should I Use for Star Trail Photography?
For star trail photography, you’ll want to set your camera to Manual mode with f/2.8-5.6 aperture, ISO 800-1600, and 20-90 second exposures. Don’t forget to focus at infinity for sharp stars.
What Are the Best Camera Settings for Star Photography?
For star photography, you’ll want to use Manual mode with an aperture of f/2.8-f/5.6, ISO 800-1600, and shutter speeds of 15-30 seconds. Don’t forget your tripod and remote shutter release.
What Is the Best Shutter Speed for Star Trails?
For star trails, you’ll want shutter speeds between 30 seconds and 1 minute per exposure. You can also take multiple 20-90 second shots and stack them later for longer, more detailed trails without noise issues.
What Is the Best ISO for Star Trails?
For star trails, you’ll want to use ISO 800-1600 for the best results. This range preserves star colors while minimizing noise. If you’re shooting in RAW, you can easily adjust any noise during post-processing.
In Summary
Star trails photography isn’t complicated once you’ve mastered the basics. With the right gear, planning, and camera settings, you’ll capture stunning celestial movements in no time. Whether you prefer stacking multiple exposures or creating a single long exposure, remember that practice makes perfect. Don’t be discouraged by initial results—keep refining your technique and post-processing skills, and you’ll soon create breathtaking star trails that showcase our dynamic night sky.


Leave a Reply