To find perfect dark sky spots, use tools like Dark Site Finder and the International Dark Sky Association’s map. Look for locations rated Class 3 or better on the Bortle Scale, with SQM readings around 21. Consider accessibility, safety, and seasonal factors when planning your trip. Always bring essential gear like a headlamp with red light mode and share your location with someone. The right dark sky location will transform your night photography from ordinary to extraordinary.
Understanding Light Pollution’s Impact on Night Photography
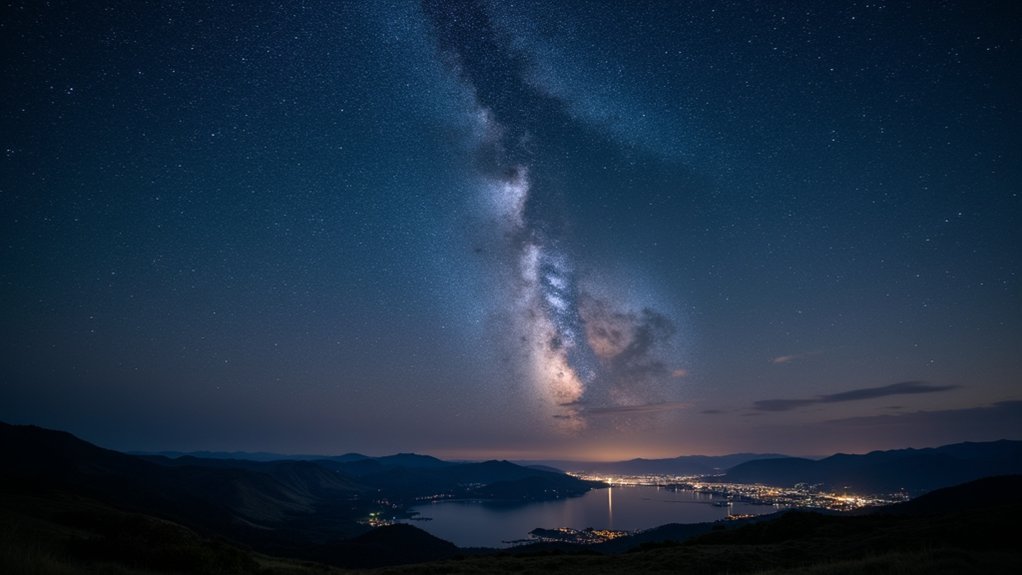
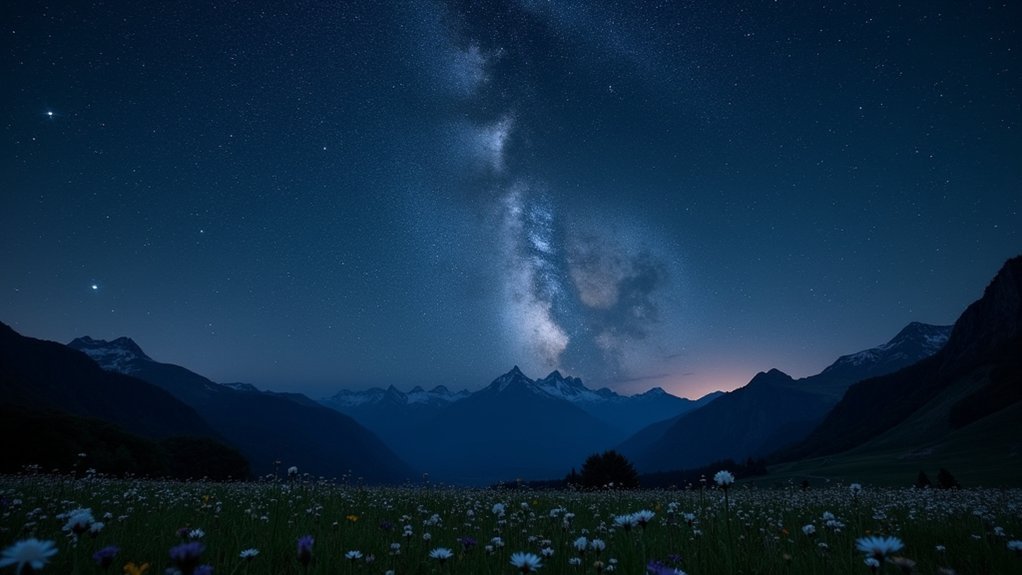
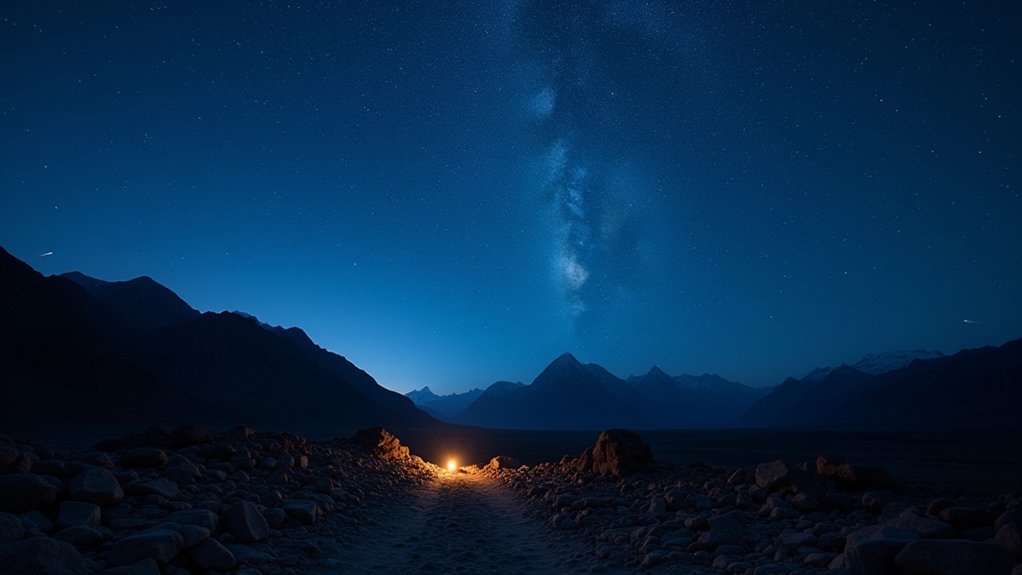
While many photographers dream of capturing the Milky Way in all its glory, light pollution often stands as their greatest obstacle. This artificial brightness creates a hazy dome over urban areas, dramatically reducing star visibility and washing out celestial details in your photos.
Even at designated dark sites near cities like Las Vegas, you’ll notice the difference in image quality compared to truly remote locations. To gauge conditions effectively, familiarize yourself with the Bortle Scale—a nine-class system that rates sky darkness.
For ideal astrophotography, seek out Class 3 or better locations, while avoiding anything above Class 5.
Consider investing in a Sky Quality Meter (SQM) to measure darkness objectively—readings around 21 indicate prime conditions, while 16-17 signals significant light pollution that will affect your images.
Essential Tools for Locating Dark Sky Areas
How can photographers consistently find those pristine, star-filled skies that make night images truly exceptional? Several specialized tools make this search considerably easier.
The Dark Site Finder allows you to visualize light pollution levels, helping you identify potential shooting locations away from city glow. For more official options, consult the International Dark Sky Association‘s global map of designated dark sky places.
To measure darkness scientifically, a Sky Quality Meter (SQM) provides numerical readings—aim for values near 21 for ideal astrophotography conditions.
The Bortle Scale offers another measurement system; seek locations rated Class 3 or lower for the best results.
Additionally, apps like PhotoPills and The Photographers Ephemeris help you plan shoots by tracking celestial movements and moon phases that might affect your night photography.
The Bortle Scale: Measuring Darkness for Astrophotography
The Bortle Scale‘s nine-class system helps you identify ideal night photography locations by categorizing skies from pristine darkness to severe light pollution.
You’ll find urban environments typically fall into Class 5 or higher, while rural areas offer the Class 3-4 conditions preferred for capturing stunning celestial images.
When planning your astrophotography session, this scale becomes an invaluable tool for locating low-light areas where stars, galaxies, and other cosmic wonders will shine more brilliantly through your lens.
Understanding Bortle Classification System
For serious night photographers seeking pristine dark skies, understanding the Bortle Scale is essential. This nine-class system helps you identify superior shooting locations based on light pollution levels. Class 1 represents the darkest possible skies, while Class 9 indicates severely light-polluted urban environments.
When planning your astrophotography sessions, consider these key points:
- Class 3 skies offer an excellent balance between darkness and accessibility, making them ideal for most stargazing activities.
- For professional-quality celestial photography, seek locations rated Class 4 or lower to minimize light interference.
- Even Class 5 skies can work for casual night photography, though you’ll sacrifice some detail and contrast.
Remember that proximity to cities can affect dark sky quality—even some Class 3 sites near metropolitan areas like Las Vegas still show significant light pollution effects.
Urban vs. Rural Skies
When comparing urban and rural environments for night photography, you’ll immediately notice dramatic differences in what’s visible through your viewfinder.
Urban areas typically register as Class 8-9 on the Bortle Scale, where light pollution drowns out all but the brightest celestial objects. Your SQM readings will hover around 16-17 in these locations, severely limiting photographic possibilities.
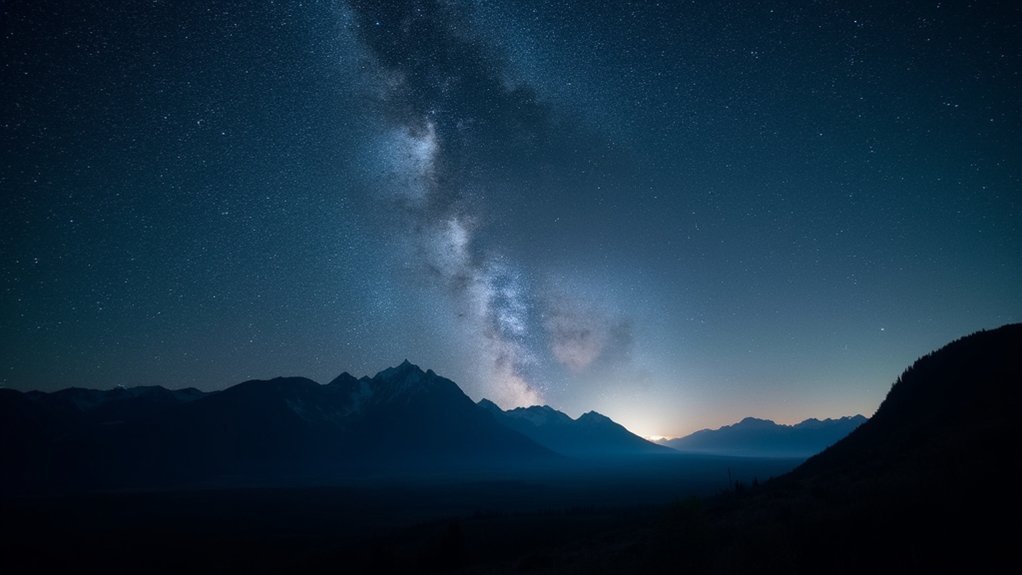
Rural settings, particularly those falling within Class 1-3, offer dramatically better conditions for capturing the night sky.
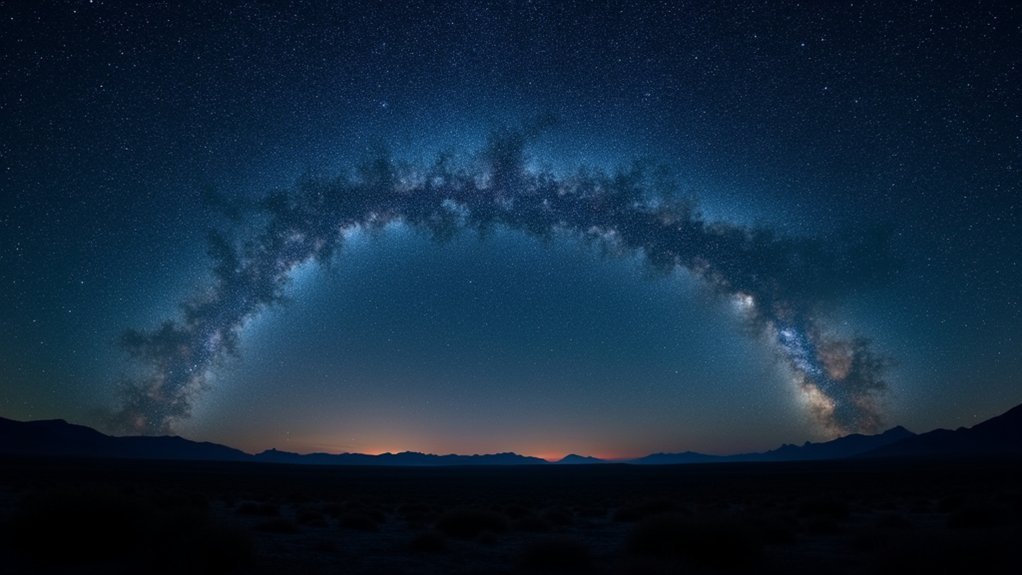
In these dark zones, often located far from cities, the Milky Way becomes strikingly visible. You’ll achieve SQM readings closer to 21, revealing thousands more stars than visible in urban environments.
For serious astrophotography, prioritize locations with Class 3 skies at minimum, though Class 1 areas provide the ultimate canvas for your night photography.
Finding Low-Light Locations
Understanding dark sky locations requires familiarity with the Bortle Scale, an essential tool that quantifies light pollution levels from 1 to 9.
To find a dark site suitable for astrophotography, you’ll want areas rated Class 3 or darker, while avoiding zones with heavy light pollution like Las Vegas.
The quality of the sky directly impacts your night photography success. Consider these approaches:
- Seek locations designated as Bortle Class 1-3, typically 50+ miles from major cities.
- Use a Sky Quality Meter (SQM) for precise measurements—readings near 21 indicate ideal conditions.
- Research dark sky preserves and rural areas with minimal artificial lighting.
Remember that even locations rated Class 3 can be affected by nearby urban centers, so prioritize distance from cities when planning your astrophotography expedition.
Planning Your Dark Sky Adventure With Digital Maps
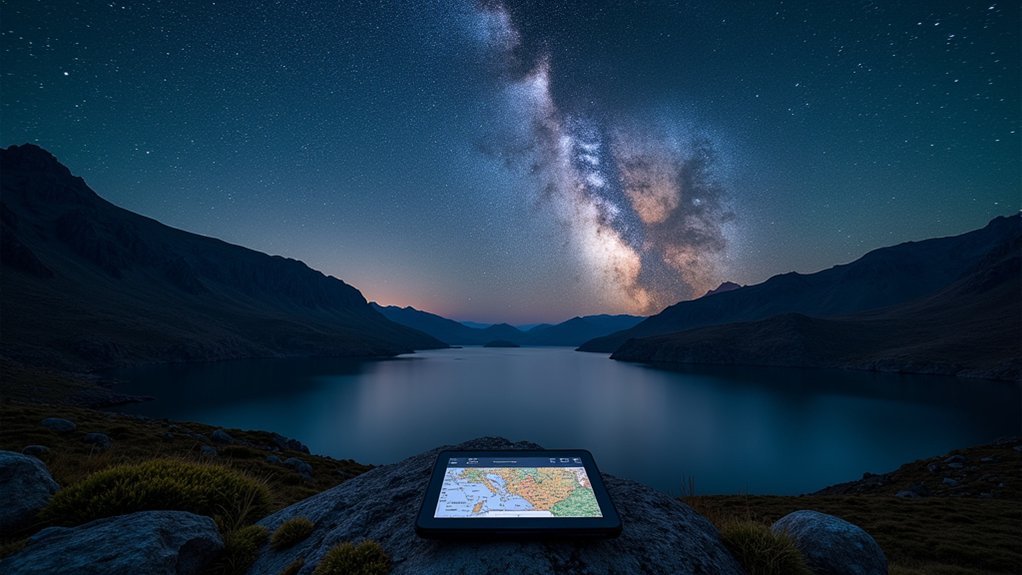
How effectively can you capture the cosmos without knowing where to find truly dark skies? Modern digital maps with light pollution overlays from 2006-2022 make finding these precious locations much easier. You’ll quickly identify ideal dark sky sites where the Milky Way shines brightest, free from the orange glow of civilization.
| Map Feature | Benefit for Photographers |
|---|---|
| Color-coded overlays | Instantly spot darkest areas |
| Geolocation | Navigate to remote spots confidently |
| Zoom functions | Examine potential locations in detail |
| Dark site markers | Find officially designated stargazing spots |
| Custom link creation | Share prime locations with fellow photographers |
Use these tools to time your adventure with astronomical events. You’ll maximize opportunities to capture stunning night sky images by precisely planning both where and when to shoot.
Seasonal Considerations for Stargazing Locations
Once you’ve identified dark sky locations on your digital maps, timing your visit becomes the next critical factor for success. The darker the sky, the better your night photography results will be, but seasonal weather patterns greatly impact visibility conditions.
- Summer months (June-August) offer the most spectacular Milky Way views in the northern hemisphere, providing ideal sky conditions for capturing dramatic galactic cores.
- Plan trips during new moon phases regardless of season to minimize light interference, especially when photographing in areas with exceptional darkness ratings.
- Consider seasonal weather patterns when scheduling longer excursions—spring and autumn generally provide clear skies, while winter delivers exceptional clarity despite challenging temperatures.
Don’t overlook seasonal celestial events like meteor showers, which can transform an ordinary night shoot into an extraordinary photographic opportunity with proper timing.
Safety Precautions When Photographing in Remote Areas
Remote night photography demands careful preparation, including an essential equipment checklist with headlamps, extra batteries, and emergency supplies to handle unexpected situations.
You’ll need reliable communication protocols, such as a fully charged phone, satellite communicator, or personal locator beacon when venturing beyond cell service areas.
Remember that sharing your itinerary with a trusted contact who’ll alert authorities if you don’t return as scheduled can make a critical difference in emergency situations.
Essential Equipment Checklist
The forgotten safety precautions for night photography can spell disaster when you’re miles from civilization under starlit skies. Before heading out, verify you’ve gathered all critical safety gear alongside your photography equipment.
1. Communication and Navigation Tools – Always tell someone where you’ll be and when you’ll return. Bring a fully charged phone, GPS device, and detailed maps to find your way if you lose light.
2. Emergency Supplies – Pack a thorough first aid kit containing bandages, antiseptics, and personal medications.
Include extra water, high-energy snacks, and a space blanket for unexpected overnight stays.
3. Visibility and Protection – Carry a headlamp with red light mode to preserve night vision while setting up shots.
Don’t forget wildlife deterrents like bear spray when shooting in areas with larger animals.
Communication Protocols Matter
Communication protocols serve as your lifeline when capturing the night sky in isolated locations.
Before heading out for nighttime photography, always inform a trusted friend or family member about where you’re going and when you’ll return. This simple step guarantees someone can alert authorities if you don’t check in.
Carry a fully charged mobile phone and a portable power bank for backup. In remote areas, reception may be spotty, so consider location-sharing apps that work offline or satellite communication devices for true wilderness adventures.
Research your destination thoroughly—including local wildlife, potential hazards, and any required permits for nighttime photography.
Navigate with confidence using maps or GPS devices, and share your real-time location with a reliable contact who can monitor your movements during your photographic expedition.
Finding Accessible Dark Sites Near Urban Centers
Despite living in a bustling urban environment, you don’t need to travel to remote wilderness areas to capture stunning night sky photographs. Many accessible dark sites suitable for astrophotography exist within a 1-2 hour drive from major cities, often rated as Bortle Class 4 – perfect for Milky Way shots with minimal light pollution interference.
To find these hidden gems:
- Utilize light pollution maps from the International Dark Sky Association to identify nearby dark spots within practical driving distance.
- Research established locations like Antelope Island or Anza-Borrego Desert State Parks, which offer expansive areas for night photography.
- Connect with local astronomy groups and online communities for recommendations on lesser-known spots that aren’t widely publicized but offer excellent conditions.
Local parks often feature designated stargazing areas that let you escape city lights without extensive travel.
International Dark Sky Preserves Worth Visiting
While local dark sites offer convenient options for night photography, internationally recognized dark sky preserves provide unparalleled celestial viewing experiences worth planning special trips around.
New Zealand boasts two exceptional locations: Aoraki Mackenzie, one of the world’s largest international dark sky preserves, and Aotea Great Barrier Island, a certified dark sky sanctuary. Both offer phenomenal conditions for astrophotography with minimal light interference.
In the UK, find dark skies at Bannau Brycheiniog National Park, where vast rural landscapes create perfect backdrops for Milky Way captures.
Meanwhile, the United States features outstanding preserves like Utah’s Antelope Island State Park (28,800 acres of pristine darkness) and California’s Anza-Borrego Desert State Park, the second-largest state park in the country with designated dark sky viewing areas.
Equipment Recommendations for Different Dark Sky Conditions
Different dark sky conditions demand specific gear setups, with Bortle 1-2 zones requiring minimal equipment while urban-adjacent areas need more specialized tools.
You’ll need to match your equipment to the location’s light pollution level, ensuring your wide-angle lens with fast aperture captures enough detail in various conditions.
A thorough gear matrix helps you prepare for each scenario, from pristine wilderness skies requiring basic tripod stability to light-polluted areas demanding additional filters and post-processing capabilities.
Essential Gear Matrix
Every successful night photographer knows that matching your equipment to specific dark sky conditions dramatically improves your chances of capturing breathtaking celestial images.
To find the best shooting locations, bring a Sky Quality Meter (SQM) to measure darkness levels, with readings near 21 indicating ideal conditions for DSLR astrophotography.
Your equipment needs vary by sky darkness class:
- Class 1 (Pristine Skies): Full-frame camera with wide-angle lens (14-24mm f/2.8) to maximize Milky Way detail and minimize noise.
- Class 3 (Rural Skies): Mirrorless camera with ISO capabilities up to 6400 paired with a stable tripod to reduce shake.
- Class 5 (Light Pollution): Narrowband filters (H-alpha, OIII) to block unwanted light while allowing specific celestial wavelengths through.
Don’t forget essentials like extra batteries, remote shutter releases, and a comfortable chair for those long nights.
Adapt for Light Levels
The right equipment transforms how you capture night skies across varying light conditions.
In urban areas plagued by light pollution, narrowband filters (HA, SII, OIII) are essential for capturing emission nebulae with striking clarity.
For moderately dark skies (Bortle 4-5), your DSLR or mirrorless camera paired with a fast f/2.8 lens creates ideal conditions to photograph the Milky Way without excessive noise.
When visiting true dark sites (Bortle 1-3), bring along a Sky Quality Meter (SQM) to measure conditions and optimize your shooting times.
Regardless of location, don’t forget practical essentials: a sturdy tripod and remote shutter to minimize vibration during long exposures, plus extra batteries to combat the cold temperatures that frequently accompany the best dark sky locations.
Composing Stunning Foregrounds With Dark Sky Backgrounds
While capturing the celestial drama above is essential, creating truly memorable night photography requires thoughtful composition that balances both earth and sky.
The most striking dark skies images combine the Milky Way’s splendor with compelling foreground elements that ground your composition and provide context.
Use these techniques to elevate your night photography:
- Scout locations during daylight – identify unique rock formations, trees, or water features that will complement the night sky when properly positioned.
- Plan your timing precisely – utilize golden hour to capture well-exposed foregrounds that can be blended with night sky images.
- Experiment with perspective – try different heights and angles to create depth, positioning foreground elements to naturally guide viewers’ eyes toward the Milky Way.
Tools like The Photographers Ephemeris can help align your compositions perfectly.
Frequently Asked Questions
How to Find Dark Skies for Stargazing?
To find dark skies for stargazing, use dark sky maps like the Bortle Scale map, look for Bortle Class 1-4 areas, and check recent data from 2022. You’ll discover stunning locations away from city lights.
What Is the Best Setting for Night Sky Photography?
For night sky photography, you’ll need a wide aperture (f/2.8 or wider), 15-30 second exposure, high ISO (1600-6400), manual focus on infinity, and a sturdy tripod. Don’t forget your remote shutter release.
How Do I Find Astrophotography Locations?
To find astrophotography locations, use Dark Site Finder to identify areas with minimal light pollution. Research legal access spots like parks, connect with online photography communities, and plan visits during new moon phases for ideal conditions.
What Is the Best Bortle for Astrophotography?
For astrophotography, you’ll want Bortle Class 1-2 skies for ideal results. If that’s not accessible, aim for Class 3-4 locations within a reasonable drive. Class 5 is workable with the right equipment.
In Summary
Your journey to find perfect dark skies doesn’t end here. By understanding light pollution, using the right tools, and planning carefully, you’ll capture breathtaking night photos that showcase the universe’s majesty. Whether you’re shooting near home or traveling to designated preserves, remember that patience and preparation are key. The stars are waiting—grab your camera and discover the hidden wonders of our night sky.


Leave a Reply